Categories
Hardwood Flooring

Tips for Buying Wood Flooring

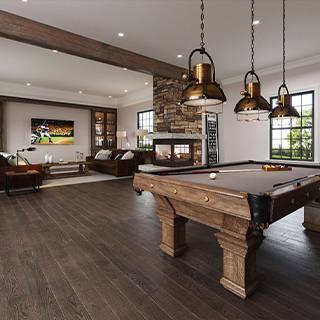
It is easy to become overwhelmed with the tremendous selection and information involved when purchasing wood flooring. There are so many aspects to consider when making a decision. Choosing the color, size, and texture are just the beginning. Here are a few key things to consider when purchasing wood flooring for your home.

What’s The Difference?

Arm yourself with knowing the difference in the types of wood flooring before you go shopping. There are two main types of wood flooring, solid hardwood and engineered hardwood. Each type comes in a variety of styles, colors, and finishes.

Solid vs Engineered Hardwood

Solid – Solid hardwood is just that, solid wood all the way through. It has a very long lifetime. The great factor with solid hardwood flooring is that it can be refinished many times, allowing you to change the feel and finish anytime you wish!
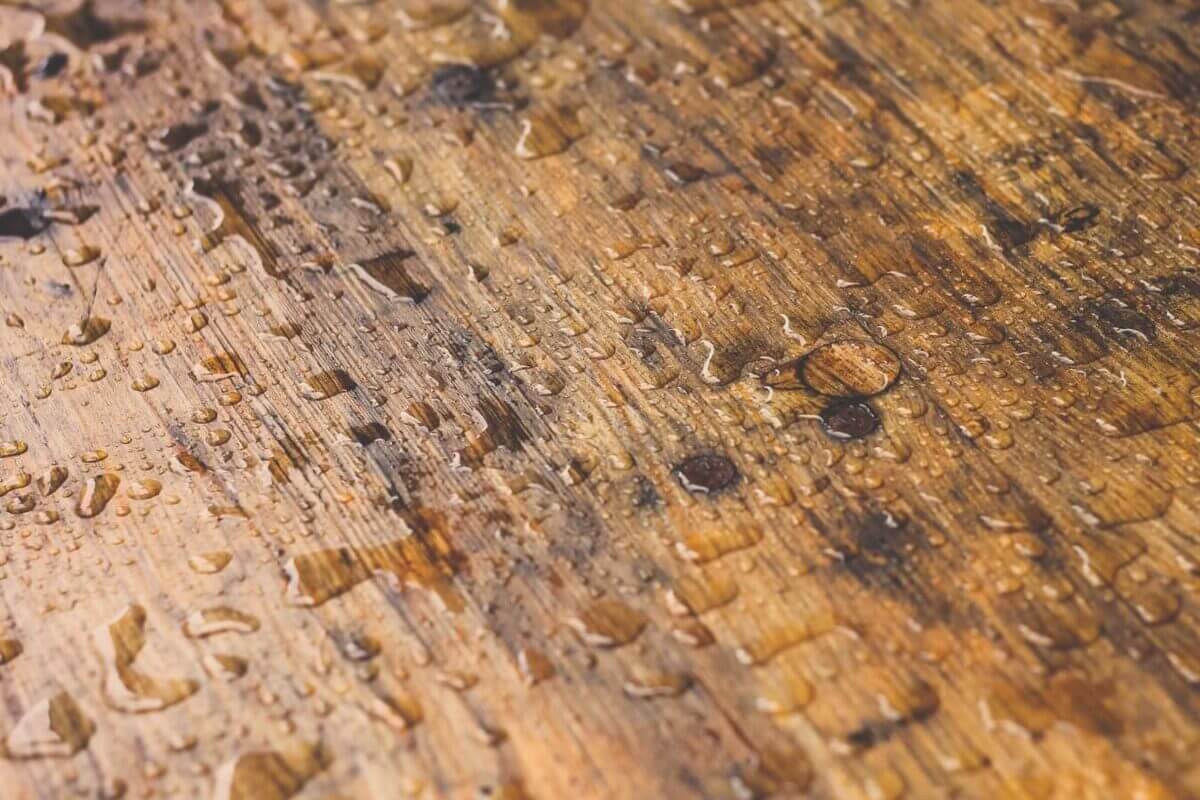
Engineered – This type of wood flooring consists of a wear layer that looks exactly the same as its solid hardwood counterpart. The difference is that this wear layer makes up about one-third of the thickness of the plank. The rest of the plank consists of crisscrossed layers of wood. The layered structure makes engineered wood stronger and less susceptible to changes from temperature and humidity. Engineered hardwood floors add to a wide array of options and colors that you have to choose from. After you understand the difference between solid hardwood and engineered hardwood, you can explore the exciting choices offered through texture and finish.

A recent survey of designers from across the country indicates that, though engineered flooring is on the rise, more still prefer a solid hardwood floor.
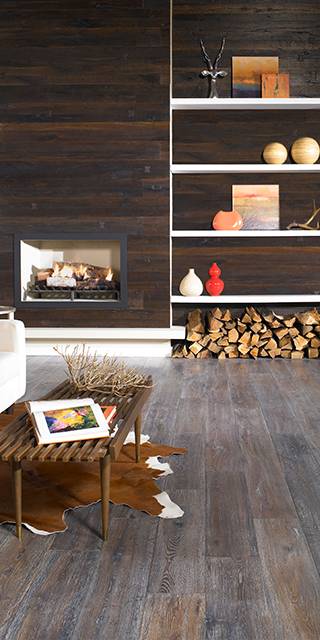
Finish

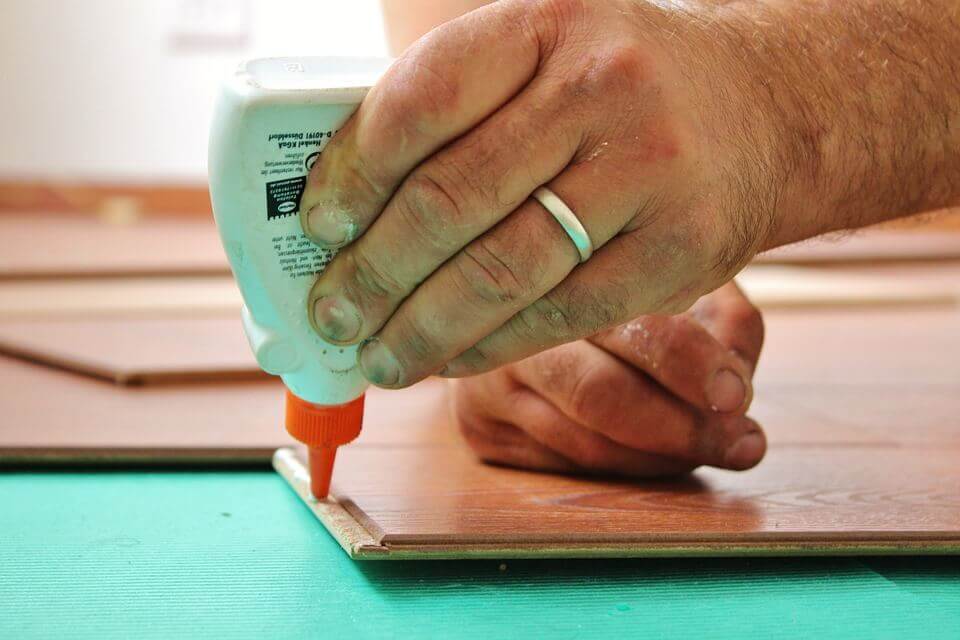
Wood flooring comes in various different kinds of finishes. You can buy unfinished wood in its raw form and have the floors installed, then stained and finally add a top coat of finish. Although this is not common anymore because labor is intensive, time consuming and costly. The prefinished flooring sold at MacDonald Hardwoods comes in various colors and finishes.
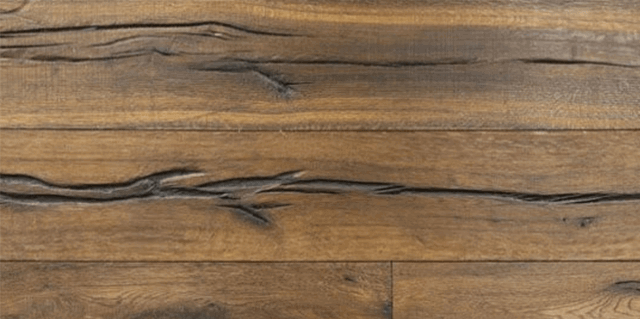
Texture

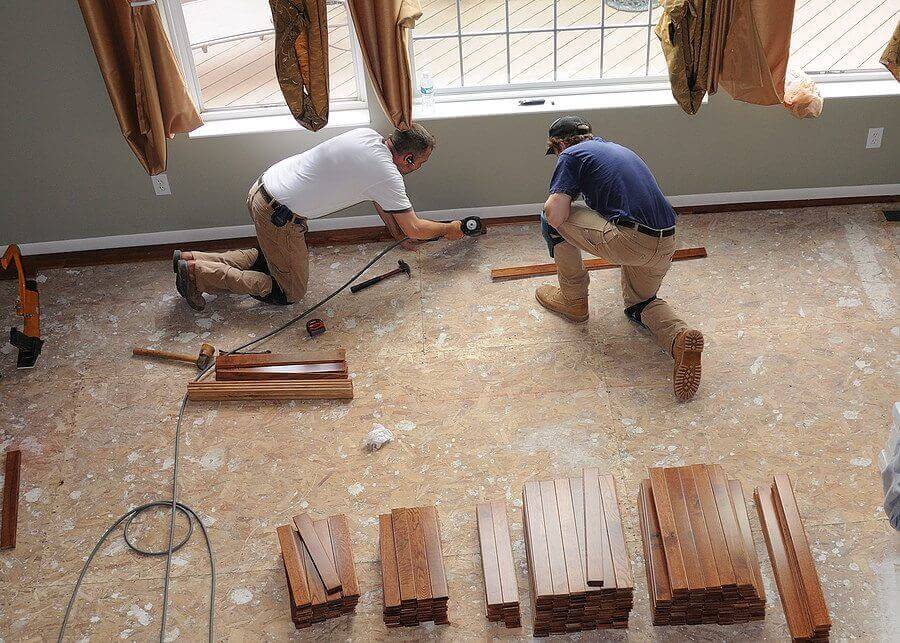
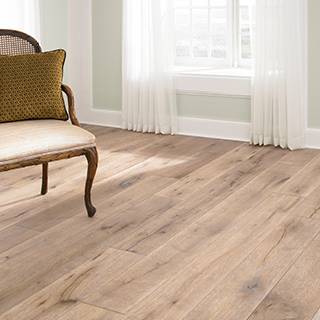
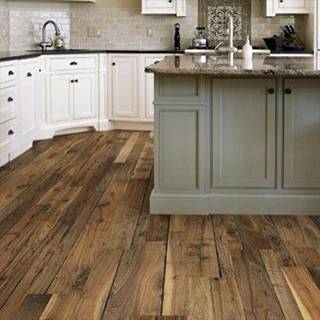
Both solid hardwood and engineered hardwood floors comes in various textures. Some of the choices include smooth or hand-scraped. There are even some that containing dings and gouges, called distressing, that gives the impression that the flooring is reclaimed or aged. There are some finishes that are whitewashed, similar to what you might see on an old barn. Another popular texture is wire brushing which creates a matte textured surface. Once you have decided on what look you want to create with your hardwood flooring and which type of wood would best suit your needs. It is important to evaluate the condition of your existing floors. Although it may not be noticeable to the untrained eye, an uneven floor will complicate the installation of wood floors. Unlike tile, hardwood floors need to have an extremely leveled subfloor.

Many people overlook this step but it needs to be addressed and it can increase both material and labor costs substantially. The best place to begin your journey is at the MacDonald Hardwoods showroom in downtown Denver. The staff is very knowledgeable about solid hardwood and engineered hardwood flooring. They will guide you through the process of deciding which flooring will work best for your goals and circumstances.

Categories
Hardwood Flooring

How to Install Laminate Wood Flooring in Your Home

While you may prefer to hire a professional, you can lay laminate wood flooring yourself. You can certainly do a great job by yourself, as long as you know what you’re doing. Laminate flooring dries faster and does not require cutting with a particular saw like ceramic and porcelain tiles; installing it is like putting together various parts of a complex puzzle. Here is a step by step DIY guide on how you can install laminate flooring.

1. Prepare the Floor

It is important you prepare the floor before you install the laminate wood flooring. Make sure the floor is perfectly level and remove any glue or paint with a metal scraper or knife. After that, sweep the floor thoroughly to remove dust and other smaller particles.

2. Prepare the Door Frames

Use a vibrating saw to get rid of the lower parts of the door frames. You can also use a trim saw to make a perfect cut. Once you remove the lower parts of the frame, install an underlayment and tap the seams.

3. Install the First Piece

Lay a piece on the first row of the floor. Doing so will help you have a rough idea of the expected length of the last section. You can trim the first piece so that the last one becomes longer. Make the first cut of the board using a square mark. Make sure you mark the side that will be used as a drop to prevent cutting the wrong side of the piece. Use a jigsaw to make a cross cut on the drop side.

4. Assemble the Pieces Together

Once you have the pieces in the first row, bring them together. Make sure you use uniform pressure when doing so. Avoid too much weight because this will cause the joints to weaken. Be careful when you get to the door frames. Make sure you have a measurement of the piece that needs to slide below the door frame. Mark the top of the board in the area where you cut. When joining the boards, make sure the longer edge is tight and shorter one not overlapping.

5. Install Additional Rows

Slowly and carefully install additional rows. As you do this, you need to sway the seams at least 10 inches in adjacent rows. You can often start a new row with the board you cut to end of the preceding row.

6. Lay the Final Row

You need to be extremely careful with the last row. Lay the boards into position at an angle before prying them with a bar. Ensure you leave an expansion gap between the wall and the final row measuring at least a quarter of an inch.

7. Reinstall the Trim

Once the flooring is in place, reinstall the trim you had removed earlier. Use a hammer and finishing nails to put in place the baseboard molding. After that, install the shoe molding and connect the laminate to adjacent surfaces using transition strips. Make sure you don’t nail through the floor when doing this.

If you decide you don’t want to tackle this job alone, contact the pros at MacDonald Hardwoods – we are always happy to help.

Categories
Eco-Friendly Flooring Hardwood Flooring Under-Floor Heating

The Pros and Cons of Installing Heated Flooring in Your Bathroom

Do you want to warm up your hardwood flooring? Have you considered adding radiant heat to your bathroom so that you never have to get out of the shower and step on a cold floor? We cover the top reasons to install and to forget about heated flooring in your bath below.

5 advantages of heated bathroom floors:

1. Durability

One of the best benefits of using heated flooring is that it lasts a long time. If you take care of your bathroom floor system, it can last as long as 35 years. That is a long time when you own a home.

2. Energy savings

When you heat your floors, you may find that it is much easier to keep the thermostat down in your home. No cold toes, so no need to turn up the furnace. Did you know that using heated floors can reduce your allergy symptoms?

3. Easy to add to programmable thermostats

All systems come with a thermostat for easy use. Some are programmable. Check the manufacturer’s features and inclusions to see which models let you program the heating.

4. Safe for even the most sensitive toes

Another great benefit of floor heat in the bath is that you will never burn your toes. Every radiant heat model has safety features that keep you from getting burnt. This news is excellent for families with young children and aging parents.

5. Higher resell value

Your house is worth more with floor heat in the bath. Imagine telling potential buyers they will never step onto a cold floor after showering. Warm floors after a bath are a huge plus.

4 disadvantages of heated bathroom floors:

1. Repairs may be costly and require extensive work

One big problem is that any repairs could need the contractor to tear up your beautiful hardwood flooring to fix. This solution will cost you. It will be noisy.

2. Old homes may not have the electric service to handle heated floors without upgrades

Are you buying a fixer-upper? Is your home more than ten years old? Beware of additional costs for adding new electric service when you want warm floors in an older house.

3. Tearing up new floors is costly and a hassle

Unless you are already planning to rip out your bathroom floor, it can cost a pretty penny to take up new floors. If you are planning a renovation, then you are doing the right thing by adding heated floors at the same time. Otherwise, you cost yourself money.

4. Heating with floor heat takes a while

Unless you go with the programmable model, your floors may take a while to heat. You may have to turn the flooring heat on before bed to get an early shower.

Final Thoughts

There are definite pros and cons to heated floors. Picking the best time to install is a huge consideration. The upfront cost is another thing to investigate before making plans to add heat to your bathroom floor. Can you install radiant heating under wood floors?

Categories
Hardwood Flooring Hardwood Maintenance Under-Floor Heating

Fireplaces and Hardwood Flooring: How to Protect Your Investment

Hardwood flooring looks beautiful in many homes, but, being wooden, it is also susceptible to damage. One particular concern is fireplaces that are near hardwood flooring or in contact with it; not only does this represent a potential fire hazard, but sparks and bits of burning wood can also scorch and damage your hardwood floors. However, this doesn’t mean that you have to replace your flooring if it’s near a fireplace. Here are a few tips to help you protect the investment that your hardwood floors represent.1. Purchase a Hearth Extension

1. Purchase a Hearth Extension

Hearth extensions do exactly what the name suggests: they are placed outside the fireplace and act as an extension of the hearth, specifically to protect flooring from scorching and fire damage. They are often made of slate, brick, or stone, but you can also use hearth extension pads made of other non-combustible materials. Some homeowners choose to create a raised section of the floor with a surface of brick or stone, which can work for either traditional fireplaces or wood stoves.

2. Have a Working Grate or Cover

Another essential to protect your floors from fire damage is to have some grate or another cover for all fireplaces. The type depends on the specifications of your hearth, but it should, of course, be non-flammable. Also, although it must have openings to allow smoke to filter through, they should be small enough to prevent sparks or burning wood from falling through; otherwise you risk damage to your wood floors.

3. Don’t Overuse Fireplaces

While the material used to build fireplaces is of course designed to withstand heat, overusing fireplaces or over-building fires risks damaging the structure, which could cause damage to your flooring in the long run. Don’t keep a fire going for excessive periods of time, as extreme heat can melt even metal. Overfeeding your fire is of particular concern with a wood stove, as their enclosures are often smaller.

4. Only Burn Wood

Whether you use traditional fireplaces or a wood stove, burning only wood is another way to protect your floors. Other flammable materials, such as paper and plant matter, may cause fires to burn hotter and cause damage to your hearth over time; these more frequently send out sparks or potentially hazardous scraps. And, of course, never use grease, oil, lighter fluid or other highly combustible substances to start a fire, as this can present a danger to both you and your floors.

As long as you take precautions and follow these crucial pieces of advice, it’s possible to have beautiful hardwood floors in the same room as a fireplace. Make sure that if the wooden flooring is near any fireplaces or wood-burning stoves, you have a hearth mat or other type of barrier made of non-flammable materials. In addition, always start and maintain fires responsibly, burning only wood and never leaving a fire going for excessive periods of time.

Categories
Hardwood Flooring

Should You Install Your Own Hardwood Floors?

Deciding which type of wood flooring to put in your home can be difficult today, especially with all of the available choices, styles, finishes and colors to choose from. However, once you’ve tackled the dilemma of which type of wood flooring to purchase, you’re now faced with another major decision of whether you should install your own hardwood floors or hire a professional.

While certain floors can be fairly easy to install, often people watch online videos demonstrating the ease of doing it yourself without considering other factors involved before diving into the process.

Research

First you should do some of your own research and gain as much knowledge about the process as you can to make it easier on yourself. Know the type of flooring you will be installing. Is it a solid or engineered wood? Will you nail, staple or glue it down or will it be a floating installation? Take time in researching and planning. Consider getting advice and tips from a knowledgeable salesperson at MacDonald Hardwoods when you purchase your flooring. The expert staff provides training classes free of charge for customers. They are also available to answer your questions and address your concerns.

Cost

Consider all of the costs involved in doing the project yourself and the possibility of having to purchase additional tools that you may never use again. Installation of hardwood flooring will require you to have certain specialized tools such as a circular saw to do the cutting so make a list of the tools needed and the cost involved in purchasing them. Depending on the type of wood flooring you are installing you may need such things as a nail gun, rubber mallet, miter saw, trowel for the adhesive, and nails or staples. You also might want to think about how comfortable you are with handling and using these tools. For some, time is money. Think about the time it will take for you to install it compare to hiring a professional contractor.

Subfloor Preparation

Consider the existing flooring. Will you be removing tile, carpet, vinyl, or any other existing flooring? Is your existing subfloor ready for hardwood? Is the floor squeaky? Consider the type and condition of your subfloor and whether or not it may need leveling or preparation prior to the installation of your new wood floors. Proper preparation is the key to a successful installation. Look at the overall shape of the room and whether the walls are perfectly square and where adjustments may have to be made. Carefully plan your room layout to avoid cutting small unsightly wedge-shaped pieces.

Sometimes the money you think you may save may not be worth the hassle. Once you have considered all of these factors, the ultimate decision is yours. Whether you are considering installing your wood floor yourself or hiring a professional, the experienced staff at MacDonald

Hardwoods can assist you by hiring expert installers for you or teaching you how to install your solid hardwood or engineered hardwood flooring yourself (including equipment rental). Still undecided? Come down to the MacDonald Hardwoods showroom. The expert staff will help you understand what is involved for your floor and recommend the best course of action.

Categories
Hardwood Flooring Hardwood Maintenance

This is What to Do Before You Install Hardwood Floors

Genuine wood is a hard-wearing and aesthetically appealing flooring choice for virtually any room. It features a high-quality appearance and is both attractive and durable. Hardwood also adds warmth and beauty to any room. Fortunately, if you are handy with do-it-yourself projects, you can install your hardwood floor. Below are some tips to help ensure your project is a success:

Gather the Proper Tools

You should collect the proper tools to prepare for the installation of a hardwood floor, and these include the following :

  • Plastic Wedges
  • Pry Bar
  • Knocking Block
  • Ratchet Floor Clamp

Once you have your primary tools in place and have selected a floor, you should prepare the room for the installation.

Eliminate Dust

Although it may seem like a minor issue, dust is a problem (unless, of course, you’re a fan of doing extra cleaning once your project is complete). The best way to contain dust is to seal off the room by covering the doorway with plastic and masking tape. You can also opt for plastic curtains or something referred to as a ”ZipWall” to ensure you contain any sanding dust.

Remove Doors

It is virtually impossible to correctly install a hardwood floor without removing any doors that lead in or out of the room. Carefully remove them and stack each entry under a separate blanket to avoid scratches. Take the doors to an entirely different area of the home, rather than trying to move them from one end of the room to the other during the installation process.

Remove Baseboards

Because the flooring should be placed under baseboards for best possible results, you should remove them and then reinstall them after you lay the flooring. Although it may seem more comfortable to allow them to stay in place, you will likely regret taking this shortcut after the fact.

As long as you are already changing the floor, you may even decide to install new baseboards, unless your current ones are unique in some way, which is probably not the case. Baseboards can also be cut with special saws and flooring inserted underneath, but attempting this as an unskilled worker is not a good idea.

Additional Preparation Tips

Do not lay wood tiles in areas where high humidity is expected, such as the bathroom, laundry room, or kitchens. Always refer to the manufacturer’s instructions regarding the highest level of moisture your floor materials can withstand. Learn more about humidity for wood floors.

Make Sure Your Subfloor is Stable

Wood should only be laid on subfloors that are stable and in excellent condition. If you think your subfloor needs work, or you suspect issues such as slab leaks, foundation abnormalities or other problems, seek the advice of a professional or you may live to regret the fact that you continued with the project, despite evidence of such issues. Jim Oursler of Granite Foundation Repair in Plano says:

“There are several reasons why your home’s foundation may crack. Common reasons include settling, poor drainage, and unstable soils. In the U.S., about 60 percent of houses are constructed on clay soil. Out of these, about 60 percent experience foundation issues.”

Although the tips above are beneficial for do-it-yourselfers, there are certain times professionals should install hardwood floors. If you are unsure that you have the skills to complete the project successfully, do not take chances with your home. Instead, hire skilled workers to ensure that the job gets done right. Whichever option you choose, the installation of a new hardwood floor is sure to add beauty and value to your home.

Categories
Hardwood Flooring Hardwood Maintenance

What’s the Difference Between Commercial & Residential Wood Flooring?

Commercial and residential floors are all susceptible to the same harshness, but because of the higher traffic in commercial setups, the wood flooring might need more attention than in a home. More people access a commercial building meaning that more pressure is exerted on the floor. Other than this, there is the likelihood of placing or even dropping heavy equipment on the floor and spillage. To ensure the floor remains strong and durable, different measures than those employed in a residential setup are needed.

The Need for a Stronger Floor

A commercial floor should be stronger than a residential one because of the amount of weight it is exposed to every day. Solid wood might be an excellent choice for the home floor but not ideal for commercial floors. A stronger alternative is required. Engineered wood flooring might be a better choice. It is stronger and can handle any amount of pressure even from heavy machinery. The wood is not made from one solid piece but multiple layers of veneers that make it more stable and strong. The wood does not expand quickly and can withstand harsh temperatures and humidity.

Commercial Flooring is Prone to More Moisture

Spillages and functions in the commercial building mean that the floor is prone to more moisture and humidity. Wood does not perform well in humidity or when exposed to too much moisture for a prolonged period. It will swell and start rotting. Floors made from engineered wood tend to withstand moisture and humidity more than solid wood. Its stability means that it expands and contracts less and does not swell.

Cleaning

Because of the higher traffic commercial flooring requires more cleaning than residential. Mud, debris, and spillages are common in a busy commercial set up. For this reason, the floor should be easy to clean. Sweeping and dusting are some the cleaning procedures you can employ. For stains, wipe with a wet clothe. There are detergents specifically made for wood floors you can use to clean occasionally.

Maintenance

Commercial floors require more care and maintenance practices than a residential floor. For this reason, a more stable material should be used. You do not want to change the flooring soon after installing it because it cannot withstand the pressure or it is too costly to maintain. One of the issues to consider is the ability to expand and contract when in different environments. This destroys wood floorings faster than any other cause.

Final Thoughts

There is a need for an engineered wood flooring to curb the effects of changing environmental conditions and moisture. When exposed to moist conditions, choose a surface finishing that is water resistant. You will also find that commercial and residential floors require different finishes. The commercial one can go for an acrylic impregnated finish that hardens floors but is not recommended for residential setups. The finishing is applicable in high-traffic areas. Wax and oil can also be applied to the finished floor in a commercial setup. These are just some of the differences you will encounter in commercial and residential floors.

Categories
Hardwood Flooring Hardwood Maintenance

4 of the Best Robotic Vacuum Cleaners for Hardwood Floors

Once upon a time, you had to use a broom to clean your hardwood floors. This wasn’t complicated, but it was very tedious and inefficient as it would scatter dust around the house. If you had allergies or pets, forget it – sweeping just wasn’t sufficient. Fast forward to present day, and there are so many options for hardwood floor vacuums, the list can be overwhelming at first. Below is a list of four of the best robotic vacuums for cleaning hardwood floors that will assist in keeping your hardwood floor free of dust, precisely the tough areas under furniture.

Why is a Robotic Vacuum Cleaner the Wisest Choice for Cleaning Your Hardwood Floors?

Are you curious why a robotic vacuum is the best choice? These machines can automate almost all of your home dusting chores. If you find yourself too busy to keep dust and allergens off your hardwood floor, then why not go for an alternative that would do the work for you. I’m not referring to hiring a house help – I’m talking about getting a robotic vacuum cleaner that will assist in cleaning hardwood floors with a push of a button without you lifting a finger. All you need to do is learn how to operate and maintain the machine. 

#1: Neato Botvac Connected

NEato Botvac Connected Robotic Vacuum Cleaner for Hardwood Floors

Amazon Price: $799

The D-shape of the Neato Botvac Connected robotic vacuum cleaner allows it to reach corners and edges in your house hence thoroughly cleaning hardwood floors. It is equipped with lasers that map your floor cleaning it in parallel lines at speeds four times faster than other robot vacuums. Sensors automate cleaning, allowing the machine to avoid obstacles in the house while doing its job. A powerful brush and suction unit clean your hardwood floor spick and span. As a bonus, WiFi connectivity allows you to control the cleaning through a mobile app.

#2: iRobot Roomba 860

iRobot Roomba 860 robotic vacuum cleaner for hardwood floors

Amazon Price: $499

The iRobot Roomba 860 is ranked among the best robotic vacuum cleaners for hardwood floors. It is equipped with iAdapat navigation feature and Aeroforce vacuuming technology making it capable of cleaning all types of hardwood floors. An advanced range of sensors and software ease its mobility around your floor and can clean almost all parts of your home (including your staircase and wall edges). Using debris extractors rather than main brush means the Roomba requires less maintenance than other models.

#3: The bObi Classic

bObi Classic Robotic Vacuum Cleaner for Hardwood Floors

Amazon Price: $295

The bObi Classic is designed to clean easily and faster. It operates with three buttons name GO, Juice, and Waffle. Go buttons initiate the normal cleaning mode with the use of proprietary algorithm to clean the floor. Use the Waffle button when you want to clean a small spot such as milk, sugar, or chocolate powder. Instruct the robot to resume its inactive charging position with the Juice button. Remote control operation schedules a cleaning program with your choice cleaning mode. This machine is highly recommended for individuals with allergies and asthma because it has HEPA filters that trap micro dust particles and both a mopping and a strong suction function for quiet cleaning.

#4: iRobot Braava Jet 240

iRobot Braava Jet for Hardwood Floors

Amazon Price: $199

iRobot’s Braava Jet 240 is the smallest in size and least expensive among robotic vacuum cleaners for hardwood floors. It’s best designed to sweep up spills on the hard floors and suction it dry. The battery lasts quite a long time before requiring a recharge. The best part is that it’s capable of using water when it comes in contact with a surface that’s not a wood floor. How’s that for intelligent?

Learn how to select the best hardwood floors for your home.

Categories
Hardwood Flooring Species

Where Can I Buy Exotic Wood Species?

For many home-improvement or artistic products that require wood, a trip to a nearby lumber yard marks the beginning and end of the work. However, there are certain projects where one or more qualities of an exotic wood species, like the color, grain, or texture, make it a necessity. If you’re wondering, “where can I buy exotic wood?” the answer is that it can be a bit more difficult than finding common wood species. But if you’re willing to drive a bit, or pay money for shipping, there are many ways to find exotic wood for sale. Here’s a quick run-through of the steps you’ll want to take to acquire high-quality exotic wood.

1. Local Sellers

If you can find a seller of exotic wood near you, you’ll save on either time or shipping costs. Do a quick search for distributors nearby that carry exotic wood, and even if it’s a bit of a drive, it’s worth it to be able to inspect the slabs or pieces yourself. It’s also worth checking if anybody in your town or area owns a portable saw mill. Typically, people with portable saw mills will mill logs for individuals or companies. By talking to them and asking about past clients, you can get a good idea of who to purchase exotic wood from.

2. Visit Hardware Stores

Hardware chains that carry standard lumber, such as the Home Depot, as well as local hardware stores that supply lumber, can be a source you use to find exotic wood sellers. In most cases, the stores you visit in this manner won’t have the type of exotic wood you need. However, they are certainly in contact with lumber distributors, and through these connections they can often point you towards a distributor that sells exotic wood.

3. Check Craiglist and Similar Platforms

Sites like Craigslist, which you can search for individuals or small businesses that fit your needs, are a great resource to find exotic woods. Simply look for wood millers or woodworkers near you, and find one that has the required equipment and knowledge. Even if they don’t have the type of wood you want on hand, they probably have the connections to acquire it that you lack. There will often be additional costs to get the wood to the millers, but this is often cheaper than working with a large distributor, and this way you help out a local business.

4. Order Online

You can purchase almost anything online today, and exotic wood is no exception. On wood distributor sites or platforms like Amazon, search the type of wood you need and you’ll almost certainly see options that can be shipped to you. However, buying online can often result in significant shipping charges, but if you have the money to spend, it’s extremely convenient. The only other downside is that when buying online you have little choice in selecting the stock–you get what you get. Because of this, it’s best to check other options first if you’re very particular about your work.

In short, the answer to the question, “where can I buy exotic wood?” is that there are a variety of sources, but the best advice is to ask around. Start with local distributors or lumberyards and branch outward, and if the sources you find don’t carry the type of wood you need, ask them of distributors that may carry it. Finally, nearly any type of wood can be bought online, but due to shipping costs, this should be a last resort unless you’re willing to spend a bit extra.

Categories
General Home Improvement Hardwood Flooring Hardwood Maintenance

Best Moisture Barriers for Hardwood Flooring

When you are preparing to lay down your hardwood flooring, you want to ensure that you are getting everything right. Let’s face it; you don’t want to put in all this time and money on your beautiful hardwood floor and then have it messed up in a few months from buckling. Since moisture is the number one enemy of hardwood flooring, you should do all you can to prevent moisture from slipping in unannounced.

By adding a moisture barrier, you can protect your hardwood flooring and protect your investment in that flooring. While many choose to have a professional lay the flooring, some want to do it themselves. For all you DIYers, here is a little more information about the different flooring types and which kind of barriers are suitable for them.

Floating Floor Barriers

Floating floor barriers are just like the name implies. They are barriers that are made to protect floating floor types like laminate or tile. Since there are wooden tiles and laminate flooring nowadays, this is an option for many people. These barriers are typically made from plastic to protect against moisture. The plastic is simply laid before the flooring is placed on top.

If you intend to use wood subflooring, you do not need a floating plastic barrier because the subflooring needs room to breathe. Since your flooring will not be nailed or glued down, your barriers do not have to be thick, either. However, if you have other subflooring like cement, you should use plastic or paper to protect against the moisture that often accumulates in these conditions.

Nailed Floor Barriers

When you are installing nailed flooring, you want a barrier that will protect the subfloor as well as the flooring. By installing plastic sheeting on top of the dirt under the subfloor, you can protect your subflooring from getting too much moisture. Between your subfloor and your new hardwood, you can lay a special felt paper that helps to eliminate moisture from getting to the topmost layer of flooring.

Since you need to purchase two different types of protection in this situation, your budget might need to be raised to accommodate the extra expense. You can purchase this felt paper and plastic at most stores that sell flooring, like hardware stores or home improvement stores. Most stores will be able to cut the plastic and felt paper to your required length, making it easier on you. If you are unsure about what is needed for a project, check with a reputable flooring dealer first.

Glued Floor Barriers

Glued flooring is often installed to concrete subfloors. These subfloors typically gather a lot of moisture especially in moisture-rich areas where humidity or heavy rain is common. If you are preparing to glue down your wood flooring to a cement subfloor, you will need a heavy moisture barrier product. These work to protect your subfloor from sweating during humid days or accumulating water from heavy rain or spills.

The most common barriers for glued flooring is epoxy or resin to help seal out the moisture and prevent more from soaking through. You can buy the correct epoxy at home improvement stores or hardware stores. Usually, the epoxy is laid with a trowel, but you can DIY it by using special tools to lay the epoxy. Remember to give it plenty of time to dry completely before laying your flooring.

Conclusion

Some flooring comes with a built-in barrier that is great for different floors, especially floating flooring. You can even purchase barriers that have noise absorption like cork, which might even help to insulate your flooring. Before you purchase flooring or barriers, you should check for built-in barriers and also look at the subflooring to see which would be the better option for your home. If you are unsure take pictures and consult a reputable flooring professional to avoid expensive mistakes and learn more about choosing the best hardwood floors

Skip to content