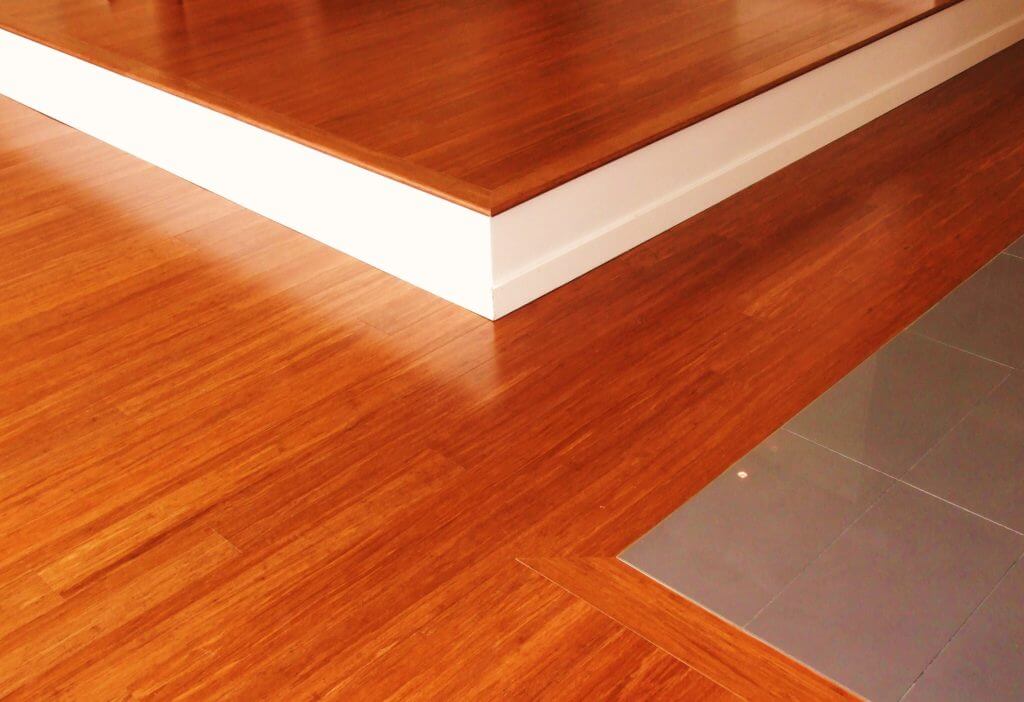
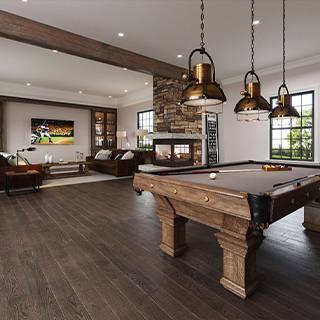
Imagine walking over heated wood floors on a cold winter night? Radiant heat is becoming more and more popular in residential heating. Most people are not aware of how radiant heat works. In fact, many people do not know that radiant heat can be installed under wood floors. If you would like to consider radiant heat for your home, there are a few issues to consider before making your final decision.
What is Radiant Heat?
Radiant heat is a system using electric coils or tubes of hot water underneath the flooring. Traditionally it has been used for tile floors but now it is also used with wood flooring. Heating floors is becoming increasingly popular due to the ease of warming up your entire home. One of the first objections raised by skeptics is that it will increase your electric bill. In reality, radiant heaters are very cost effective and those that have them installed noticed a slight decrease in their electric bills.
Do Radiant Heaters Really Warm Up A Floor?
Yes! This isn’t a fad or a limited-time promotion. Radiant heaters really do work and can warm your floor up to 85 degrees Fahrenheit! Some manufactures would recommend that you maintain a consistent temperature, ideally between 78 and 80 degrees. The type of wood flooring that you install over the radiant heat mechanism will ultimately determine your temperature guidelines.
Limitations
There are some limitations on the type of wood flooring that can be used with radiant heat. If you are considering radiant heat in your home, consult with experts to advise you which species are best suited for this application. Be sure to discuss how the thickness of the flooring will affect heating; how the natural shrinkage and swelling will affect your floors, and which types of wood are most stable when heated. This factor varies with wood species as well as the flooring manufacture.
Installing Wood Floors
If you choose to have radiant heat installed beneath your wood floors, the next step is planning the installation. Floating floors work best. It is recommended that you do not glue or nail down your wood floors. This would be affected by the heat in the near future and cause conflict in case of any repairs. Instead, aim for interlocking, floating floors. This will allow you to easily replace any floors in case of a damage.
Remember to always check with the manufacturer to ensure that the wood floor you are considering is compatible with radiant heat. Not all radiant heating systems will work with wood flooring. There are several radiant heating manufacturers so make sure you equip yourself with as much information as possible. While most radiant heating systems can be installed by the homeowner there are various technicalities to consider or you may opt to have it professionally installed.
Storing hardwood floor material in the garage makes sense in terms of storage space. It’s perfect to remove unused items from the house without throwing them away. If homeowners viewed hardwood floor material storing from the material’s perspective, the garage may make sense depending on environmental conditions.
Environment
Temperature affects the appearance of hardwood flooring. Specifically, moisture shrinks and expands its normal form. Heat, cold air, and dry air equally affect the look and condition of the wood. And, any changes to stored wood will affect flooring installation. For example, if hardwood floor material stays in a chilly garage and is placed in a room-temperature area, the wood will over-expand, adjusting to the temperature change. On the contrary, wood shrinks and cups if hardwood material stored in a warm climate and installed in a colder climate, creating gaps during the drastic temperature change.
The worst case scenario is unusable hardwood floor caused by warping. So, you want to make sure your materials are stored in the proper environment prior to flooring installation. Ventilation is crucial in the garage for storing hardwood floors. It must stabilize at the correct temperature. A safe temperature for hardwood is between 60 and 75 degrees Fahrenheit. Hardwoods should preserve a 6-9% humidity level while the garage should keep humidity between 30-50%.
The grade level on the garage explains the garage’s foundation. The garage is below ground level, on ground level, or above ground level. Homes with garages below ground level are similar to walkout basement houses and drive under houses. Garages built on the ground level connect to or is beside a first story house. Garages above ground level mean the garage sits on top of a platform. For hardwood floor storage, avoid below ground level garages. Moisture naturally inhabits it due to the dirt behind the walls. Hardwoods stored there become impractical due to warping.
Storage Method
Hardwood flooring leaned against a wall warps and curves it over time. Continued careless storing methods can cause cracks, splits, and unwanted stains on the wood. Therefore, rely on environmentally-controlled storage solutions for hardwood flooring to keep it in good condition. Store hardwoods flat on the floor away from walls. Elevate wood off the concrete ground by stacking it on top of a level and stable object. Monitor the wood’s condition regularly. Relocate the wood to another area if the garage’s conditions change the wood’s exterior. Dry wet hardwoods after relocation and dry it again before installation.
In closing, the garage is a great place to store hardwood floors if it passes every test on this list. When it’s time to use the flooring, allow the flooring to adjust to the room’s temperature for a few days before contacting a professional to install the flooring. If the garage isn’t the place to store hardwoods, don’t worry. Our company has plenty of space available in our self-storage facility. Rent a storage facility for hardwoods, belongings, remodeling projects, and more. For more information on storing hardwood floors or storing belongings properly, contact us.
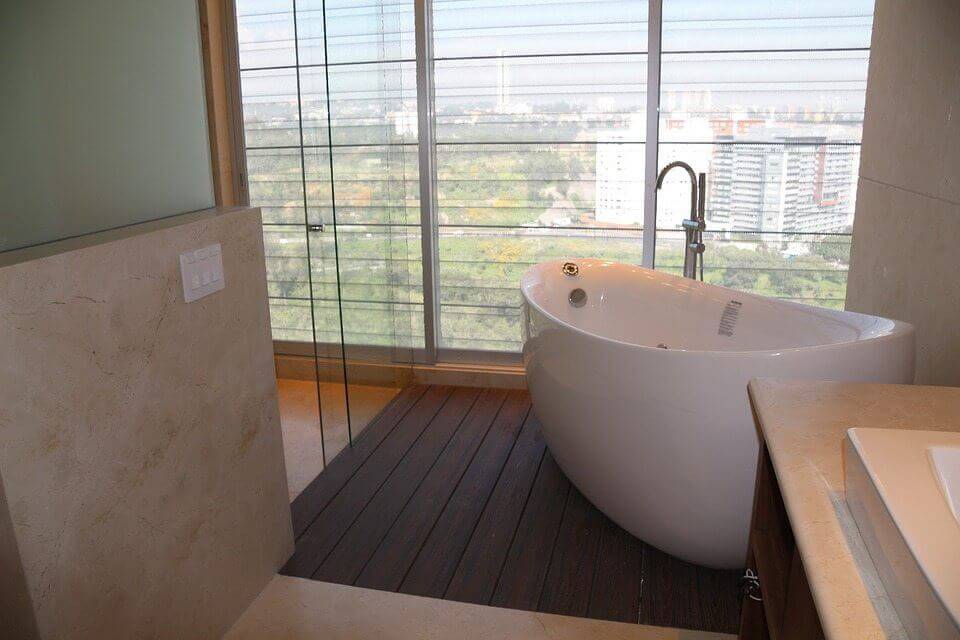
Do you want to warm up your hardwood flooring? Have you considered adding radiant heat to your bathroom so that you never have to get out of the shower and step on a cold floor? We cover the top reasons to install and to forget about heated flooring in your bath below.
When you heat your floors, you may find that it is much easier to keep the thermostat down in your home. No cold toes, so no need to turn up the furnace. Did you know that using heated floors can reduce your allergy symptoms?
3. Easy to add to programmable thermostats
All systems come with a thermostat for easy use. Some are programmable. Check the manufacturer’s features and inclusions to see which models let you program the heating.
Your house is worth more with floor heat in the bath. Imagine telling potential buyers they will never step onto a cold floor after showering. Warm floors after a bath are a huge plus.
4 disadvantages of heated bathroom floors:
1. Repairs may be costly and require extensive work
One big problem is that any repairs could need the contractor to tear up your beautiful hardwood flooring to fix. This solution will cost you. It will be noisy.
2. Old homes may not have the electric service to handle heated floors without upgrades
Are you buying a fixer-upper? Is your home more than ten years old? Beware of additional costs for adding new electric service when you want warm floors in an older house.
3. Tearing up new floors is costly and a hassle
Unless you are already planning to rip out your bathroom floor, it can cost a pretty penny to take up new floors. If you are planning a renovation, then you are doing the right thing by adding heated floors at the same time. Otherwise, you cost yourself money.
4. Heating with floor heat takes a while
Unless you go with the programmable model, your floors may take a while to heat. You may have to turn the flooring heat on before bed to get an early shower.
Final Thoughts
There are definite pros and cons to heated floors. Picking the best time to install is a huge consideration. The upfront cost is another thing to investigate before making plans to add heat to your bathroom floor. Can you install radiant heating under wood floors?
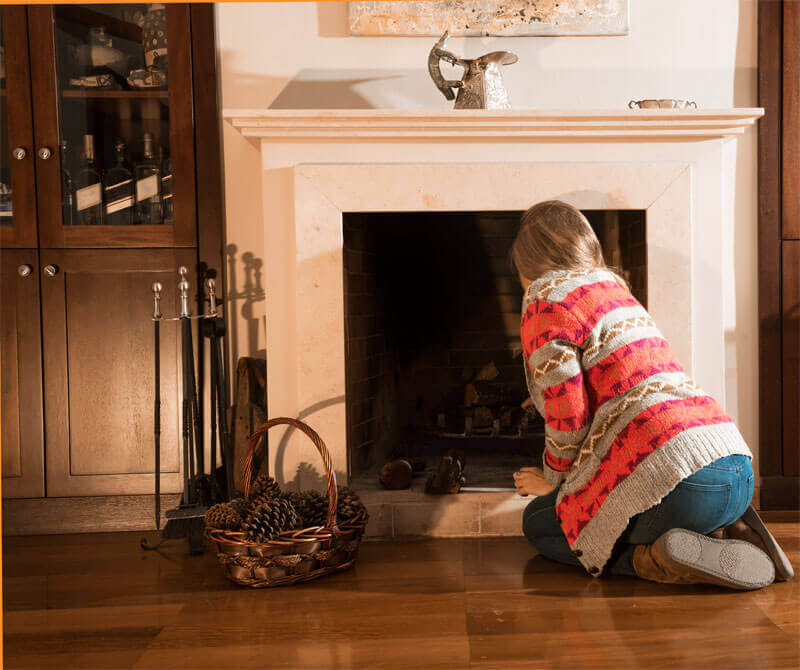
Hardwood flooring looks beautiful in many homes, but, being wooden, it is also susceptible to damage. One particular concern is fireplaces that are near hardwood flooring or in contact with it; not only does this represent a potential fire hazard, but sparks and bits of burning wood can also scorch and damage your hardwood floors. However, this doesn’t mean that you have to replace your flooring if it’s near a fireplace. Here are a few tips to help you protect the investment that your hardwood floors represent.1. Purchase a Hearth Extension
1. Purchase a Hearth Extension
Hearth extensions do exactly what the name suggests: they are placed outside the fireplace and act as an extension of the hearth, specifically to protect flooring from scorching and fire damage. They are often made of slate, brick, or stone, but you can also use hearth extension pads made of other non-combustible materials. Some homeowners choose to create a raised section of the floor with a surface of brick or stone, which can work for either traditional fireplaces or wood stoves.
2. Have a Working Grate or Cover
Another essential to protect your floors from fire damage is to have some grate or another cover for all fireplaces. The type depends on the specifications of your hearth, but it should, of course, be non-flammable. Also, although it must have openings to allow smoke to filter through, they should be small enough to prevent sparks or burning wood from falling through; otherwise you risk damage to your wood floors.
3. Don’t Overuse Fireplaces
While the material used to build fireplaces is of course designed to withstand heat, overusing fireplaces or over-building fires risks damaging the structure, which could cause damage to your flooring in the long run. Don’t keep a fire going for excessive periods of time, as extreme heat can melt even metal. Overfeeding your fire is of particular concern with a wood stove, as their enclosures are often smaller.
4. Only Burn Wood
Whether you use traditional fireplaces or a wood stove, burning only wood is another way to protect your floors. Other flammable materials, such as paper and plant matter, may cause fires to burn hotter and cause damage to your hearth over time; these more frequently send out sparks or potentially hazardous scraps. And, of course, never use grease, oil, lighter fluid or other highly combustible substances to start a fire, as this can present a danger to both you and your floors.
As long as you take precautions and follow these crucial pieces of advice, it’s possible to have beautiful hardwood floors in the same room as a fireplace. Make sure that if the wooden flooring is near any fireplaces or wood-burning stoves, you have a hearth mat or other type of barrier made of non-flammable materials. In addition, always start and maintain fires responsibly, burning only wood and never leaving a fire going for excessive periods of time.
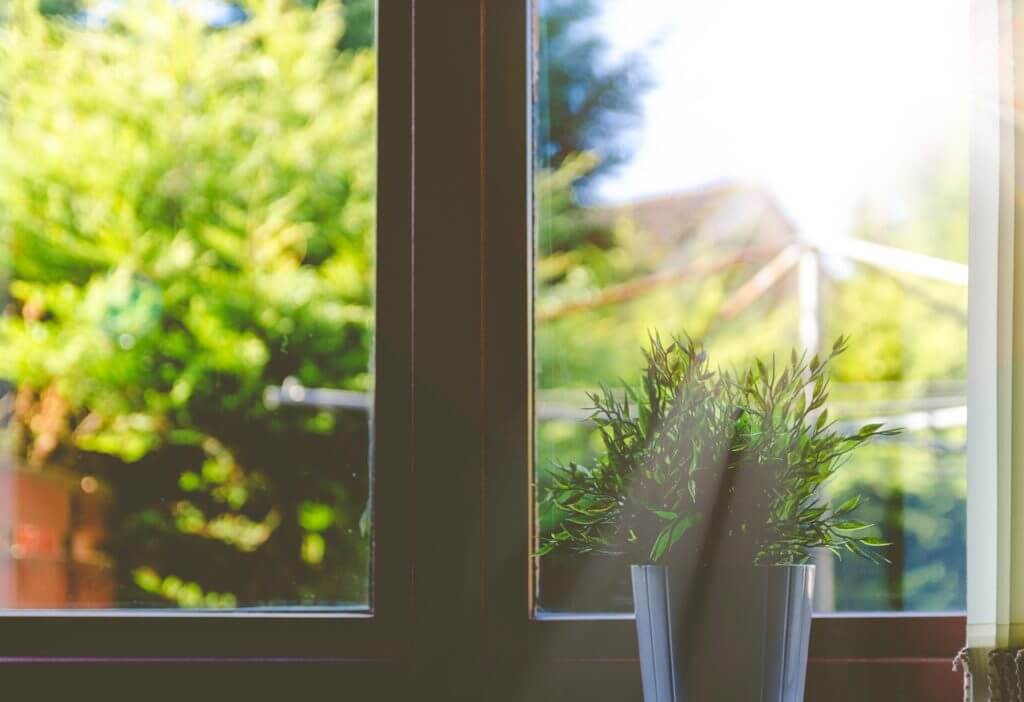
If you’ve ever had an upholstered sofa or a decorative rug in front of a window and noticed it fading more and more each year, you know what direct sunlight can do to your furniture and belongings. You might not realize that it can actually even change the color of your wood floors and bleach your artwork and family portraits. Sun damage isn’t only unsightly, though. It is also costly and will likely force you to replace your rugs and other home furnishings more often.
While you might not be able to slather a layer of sunscreen on your sofa, there are a number of preventive measures you can take to ward off sun damage. Use these tips to protect your belongings and save yourself a little money while you’re at it.
What Causes the Damage?
Like with sun damage to your skin, the majority of damage to your floors and furniture is caused by ultraviolet (UV) light from the sun. In fact, according to the National Fenestration Rating Council, a nonprofit that assesses windows to determine their energy efficiency, roughly 40 to 60 percent of damage is caused by UV radiation, which results in bleaching and corrosion in furniture. The other causes include heat, humidity, and artificial light.
What is the Best Form of Protection?
Obviously, some measures of protection are relatively common sense, such as keeping your curtains closed and blinds drawn. However, if you’re like most of us and don’t want to feel like you’re living in a dungeon, you may want to consider other options.
Upgrade Your Windows
One of your first lines of defense is your windows themselves. If you are in the process of building a new home or upgrading your windows in your existing home, a great option for your windows is laminated or low-e coated glass. Some manufacturers claim their products made with this type of glass can filter as much as 99 percent of harmful UV radiation. Keep in mind, though, that this option may cost more than traditional windows.
Use Window Film
Window film is another option to consider if you’re not in the market for replacing all of your windows. Not only does this film filter UV light, but it also makes windows resistant to breaking and facilitates less heat loss. If your main concern is sun damage, then focus on UV protection when you are selecting films. You can purchase window film from a local home improvement center and install it yourself, or have a professional complete the install.
Leverage Window Coverings
It’s obviously nice to let a little sun and air in your home on occasion. But, there’s a good reason to keep them covered, especially when you’re not home. Curtains and blinds not only provide privacy, they also protect your furniture and other interior assets from unsightly Sun damage. So, keep window coverings on at all times — open them up when you want to experience the sunlight and close them up when you’re not home and at night, when sleeping.
Can Specific Items Be Protected?
If you’re concerned about a certain item in particular, such as a valuable painting from your great aunt, there are options for protecting precious possessions without installing new windows or special film.
Protect Your Floors
Sun exposure lightens certain types of wood and darkens other. Be sure to move furniture and rugs regularly to create more even sun exposure throughout each room. Likewise, consider applying a sun-resistant sealant on your wood floors. Depending on the type of floors you have and the look you’d like to achieve, you can use varnish, lacquer, polyurethane, or shellac. There are also several wax and oil finishes that will protect your wood floors.
Preserve Your Art
Expensive artwork is another grave concern for collectors. Ultimately, you might consider having a copy made of your favorite pieces and hang the copy instead of the original. However, if you’re set on having your collections hung in rooms with windows, always hang artwork out of direct sunlight and behind UV-blocking glass, such as acrylic.
Carpet and Rug Maintenance
Rugs and carpets are also highly susceptible to sun damage. You may want to consider applying a spray-on protector, though their efficacy has come under debate in recent years. Likewise, rotating your rugs and moving furniture around periodically can help equalize fading.
Final Thoughts
While you may not be able to completely eliminate sun damage to your floors and furniture, you can prevent and reduce a great deal of it. Follow these tips to minimize damage and keep your floors and furniture as pristine as possible for as long as you can.
Hardwood floors are prized in many homes for their beautiful looks and easy cleaning. Yet, just as with any flooring materials, hardwood brings with it unique challenges which any homeowner must address. In particular, dry climates and high altitudes expose hardwood to adverse conditions not found elsewhere. Even so, if you live in a desert climate or tucked away in the mountains and still want a beautiful floor, you don’t need to give up on your dream of owning hardwood.
The problem
Unlike artificial flooring, wood is a living material. It derives many of its qualities from internal moisture both at build time and over its life. If you’re in a high, dry climate, your floor isn’t getting the moisture it needs.
This lack manifests in several ways. Most common is dry cupping, a process caused by the difference between the floor’s underlying plywood substrate and the hardwood top. As these layers dry, they contract unevenly. The result is a top layer that contracts faster than the layer beneath, causing cracks and other disfigurements.
The Solution
Fortunately, dry cupping and other hardwood floor issues are easy to prevent by following a few important principles.
Pick Good Materials
Wood thickness and density plays an important role in how flooring responds to drier climates. Thicker woods absorb less humidity, but once they’re warped, those changes aren’t going away. Dry climates need materials that will respond well to sudden shifts in humidity and temperature.
Cherry and walnut are very stable woods. They may warp over time, but not in ways that will adversely affect the utility of the floor. No hardwood floor is perfect, and good materials will settle into their structure over time. A wood like hickory is dense and unyielding, but walnut and cherry will accommodate a foundation and retain that shape despite shifts in temperature and humidity.
Acclimate When Installing
Floors were most likely not manufactured in the environment where they are to be installed. Even if they are, conditions in the factory and at the installation site may differ enough that the wood’s character will change slightly over time. It is important for these changes to manifest before the floor is installed.
Acclimation is the process of letting wood sit in the ambient environment before commencing installation. This is especially important in dry climates, whose conditions are particularly harsh for moist woods.
Heat in Winter
Cold materials contract. As such, hardwood in winter will shrink and split, causing cracks that may expose the underlying plywood. Since colder temperatures are particularly harsh at high altitudes, heating in winter is critical to minimizing the temperature transitions to which a floor is subjected.
Control Humidity
Humidity permeates wood more slowly than it does air. As such, variable humidity levels will travel through hardwood and plywood like waves, causing tension that damages your floor over time.
By maintaining a constant humidity level, the tension between these layers can be normalized. Rather than expanding and contracting at random, they will maintain an equilibrium appropriate for their environment. The best way to achieve this is by integrating humidity control directly into HVAC systems, thus maintaining regulated levels of moisture throughout the life of the home.
Conclusion
While caring for a hardwood floor in high, dry climates may seem more complicated, it is just a matter of making the right initial choices while being aware of an area’s unique weather conditions. With the right wood, acclimation and internal environment, hardwood floors will look good and perform well for many long years.
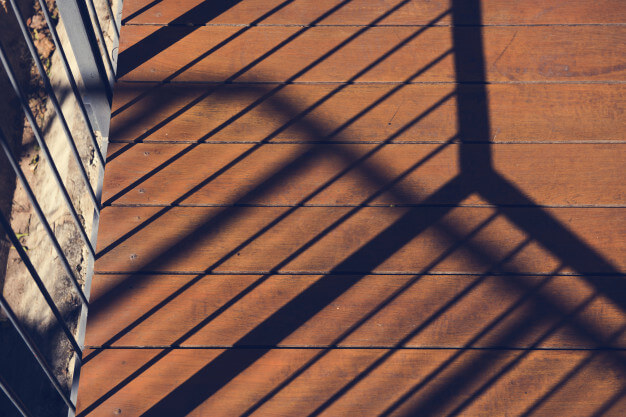
Summer is here, and while many people would cheer in celebration, those people probably aren’t thinking about how to protect their hardwood floors. If you want to protect your hardwood floors from the damages of the summer Sun and heat, then these are the tips and tricks for you!
What is the Harm?
Before getting into how to protect your hardwood floors, you should know what the summer can do to them. Prolonged exposure to the Sun can cause discoloration in a lot of types of hardwood floors, and the additional heat and moisture can ruin them just as easily.
With these easy tricks, however, you can rest assured that your floors will be good as new when fall comes around.
Run the AC
While many people hesitate to turn on the AC during summer, it can have a big impact on the longevity of your hardwood floors. This will not only keep your home from overheating, it will also drain the moisture from the air. As you might imagine, moisture and hardwood floors do not exactly get along!
The obvious downside is that it can be expensive to run an air conditioner for an extended period of time. While this is true, consider how much it will cost to replace your floors. Once you’ve done that, crank up the AC and enjoy your 68 degree home in the middle of July!
Install Awnings
Imagine that your hardwood floors are a red-haired, light-skinned and freckled little boy. If you don’t keep him out of the Sun, you can be sure that he is going to burn like crazy! How would you protect the boy when he goes outside? Probably with an umbrella. The same concept proves effective here!
No, you don’t want to build a giant umbrella over your house (at least not for this reason). Instead, install awnings over the windows of your home, especially those that look into your hardwood floors. Not only will this keep your home cool in the summer, but it will make sure that you don’t have to worry about sun damage on your floors.
Change it Up
Another great tactic to protect hardwood floors is to periodically move the furniture around the room. The Sun cannot reach your floor if the couch is sitting over it, so move that around to protect a wider area.
If you do no other step on this list, this is the one that you should be doing. That way if your hardwood floors do experience discoloration or damage, you at least won’t have stains in the shape of your furniture!
Stop Cleaning
Before anyone gets too excited at the idea of having three months without the need to clean, let’s clarify. You should still be cleaning your floors, but you can back off with a couple of things. Polishing and waxing your floors won’t do much good in the summer months, as this will just draw the sunlight to them even more.
That said, you’re not off the hook entirely. You’ll still need to vacuum them from time to time…unless you want your mother-in-law to give you that look when she comes to visit.
Be Smart
Most of all, just be smart. Don’t leave your bay window open on the hottest day of the summer. Try to give your floors as much shade and cool air as you can, but don’t obsess. Just follow these simple tips and you won’t need to worry about your hardwood floors discoloration this summer. It’s the summer, so don’t drive yourself crazy worrying about your hardwood floors. Enjoy the warm weather, do your best with your floors and have a little fun!
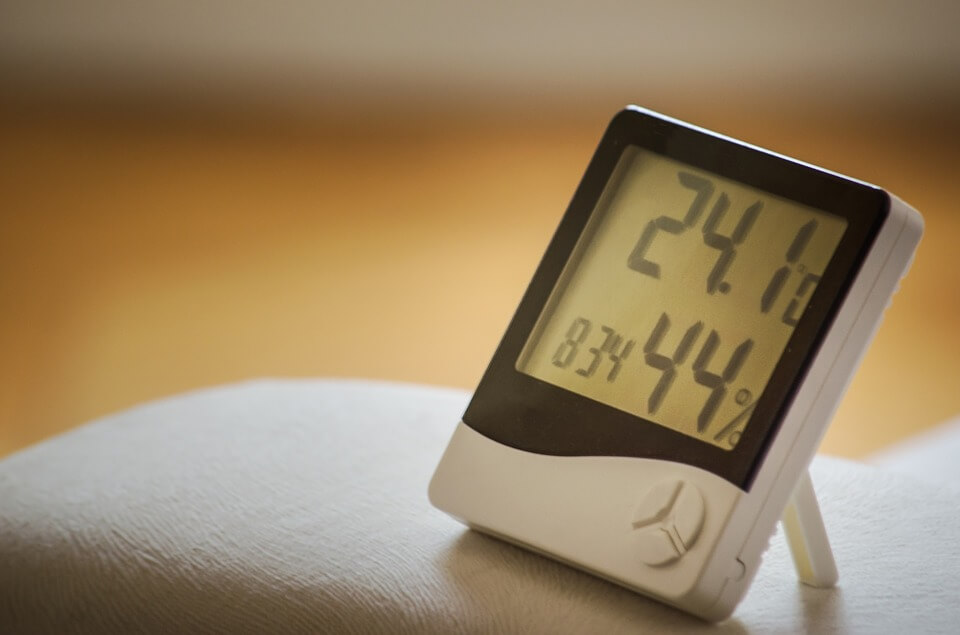
Because it is a natural product, hardwood floors respond to temperatures and humidity levels in your home. For example, when the humidity level in your home is high, wood flooring expands. On the other hand, when humidity levels drop, the flooring in your residence will contract.
The reality is that this cycle of expanding and contracting can actually cause unnecessary and damaging wear and tear to your wood floors over time if the levels are extreme enough. There are tactics that you can and should consider employing to address the issue of rising and lowering humidity levels in your home as a means of prolonging the life and luster of your hardwood floors.
Install Humidity Controls Before Placing Hardwood Floors
If you are planning installing hardwood floors, you can be proactive when it comes to rising and lowering humidity levels. Before you have your hardwood floors installed in your residence, you can first have a humidity control system added to your home.
This type of system is the only real way in which you can garner continuous and reliable control over fluctuating humidity levels. Although there are some other strategies that can be employed to control humidity levels in your residence, an automated system is your best bet. Once it is programmed, it really does all the work for you.
Optimal humidity for wood floors is between 40 and 60 percent. If it deviates beyond this zone, hardwood flooring can be impacted in a negative manner.
Controlling Humidity in Wintertime
In the wintertime, particularly when the heater is on in the residence. humidity levels drop. When humidity levels drop, wood contracts. This can result in gaps between the planks of a hardwood floor.
If the home lacks a humidity control system, a portable humidifier can be placed in the room or rooms that hard hardwood flooring. In the alternative, in the absence of an installed humidity control system, a humidifier can be added to the furnace.
Controlling Humidity in Summertime
In the summertime, humidity levels can rise significantly inside a home. Humidity levels can rise as high as 90 percent in some instances based upon your home’s location.
High humidity results in an expansion of wood. It can result in planking, as has been discussed. If this persists, the wood planks that make up a wood floor can lose their integrity and become damaged permanently.
In the absence of a humidity control system, a homeowner should look at installing a dehumidifier to control rising humidity levels.
Dealing with Floor Cupping
Cupping is the ultimate problem you may experience with hardwood floors when you have humidity issues in your home. Cupping occurs when hardwood floors bows up, usually rather slightly, but noticeably.
In addition to humidity being a potential cause of cupping, it can also be caused by a plumbing leak, usually in the basement under the floor. In most cases, cupping corrects itself when the source of the moisture, a leak or humidity issue, is corrected.
If cupping is more than minimal, some additional work may be need to be done on the floor in order to restore it to a normal condition. It may need to be sanded and refinished. Keep in mind, however, that the floor must be completely dry before the restorative processes are commenced.
Domestic Versus Exotic Wood Flooring
A homeowner needs to keep in mind that some of the more exotic types of wood flooring is more susceptible to cupping and other problems associated with variable humidity levels. Domestic woods tend to be heartier and less susceptible to significant issues associated with humidity fluctuations.
Contact a Flooring Specialist
If you find yourself having problems controlling your interior environment in your home, do not hesitate to consult a specialist. You invested a good deal of money in your hardwood floors. You do not want your floors to suffer permanent damage because of an issue like humidity levels that truly can be regulated and controlled.
Your Health and Humidity
There is a major side benefit to getting humidity levels under control beyond taking care of your hardwood floors. A constant humidity level is believed to improve the health of residents in a home. This includes lowering the incidence of lung related issues and other maladies like the cold and flu.
Thanks to the advances made in the heated floor industry, it is now possible to confidently install hardwood floors over radiant heat. This means homeowners can now enjoy the natural beauty of hickory, oak, cherry, walnut, maple, ash, and any other fine hardwood, plus the efficiency and luxurious comfort provided by radiant heating.
Depending on where you reside, radiant heating offers the possibility of application as either the sole or as a supplementary heat source in your home.
Installation of Radiant Heating Systems
There are several possible methods of installing radiant heat systems, and these are;
For home renovations, direct installation of radiant heat tubing, under a wood subfloor, from the underside is a common practice, especially with the use of foil or traditional fiberglass to provide additional insulation.
The installation of radiant heat tubing within a plywood underlayment system, either over an existing slab of concrete or directly over a current wood subfloor is another option. It is, however, a strong recommendation to incorporate the traditional closed-cell foam insulation developed for utilization in damp areas.
Embedding radiant heat tubing within the concrete slab while pouring the concrete is an option for new constructions.
Most of the flooring materials can fruitfully be used over radiant heat when properly installed, although as we might all be aware, hardwood flooring offers the best comfort levels in addition to the highest aesthetic value.
Radiant Heating and Solid Hardwood Floors
Radiant heat is usually not recommended for application with solid woods since being a natural material, exposure to high levels of moisture and extensive fluctuations in temperature result in contractions and expansions. The presence of dry heat directly under solid wood floorings can, therefore, lead to quick drying out and contraction of the wood, which might result in cupping issues or the development of large gaps between floorboards. This is why most warranties for solid wood offered by manufacturers rarely cover installations over radiant heat.
For homeowners with hearts set on the ¾ inch traditional solid wood flooring, listed below are but a few recommendations.
Selection of wood
The choice of wood type is quite important, and this becomes apparent once you understand the impacts of the available options. Boards are cut from logs in two ways, these are;
Quarter-sawn: The grain runs vertically
Plain-sawn: The grain runs horizontally
Plain-sawn woods, upon exposure to temperature variations, expand from side to side, and this will more likely than not lead to cupping and gaps. On the other hand, quarter-sawn woods when exposed to temperature changes expand from the top to the bottom, reducing the possibilities of developing both gaps and cupping. It is, therefore, wiser to opt for quarter-sawn wood even though this type of wood will rarely be pre-finished at the factory.
The narrower the boards, the more seams your flooring eventually contains, and this significantly assists in the absorption of possible shifts. Narrower boards are therefore the better choice compared to wider boards.
You must also consider the species. As a result of its stability, solid white oak can be successfully applied over radiant heat, while several other types of wood, including Brazilian Cherry, Maple, and Pecan are not recommended for use over radiant heat. Discussing the different floor options available with your flooring service provider ensures you choose the most suitable option for your home.
Professionalism
Nailing down or stapling of wood is usually a part of the installation process of the ¾ inch solid wood floors, and this involves the risk of possible punctures to the radiant heat tubing underneath the wood. It is, therefore, an excellent idea to engage the services of a certified and professional installer, one with experience in such installations.
Engineered Hardwoods
For the installation of hardwood flooring over radiant heat, engineered woods make the better choice. The arrangement of thin plies of wood is made such that the wood grains end up running in opposite directions. As a result of cross-ply construction, the planks are consequently more dimensionally stable, offering less movement, and withstand moisture as well as variations in temperatures far better compared to the solid woods.
Most of the engineered woods can also be floated, which essentially makes them quite ideal for installation over concrete, plus a majority of the flat and secure subfloors. Even though most of the manufacturers cover the installations of engineered floating floors over radiant heating systems with warranties, all installations have to be conducted as per the manufacturer’s specifications and guidelines.
Benefits of Radiant Heating with Wood Floors
In-floor radiant heating systems are quite reliable and durable, plus they provide evenly distributed and set temperatures, which consequently assists in the preservation of hardwood floors and offer the possibility of lasting for up to 35 years.
Radiant heating systems warm rooms from the floor upwards, resulting in the capability and comfort of setting home thermostats to lower temperatures, which effectively reduces energy consumption and saves money, even more so for hardwood flooring since it retains heat for longer periods compared to other flooring materials. Moreover, if you put to use, modern products like using a cheap smart thermostat, you could further reduce electrical waste and efficiency.
Due to the minimized use of the central air heating system, the blowing of dust, dirt particles and allergens through vents and into homes is also greatly reduced.
Wood floors are additionally ideal for radiant heating because of the possibility to reduce extra noise, mainly due to muffling characteristic, though radiant heating does not use a blower and usually produces very minimal sounds.
Hardwood and the Rise of the American Middle Class
Before the 1600s: Europe
Hardwood is not for floors
Before the 1600s, wood flooring was not a thing. This is not to say that no floors were made of wood, but most were made of dirt or stone. In the more densely populated urban centers, where two-story buildings had begun to be constructed, the second floors were, of course, made of wood (usually oak or elm planks about 2 feet wide), but this was a matter of practicality, and little thought was given to them beyond this.
Baroque Era (the mid-1600s to early 1700s)
Hardwood is for Royal floors
It was not until the Baroque era that wood flooring came to be a matter of fashion; this was in no small part due to Louis XIV’s choice to install elegant parquet floors in the Palace at Versailles. From that point forward, the royalty and very wealthy of Europe followed suit and fancy wood floors, some sporting 3D illusions, others modeled after those at Versailles, and others a bit simpler.
King’s Apartment, Versailles
Floors like this one in one of the King’s apartments at Versailles started a craze that hasn’t stopped. Throughout the areas of the Palace constructed by Louis XIV, parquet designs, many even more intricate than this, can still be found adorning the floors. One of these, the parquet design in the Hall of Mirrors, is famous for the way it changes from light to dark, depending on the angle from which one views it. Parquet tiles in style shown here are still called “Versailles Parquet.”
These floors were laid over periods of several years by expert artisans, with each inlay or pattern piece carefully hand-crafted and placed. Once placed, any outlying bits would be scraped off; then the whole floor would be scrubbed with sand and polished to a shine.
During this time it became common among the burgeoning merchant class to install wood flooring that could be painted to imitate the ornate parquet floors that only the very wealthy could afford to construct. While many of the parquet floors of the palaces and estates survive today, few of the painted imitations can still be found.
Colonial Era in North America (the 1700s)
Hardwood floors are for colonists
When European colonists began to arrive in North America, they were quick to take advantage of any number of the continent’s abundant natural resources. One of these was its vast native hardwood forests. Very soon, hardwood flooring was no longer for the rich.
The earliest colonial homes featured very basic plank floors made from local hardwoods or slow-growth pine. Because of the age and consequent size of these trees, they contained more of the tight-grained heartwood. This tight grain made the wood harder and more durable than the younger trees usually harvested today. These massive trees also tended to yield wider planks, which, rather than being finished, would merely be worn smooth over time.
Converting the timber into usable lumber was an arduous process; the introduction of the circular saw was decades away, and the predominant method available to create dimensional boards was to pit-saw the logs into planks. This required two men: One stood in a pit beneath a huge log that had been squared with hand tools, while the other perched atop it. Working together, they pushed and pulled at opposite ends of a long-bladed saw, carefully following chalk lines that indicated the direction of the cut. These rough-sawn planks were finished with plain, squared edges; laid side by side; and face-nailed into the floor joists. The lumber was often left bare and was eventually burnished by years of use.
One of the most remarkable enduring examples of this early colonial flooring can still be seen in heart pine floors in the historic Bacon’s Castle in Virginia.
As wood flooring came to be used more and more, several improvements were made to how it was cut and laid. For example, it was soon found that by using ship-lapping — a method by which the edges of the board are cut into an “L,” allowing them to overlap one another— one could avoid gapping that otherwise occurred as seasons changed and as floors got worn-in.
During the latter part of the century, it also became popular to paint wood floors, not to imitate parquet as had been done in Europe a century earlier, but to continue the decorative motifs that began to adorn walls and furniture. The checkerboard patterns you often see in restored colonial homes were a product of this trend.
Industrial Revolution (the mid-1700s to early 1800s)
Could hardwood floors be for everyone?
With the advent of steam-driven machines, finished lumber could, for the first time, be produced on a large scale. No more did it take two men with a giant saw several hours to create a few planks. Now, lumber could be milled in set lengths and widths, without the rough and often uneven cuts of the pit saw. It was during this time that we began to see the narrower floorboards that were common through the 19th and 20th centuries and are still so prevalent today.
Industrialization also saw an improvement in the ship-lapped boards with the advent of tongue-and-groove molding. Where ship-lapping only provided a bit of cover when boards began to move, tongue and groove boards, made possible by the invention of the automated side-matcher, could not only be joined together but nailed down without leaving any nails exposed to attack bare feet or snag sweeping skirts.
Also from Old House:
Tongue-and-groove molding is a precise method of joining boards together along their lengths by fitting a protruding “tongue” on one board into a channel cut on the adjoining board. With tongue-and-groove installation, the nails are driven through the tongue, forcing the boards together; this also conceals the nail holes, creating an unmarred surface. The interlocking boards also were much more resistant to upward movement, which minimized irregular edges sticking up in the path of passing feet. Structural-grade tongue-and-groove floorboards, typically pine or lower-grade oak, were typically a uniform 6″ to 8″ in width, much narrower than the wider pit-sawn planks of the 17th and 18th centuries.
The side-matcher also made it possible to create hollow-backed boards, which were lighter and conformed better to subfloors, which were becoming more and more common.
During this time, though many homeowners continued to paint their floors to match their décor, it also became popular to lay tightly woven carpet over a hardwood floor. Just as steam-powered mills had given a boon to the lumber industry, so too had the invention of the power loom made carpet more common and affordable. It was around this time, then, that wall-to-wall carpet made its first inroad to the mainstream.
Victorian Era (the mid-1800s to early 1900s)
Hardwood floors ARE for everyone!
As the Victorian Era came into full swing, so did the hardwood flooring industry. Parquet patterns began to make a comeback, though usually only in those rooms reserved for entertaining in the homes of the wealthy. However, it was also during this period, and thanks to industrialization, that we began to see what we now think of as hardwood flooring (smooth, even, polished boards) in middle-class American homes. Hardwood floors started to be advertised as literally for everyone and anyone.
This description of “wood carpeting” from WoodFloorDoctor.com is an excellent example of how far the hardwood industry began to reach.
A 1903 E. L. Roberts catalog shows “wood carpeting” consisting of 1 1/2″ by 5/16″ strips glued to a heavy cotton canvas. These came in rolls about 3 feet wide and were installed by tacking down each board every foot or so. They suggested many patterns of installation, most with fancy parquetry borders. Each of these small brads had to be set below the surface and filled. All these pieces were then scraped, sanded with the hand operated floor brush. This was a 25 pound block with natural bristles on it’s bottom. A broom handle attached, you pushed it across the floor, with sandpaper strapped to it. Slow but effective. Varnishes were usually slow curing tung oils introduced from China. These were not durable in themselves so the floors were hot waxed and buffed to a shine with the floor brush.
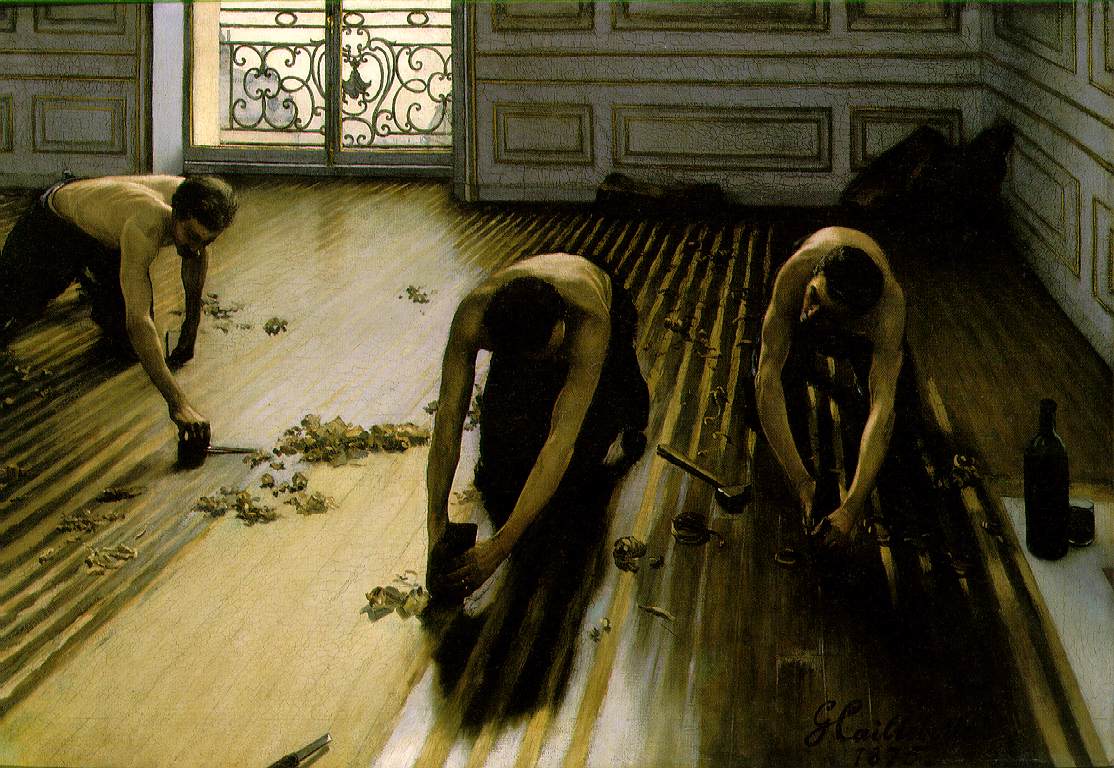
The factory mills said in their ads “Any one familiar with the use of a saw, hammer and varnish brush can lay and finish them. A servant of average intelligence can keep parquetry floors as if they were newly laid with but little effort” Sure and at 10 cents an hour why not? These floors were touted as easy to install and yet as elegant as the time proven European parquetry. But few of these floors survive today. All that face nailing of small strips made for a squeaky and split-ridden floor. At the same time mass produced 3/8″, 1/2″, 3/4″ strip hardwood flooring was cheaply available at 10, 15 and 20 cents per square foot respectively.
Les raboteurs de parquet (The Floor-Scrapers) by Gustave Caillebotte, 1875
By contrast, quality hardwood floors were usually installed over concrete slabs and glued down with hot tar. Then laborers were paid (a little) to scrape the floors smooth, sand them even smoother, then shellac, wax and buff them shiny. It was also in the early 20th century that the herringbone pattern of wood flooring began to gain popularity.
The 1920s and 1930s
Hardwood is for everyone, but not everyone is for hardwood
Wood remained the dominant choice for flooring in private homes, shops, and public buildings well into the 20th century. However, during the 1920s and ‘30s, flooring materials like linoleum and cork, which tended to be less expensive, easier to maintain and, at the time, easier to install, started to give hardwood some distinguished competition. In response, the hardwood industry made some advancements of its own, developing quicker-curing, harder varnishes and, finally, polyurethane finishes, eliminating the need for wax for the first time since hardwood floors were just a step up from dirt.
Post-WWII (the 1940s and ’50s)
Hardwood falls on hard times
Hardwood was able to hold its own against linoleum and cork, but when inexpensive wall-to-wall carpeting became widely available following the Second World War, the hardwood industry took a hard hit. Carpet had long been coveted among the middle classes because it had, until now, only been affordable by the very rich. Now, not only could average Americans afford to carpet their homes, but the cost of carpeting was often included in home loans. Unfortunately, the response of the hardwood industry this time was a more desperate one. Many installers, forced to cut costs to offer competitive pricing, also began to cut corners and the quality of the beautiful floors they laid began to falter. Wood flooring came once again to be seen as a lower-quality alternative to more popular materials, materials that now had become reasonably affordable to most homeowners. Consequently, wall-to-wall carpet and linoleum continued to dominate the flooring market through the 1980s.
In 1985, the National Hardwood Flooring Association (NHFA) was formed. One of its tasks has been to ensure that the kind of quality crisis that followed the carpet-craze after WWII never happens again.
The 1980s – 1990s
Hardwood makes a comeback
As the century drew to a close, the dark cloud that had lain over oak began to dissipate and, mainly as carpeting laid decades earlier began to need replacing, younger generations once again turned their eyes to the hardwood. In many cases, they found, when they pulled up their carpet, which a decent hardwood floor lay beneath. With modern finishing methods, it was not too complicated to bring these floors to a presentable state. Consequently, the perfect plank looks slowly began to come back into style.
Today
Hardwood is back on top
These days, more and more homebuilders are looking to hardwood to increase the value of new homes. “Hardwood floors” has become a selling point for older homes and renovated apartments, and renovators go to great lengths to preserve original wood floors. Our recent survey of designers nationwide showed that 84% percent of designers prefer to install hardwood when undertaking a project.
The advent and constant improvement of prefinished and engineered flooring over the past couple of decades have provided wood flooring more durable and more stable than ever before. These advancements have also made self-installation a practical choice, finally marrying the convenience of Roberts’s “wood carpeting” with the quality of traditional hardwood floors.
Exotic hardwoods are imported from all over the world, and domestic hardwoods are harvested more and more sustainably.
New and trendy materials will no doubt continue to come and go, but when it comes to practical, lasting, beautiful floors, nothing compares to hardwood.
Final Thoughts
Are you planning on laying new floors in your home or perhaps buying a new house? If so, hardwood is a timeless option. It’s been sought after and trusted for centuries.