Hardwood floors can be both visually pleasing and increase the value of your home; they are durable, add warmth to a room and offer great stain resistance. However, keeping your floors looking like new for years to come you will need to do some routine maintenance. The following practices will ensure that your hardwood floor will always look great.
How to Keep Your Floor Clean
Sand and dirt can scratch your hardwood floor, so it’s important to sweep, dust or vacuum your floor regularly. This will prevent sand and dirt from harming your floor. If you have children or pets who track in lots of sand and dirt, you may have to sweep or vacuum your floor every day. When vacuuming your floor, use the attachment or setting for bare floors. If you use the beater bar, it may scratch your hardwood floor.
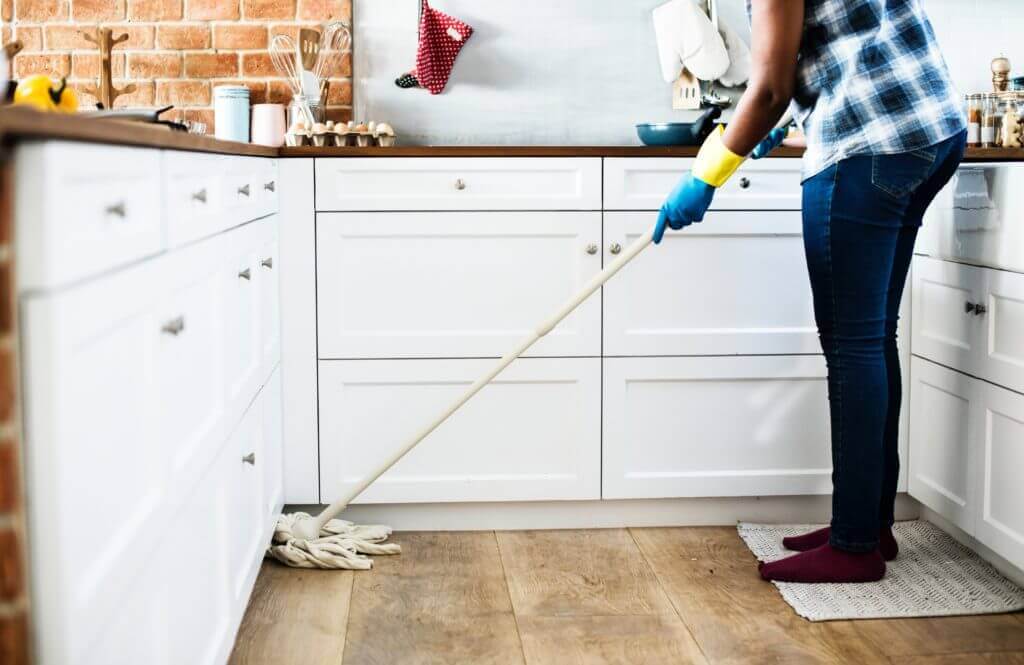
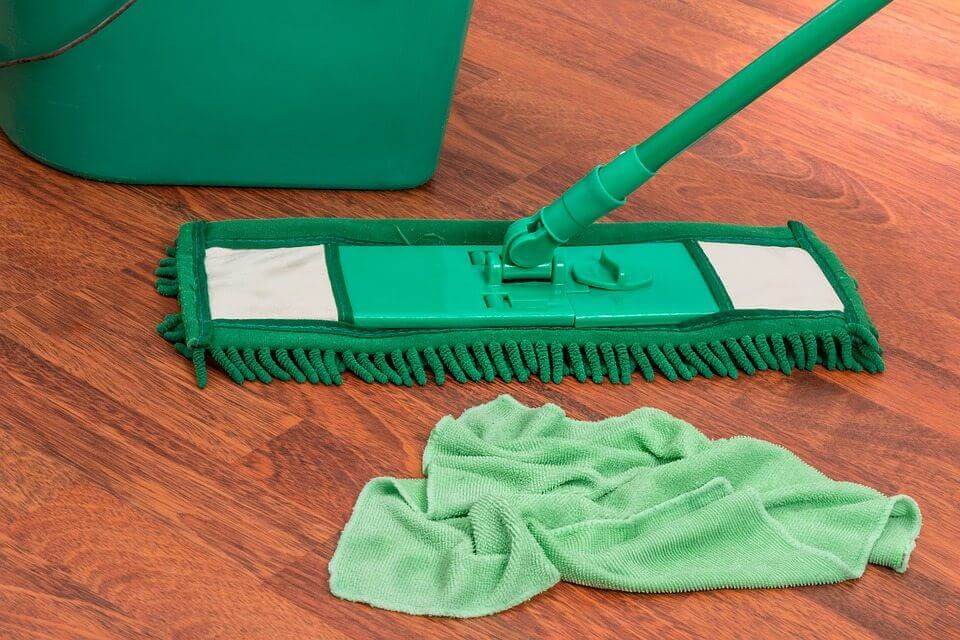
Every week, you should wipe your hardwood floor with a damp mop or a clean cloth. This will help to clean any dirt that you missed when sweeping or vacuuming.
Periodically, you should clean your floor with a cleaner made specifically for hardwood floors. Never use soapy water or a wet mop on your hardwood floor.
Cleaning up Spills and Stains
Hardwood floors are very stain resistance, however, if you allow liquid to stay on a hardwood floor for an extended period, it may cause damage or stains. To prevent damage or staining, wipe up any spills immediately. Always use a clean soft cloth to prevent scratching of your floor.
If you have a tough stain like paint, ink, lipstick or oil, you can try cleaning the stain with acetone nail polish remover on a soft cloth. When you have removed all traces of the stain, be sure to clean the area with a clean cloth that is dampened with water.
If you get candle wax or gum on your hardwood floor, apply ice to harden the wax or gum. Then use an old credit card to scrape off the wax or gum. Once you have all of the gum or wax removed, you can clean the area with a clean cloth that is dampened with water.
Things You Should Avoid with Hardwood Floors
Only use cleaning products that are designed for hardwood floors. Do not use any type of abrasive like scrubbing pads or scouring powder. These can scratch and destroy your floor. Don’t use ammonia, bleach or oil on your floor because they could stain or discolor the floor.
If you have high traffic areas, like hallways or entryways, you may want to use floor protectors to prevent your hardwood floor from being scratched or scuffed. Don’t use rugs with a rubber backing because they may cause stains on the floor. They may also stick to the hardwood floor and leave behind residue that is very difficult to remove.
Place furniture pads under any heavy furniture and they will help prevent scratches and indentations from your furniture. If you move furniture take care not to slide it across the floor. Either pick up the furniture or place it on a piece of plywood or carpeting before you slide it across the floor.
Hardwood floors are often the most attractive feature in any room. Hardwood flooring in good condition can add warmth to your home and contribute to the total value of the house; keeping hardwood floors in good condition, however, is vital to bringing out the glowing qualities that make this true.
At MacDonald Hardwoods, a Denver hardwood flooring company, we understand what an asset hardwood floors can be. We also understand that flooring is often subject to constant dirt and grime, sliding furniture, and the scuffling paws of household pets. In order to help protect your hardwood flooring, we provide Denver customers the safe and effective wood floor cleaning products and also offer the following tips.
A Matter of Maintenance
We realize that the majority of maintenance for hardwood floors is done by the homeowner. For this reason, we provide easy-to-use cleaning products that are fast and efficient. A regular cleaning routine is a key to keeping the floor free from dirt and other materials that can potentially scratch the finish. Our MacDonald Hardwood Floor MacVac is the perfect tool for quick removal of this kind of debris.
Protection Where It Counts
Wood floor cleaning is also about prevention. We recommend:
Placing mats and rugs over high-traffic areas of the house such as hallways and entrances.
Placing small pieces of felt padding beneath all surfaces that come in contact with the wood, as this can prevent accidental scratches caused by inadvertently shifting furniture.
Maintaining a relative humidity between 45% to 55% saturation to prevent swelling, shrinking, or cracking in the flooring.
Our MacDonalds Hardwoods Easy Floor Cleaner will assist in quickly removing damaging liquids while restoring the protective finish in the area.
Knowledge is Power
Our specialists are able to assist customers with every aspect of the maintenance and cleaning of their wood flooring. From cleaning product recommendations to environmental risk factors, our knowledgeable staff is always available for assistance. Call MacDonald Hardwoods at 800-639-3006 for more valuable tips and training on how to take care of your hardwood floors.
Refinish, refinish, refinish! In almost every case it is preferable to refinish rather than replace hardwood floors. Part of the appeal of hardwood is that it lasts so long. A quality hardwood floor can be sanded down and refinished at least six times, and up to ten times before you need to replace it. You can change the color, closely match and replace warped, stained, or termite ingested planks, silence squeaky boards, and fill gaps or patch knots. With all of these easy solutions, why would anyone choose to replace hardwood floors? Well, here are the cases when a complete rehaul becomes a better option.
How Much Time Do You Have to Refinish or Replace Hardwood Floors?
Refinishing a floor takes a lot of time. You’ll need to remove all of the furniture from the room. The wood needs to be sanded bare. If you need to make a structural or cosmetic repair, you must do so before staining and coating. During the week that all of this is going on, nothing else can happen in that room. Dogs cannot walk through and sniff everything, children cannot bounce their balls, dust is everywhere, and the smell is enough to kill you. Well not really, but you get the idea. All of this time and trouble is reason enough for some homeowners to prefer having the old floor ripped out to put in something fresh and new.
Consider the Aesthetics of Your Current Flooring
The number one reason homeowners choose to replace hardwood floors is to change the overall look. But, maybe you like your flooring. Or, maybe you’ve got plain, old, oak planks and you’d like to upgrade to an exotic species. Here are some crucial aesthetic factors to consider:
Fashion – Parquet kitchen tiles that once were cute aren’t very fashionable today; the modern approach involves using wide planks to make a room seem more spacious.
Species – The oak that is prevalent in American homes pales in comparison to designer applications of Brazilian Tigerwood and cork.
Artistry – Implementing a creative herringbone border, an artistic inlay or pattern warrants laying down a new canvas.
Direction – Many installations feature diagonal placement of the wood making the room seem more spacious.
Are you attached to the look and feel of your home, other than some cosmetic damage to some of the flooring? Then, you may want to refinish your floors rather than go to the trouble of replacing them.
Can All Hardwood Floors Be Refinished?
You may be on the fence about your decision to refinish your hardwood floors because you wonder if your floors are a candidate for refinishing. The truth is, not all hardwood floors can be refinished. Although most common problems can be addressed and fixed without replacing the entire floor, there are some exceptions. Consider the following to make an informed decision.
What Flooring Damage Can’t Be Refinished Away?
Structural Damage – These problems need to be addressed directly, which usually requires ripping up the floor to get a good look at the frame of the floor. If you think you may be looking at underfloor damage, you may not be able to sand, stain, and refinish your existing flooring.
Movement – Refinishing the floor with boards that wiggle and move around a lot will only make things worse. You’ll end up with even bigger gaps between the floorboards and an unsightly mess.
Severe Flooring Damage – If more than 30% of the boards have sustained damage such as warping, chipping, ugly stains, or termite infestation, the time, effort, and money spent replacing that much of the floor would be exceedingly cumbersome — a replacement would make more sense.
“Termite treatments are one of the costly pest control jobs due the urgency and great damage involved.”
Extreme Wear – If the floor has been refinished too many times before, you will begin to see the grooves in the planks and nails. Even if this is only visible in some areas, sanding the wood down will no doubt reveal more problems, making replacement more of a requirement than a choice.
If you’re still not sure, consult a flooring professional who can tell you whether or not it’s time to toss out your old flooring.
How Much Will a New Floor Cost?
The advantages of hardwood flooring are limitless. At the top of the list is comparable cost over time. Although a significant investment may be required to install hardwood flooring initially, it is unlikely that you will ever have to replace it.
It can be sanded down and refinished five, six, even seven times. And, if maintained properly, you won’t have to do it for 20 years. Refinishing a floor may be messy and troublesome, but most homeowners learn to live with it. After all, it costs five times as much to replace hardwood floors than it does to refinish them. For some people that is reason enough.
Here’s How to Replace Your Hardwood Floors:
If, after considering everything above, you have made the decision to replace rather than refinish your hardwood floors, here’s what you can do.
What You Will Need to Replace Hardwood Floors:
Vacuum Cleaner
Broom
Mop
Tar Paper or Roofing Felt
Hardwood Planks
Pneumatic Flooring Stapler or Nail Gun
Rubber Mallet
Miter Saw
Awl
Hammer
Baseboard
Pre-Installation Preparation for Hardwood Flooring Replacement:
Hardwood planks should be allowed to adjust to the temperature and humidity of your house anywhere from 48 hours to 2 weeks. Learn more about Humidity for Wood Floors.
Remove any and all debris from the subfloor that cannot be vacuumed up. Check for any nails or staples left over from the previous flooring.
In order to remove dust, vacuum the subfloor. Follow up the vacuuming with sweeping and mopping the subfloor.
Hardwood Flooring Replacement Steps:
Install a moisture barrier between the subfloor and the wood planks. The tar paper or roofing felt should be stapled to the subfloor.
Do a dry run. Lay out your wood planks, but don’t nail anything down. In addition to getting a feel for how the flooring works, a dry run will enable you to avoid sudden color shifts and figure out which planks need cutting in order to fit properly.
Lay the first row of planks 3/8 in away from the wall, tongue side facing the wall. Staple or nail the planks down every 6-8 inches.
The next rows should go down about the same as the first. Tap the planks on the groove side with the rubber mallet to make sure you get a good fit.
Use an awl and hammer to tap down any raised nail heads.
In the end, the decision to repair and refinish or replace hardwood is up to you, the homeowner. Using the advice above, the hope is that you will be confident in your choice, no matter what route you take. Let us help you select the best hardwood floors for your home.
This post was originally published on August 13, 2013, and has been updated to be more informative for readers.
Rocky Mountain region residents love dogs. Your friends at MacDonald Hardwoods are often asked which types of wood flooring will fare the best with dogs. There are many suitable options available but there are a few rules of thumb that will help you select the best flooring for you.
Choose Hardwood Flooring
First of all, it is important to mention that hardwood flooring has many advantages over other flooring options. It is completely natural. The wood is harvested from forests in a specific pattern and process that ensures its long-term sustainability. There is no better option for hygiene, air quality, and protection from allergens. Engineered hardwood is durable, but solid hardwood flooring is better for homes with pets.
Available Options
Years ago, the options available for hardwood flooring were very limited. A homeowner could select one of a handful of colors that had little or no grain or texture. This traditional look is still popular today but now it only represents a small segment of the options available. There are many different types of hardwoods in a full range of colors – some are naturally occurring while others are stained or whitewashed.
Dog Lovers
Dog lovers need to be concerned with three issues when choosing a hardwood floor: color, gloss, and species hardness. Experienced dog owners recommend that you choose a hardwood species that is very hard so that it will resist scratches and dents. They recommend a light color so that animal hair will not be easily visible. And, they recommend against using a glossy finish because it tends to shows the scratches more easily in reflected light.
Hardwood vs Softwood
The Janka Hardness Scale shows the hardness of each species of wood. While a softer species would not hold up well in a house with pets, a harder species will not be impervious to scratches and dents. In our 2015 survey of designers from around the U.S., more than 50% of them recommended Oak to their clients with dogs. Other popular choices were bamboo and Hickory. To determine which hardwood species is best with pet concerns and the Denver area climate, consult one of the experts at MacDonald Hardwoods.
Avoiding Scratches
A typical nail trimmer cuts dogs’ nails but leaves a sharp edge. If a dog owner also files the dog’s cut nails, the nail surface will not scratch as easily. Some dog owners use Soft Paws, vinyl nail caps that glue on to the dog’s nails. Problem solved!
Moisture
Dog lovers also need to be concerned with avoiding moisture on the hardwood floors. It is very important to avoid the possibility of the dog urinating on the wood flooring, especially when no one is home to clean it up right away.
The dog’s food and drink should be placed on a waterproof surface to avoid any moisture reaching the wood floor. Even homes without a dog should have an absorbent rug by the entrances to avoid tracking rain, snow, or dirt into the house. Having a rag handy to wipe off paws is very helpful as well.
Assistance
We all understand that sometimes accidents do occur. Visible scratches can be easily remedied with a new coat of finish applied periodically. Damaged or stained sections of hardwood flooring can be repaired or replaced. Learn more about the best hardwood flooring to consider other aspects of your lifestyle before making a final decision.
When you install hardwood floors, concrete is one of the best bases to work from — there are only a few steps to take. Follow these steps with care to safely complete the installation yourself. Whether you’re planning on renting out your home or looking to increase its value, using concrete as a base is a great idea.
To get you started we put together this do-it-yourself guide. Follow these steps with care to safely complete the installation yourself.
1. Remove Anything Standing Between You and the Concrete
While pulling up carpet, laminate, or any other flooring is the obvious first step, existing flooring isn’t the only thing that needs to be removed before you can install hardwood floors. Your baseboards will need to be taken out, as well, to ensure the new flooring has no gaps around the edges of the walls. If you’re careful while removing the baseboards, you should be able to reuse them. You can even spruce them up by sanding any paint off or staining them the same color as the new floor.
Look to see if your concrete has paint or not. If it is, the varnish may prevent the adhesive from working correctly. Don’t worry, though. You can rent a concrete grinder from most big-box home improvement stores. You can even call around your local tool rental shops or hardware stores to see if they offer concrete grinder rentals.
Once you have the hardware you need, carefully grind the pain, glue, or finish from the concrete. You’ll want to wear protective gear, like goggles and a mask, while you do this. You don’t want to inhale any concrete dust or get some in your eyes. Make sure you remove all the paint and sweep up any dirt or debris that might be left behind.
2. Protect Your Floor From Moisture
Moisture and moisture vapor is your hardwood’s natural enemy. To combat these villains, you’ll need to apply a moisture barrier to the floor before the flooring can be laid out. You will need a barrier that is appropriate for the flooring you choose:
Floating Floors – Typically, these moisture barriers are made from plastic.
Nailed Floors – You will need a moisture barrier that protects the subfloor as well as the flooring.
Glued Floors – A heavy coat of moisture barrier will be required since the flooring is glued directly to the subfloor.
Before you begin, open any doors or windows in the room to provide proper ventilation. You will not likely want to inhale the fumes from your moisture barrier because it is likely to contain chemicals that are harmful to your lungs. As a precaution, it’s a good idea to wear a mask. If you are using plastic sheets, this step isn’t crucial.
Next, start at the side of the room opposite the door, and follow any and all instructions on the barrier’s packaging. Once the barrier is applied, you do not want to step on it. If you do, there’s a chance you’ll have to start over, so take care to move your materials with you as you work your way out the door.
Finally, let the moisture barrier set for 24 hours. This should be plenty, but before you take a chance and step back in the room, lightly touch the floor – if it’s still tacky to the touch, it has not set all the way and will need to be left alone a little longer. Some areas are more humid than others and will require more time to dry. In this case, check back every four hours or so.
3. Lay out the Flooring Materials
It’s time to start laying down your floorboards. Depending on the type of flooring you chose, your method for completing the next part will be different. Do this in one of two ways:
Method #1: Lay out the Materials for Floating Floorboards:
If you will use floating floorboards, you don’t need to worry about using an adhesive (If you’re unfamiliar with floating floorboards, they’re the boards that fit together like a jigsaw puzzle). The edges of each board click into place with the boards around it, creating a solid floor.
After you’ve measured the room and made sure you have the correct amount of flooring, the installation can commence. You can lay down a foam layer as you go, but you don’t have to. The foam will help if you want a cushion between the boards and the concrete, which can help muffle sound and create a more pleasant walking experience, depending on your preference.
Method #2: Lay out the Materials for Conventional Floorboards:
If you decided to use any boards that don’t click together, you need to apply adhesive while you place the boards. Just like when you apply the moisture barrier, start at the back of the room and work towards the door. Don’t administer all the adhesive at once. Instead, work in small sections. Let the adhesive dry for 24 hours after you install the flooring.
No matter the type of hardwood you’re using, be sure to cut the boards as you work. Don’t measure the room and assume how many boards need to cut, or you’ll likely run into trouble. You will also want to leave a small half-inch gap between the flooring and wall. Wood doesn’t stay one size, and you want to make sure it has room to expand.
4. Finally, Add the Finishing Touches
Now it’s time to finish up. Reinstall your baseboards and trim, then clean up the room. Be sure to take a moment to admire your work. There’s nothing like a job well done!
So, you’re thinking about retiring your old floors, or you’re moving into a new space, and you’re interested in a natural, easy-to-maintain flooring choice. Of course, hardwood is an excellent pick for many people — it’s easier to clean than carpets and is known to stand the test of time. But, there are so many available options that finding the best hardwood flooring can be overwhelming.
How to determine the best hardwood flooring for your home:
First, understand the pros and cons of hardwood floors.
Next, examine your lifestyle.
Then, set a realistic budget.
After that, explore various hardwood types and species.
Once you know the rest, research your finish options.
Finally, consult with an expert.
Each of the above items has its own set of intricacies. In this article, we take some of the guesswork out of it for you. Here’s everything you need to know to choose the right hardwood flooring options.
First, the Pros and Cons of Harwood Flooring:
Hardwood is a natural, long-lasting choice for home flooring. Still, it comes with maintenance responsibilities. Before you do anything else, it’s crucial to consider the pros and cons of installing wood floors in your home.
Hardwood is durable… as long as you don’t overexpose it to water.
While hardwood floors are durable and can withstand spills and stains with proper treatment, they are especially prone to water damage (kind of like the wicked witch of the west); this makes them a risky candidate for areas like your bathroom, kitchen, and entryways. Installing hardwood in rooms where they are exposed to liquid will lead to damage.
It is easy to refinish, but not so easy to install.
Most people will tell you it is easy to refinish hardwood floors, as long as you can stay off of them for a few days. Even so, it is difficult to install them, even for experienced DIYers. So, in the beginning, be prepared to hire a professional for the installation. At the very least, consider hardwood flooring installation classes
It is considered a wise investment.
The homeowners’ paradigm is that hardwood flooring will increase the value of your property. Most homebuyer’s jump at the idea of purchasing a home with hardwood floors — in many cases, even when carpet covers the original wood flooring. So, in the long run, the initial investment is probably worthwhile.
Hardwood flooring isn’t likely to go out of style.
Hardwood floors are timeless in the decor world; it was considered a luxury interior decoration asset as early as the 1600s and is popular still today. If you choose hardwood, your floors are likely to stay in style as long as your home stands. According to GentlemanZone Magazine, hardwood stands for luxury and fine taste. It is the warm and shiny glaze of wood that noblemen love to this very day.
It isn’t the coziest flooring to walk on.
One of the downsides to hardwood flooring is that it can be hard and cold on your feet compared to carpeting. Because it is so hard, it doesn’t absorb sound; this can lead to more noise when walking around with shoes. Some people might not like this idea, for a number of reasons, and will opt for carpeting instead. But, if you’re still undecided, there are ways to reduce sound with hardwood floors.
It is an allergy-friendly, eco-friendly, low maintenance flooring option.
People with pets will tell you that carpets need to be vacuumed daily to keep a hair and dander-free home. If you have allergies to pets or pollens, you can be sure hardwood floors will be much easier to maintain, and you’ll experience fewer attacks. Also, most of the wood used for flooring materials are sustainably sourced and use non-toxic adhesives and finishes.
Next, What You Need to Consider About Your Lifestyle:
Your lifestyle dictates the best hardwood flooring option for your home — foot traffic, kids, pets, and maintenance crucial considerations. Are your floors prepared for wear and tear, or will choose luxury options for their aesthetic appeal? Consider the following.
While you probably won’t be bowling on your floors, you may live in a home with a lot of guest foot traffic, kids playing, or pets running around. In this case, you are going to expose your floors to scratches; this requires a “harder” floor and finish (or a ridiculously laid-back attitude).
On the contrary, if you have a lifestyle with more solitude, you might be able to afford to go with softer wood and a natural oil finish. If you require people to take their shoes off at the door, take precautions when moving furniture, your home isn’t prone to messes, and you expect things to stay this way, there’s no reason to worry yourself too much over potential scratching and stains.
Recommended reading for the best hardwood flooring care:
Then, get Clear About Your Flooring Installation Budget:
While some homeowners consider hardwood flooring installation to be a DIY job, more often than not, they require professional installation. Whether you install the flooring yourself or hire someone to do that for you, be realistic about your budget. It’s always a possibility that you will end up spending more than you anticipate by the time everything is complete.
What to consider when you set your hardwood flooring budget:
Cost per square foot of flooring
Size of the project area
Subfloor, joists, and other structural materials
Floor finish
Molding replacement
Professional labor costs
Future flooring repair & replacement costs
In addition to the installation (all materials and labor), you must consider the cost of repair and replacement for your hardwood floors. So, while you may have the initial budget for an exotic species like Padauk, think about whether you will have the funds to repair or replace a more expensive floor in the future, should you have to. If you have to refinance your home to pay for new floors, it may be best to choose an option that is on the conservative side of the price scale.
Recommended reading to set your hardwood flooring budget:
After that, Consider Solid, Prefinished, Engineered, and Laminate Flooring Options:
There are three main hardwood flooring options: solid, engineered, laminate, and prefinished. Here are the similarities and differences.
Solid Hardwood Flooring
Solid hardwood is the term used for planks of wood, cut directly from the tree — it is precisely what you think it would be; this is the flooring that has been around for ages. It is the most natural and customizable type of hardwood flooring. If you choose this option, you can have any wood species, stain and flooring finish you like. The only downside is that, in general, it can be slightly more prone to damage than your other options and typically more expensive. It would be the obvious choice for any luxury home and is the only type of wood flooring that can be refinished.
Prefinished Hardwood Flooring
A convenient option for homeowners is to choose prefinished flooring. Again, this is precisely what you might think it is: hardwood flooring planks that are finished prior to installation. Both engineered and solid hardwood, exotic and common species come in pre-finished options. The upsides are that installation takes less time, you will be able to walk on your floors sooner, and you will not have to inhale sometimes toxic VOCs of polyurethane finishes. It can be more expensive than unfinished planks, but that is usually made up for by negating the final step of installation. It might be difficult to find high-end species, yet many people still consider this the best hardwood flooring option.
Engineered Hardwood Flooring
Not to be confused with laminate flooring, engineered hardwood flooring is a semi man-made product. However, it is made from several layers of real wood. The top layer is a piece of solid wood lamella, and it is most often prefinished. So, if you choose this option, colors and grains are preserved. At a glance, you won’t be able to tell the difference between solid and engineered hardwood, as you are basically left with the same color and appearance of natural wood flooring.
Laminate Flooring
Laminate flooring is another choice that many modern homeowners go with, especially in rentals or homes with small children. Homeowners with laminate flooring claim that it is extremely easy to keep clean. With laminate flooring, you don’t have the high risk of water damage. It is also less prone to sun damage and staining. But, there is a downside: it is obviously not wood. This option doesn’t leave you with the same unique grain variants and color evolution as many hardwood options.
And, Explore Common and Exotic Hardwood Species:
If you like the idea of solid wood flooring, it’s best to look at several different species. There are common American species like Oak, Maple, and Hickory, that you’ve probably already thought about. You should also look at exotic species like Australian Cypress, Merbau, or Burmese Teak. Here’s a brief breakdown of some of the most popular species that we work with to inform your journey to the best hardwood flooring.
Black Cherry:
The heartwood of Black Cherry is a stunning red-brown color and the sapwood ranges from pale to light brown with an almost pink tint. Rather than using this type of wood for an entire floor, it is usually used for accents and borders, creating a luxury decor feel. This species is more stable and softer than oak with a moderate hardness.
Birch:
Birch grain is generally wavy or curly but maintains an even, medium texture. The heartwood of Yellow Birch is usually red-brown while the sapwood is white or yellow. The heartwood of Sweet birch is generally dark brown with reddish tones and the sapwood is typically lighter. It is more stable than red oak and is known for absorbing shock.
Oak:
Oak grain is coarse with a flame or curvy pattern. White oak varies from light brown to off-white with hints of pink or gray and is naturally protected from many insects and fungi. Red oak has a strong, reddish tint and is slightly less durable than white oak, but is more likely to absorb shock. These are two of the most common species used in flooring.
Pine:
Southern Yellow Pine and Heart Pine (aka “Blue Pine”) are the two most common Pine species used in flooring. Heart Pine is yellow but contains occasional bluish-black sap stains. Southern Yellow Pine ranges in color from orange and light yellow to yellow and brown. It is known for its knotty grains and is much softer than its rival Oak flooring options.
Maple:
Sugar Maple is available in a myriad of colors. The sapwood can range from a creamy or pale white while the heartwood can be creamy white to reddish-brown. It has a closed fine, light grain and subtle appearance overall. Occasionally, on the higher end of the price scale, Maple grain presents quilted, “fiddleback,” or bird’s eye patterns.
Walnut:
Black Walnut, another common American hardwood species, contains a myriad of heartwood tones ranging from beautiful medium browns to almost purple hues. The straight, open grains can occasionally burl or curl, but for the most part, maintain a long brushstroke look. It is softer but more stable than typical American Red Oak hardwood.
African Padauk:
African Padauk is a popular exotic hardwood flooring option, mostly because of the way it changes color over time. In the beginning, Padauk floors might be reddish-orange, but will darken to red and can eventually become purplish-brown to black with age. Padauk is significantly harder and more stable than oak, making this one of the most durable available flooring options.
Merbau:
Merbau has medium to high color variants on each board. It is especially lustrous, with golden yellow streaks throughout. Like Padauk, it changes color with age, typically starting out reddish-orange and eventually turning dark reddish-brown. The sapwood is, however, much lighter than the heartwood. Merbau grain is coarse and either straight, interlocked, or wavy.
Australian Cypress:
Australian Cypress is much more stable and slightly harder than Oak. The heartwood ranges from honey-gold to brown, and the sapwood is generally cream-colored. Cypress grain is generally closed, yet it can often resemble the knotty texture of Pine. While the stability is high, some movement can happen with Cypress after installation.
Thai/ Burmese Teak:
Thai/ Burmese Teak sapwood is usually a light cream color. The heartwood ranges from dark, golden-brown to yellow-brown. Teak becomes richer in color when exposed to the sun, which is not typical of other hardwoods that often experience sun bleaching over time. It is more stable yet softer than Oak and has a straight, coarse grain with inconsistent texture.
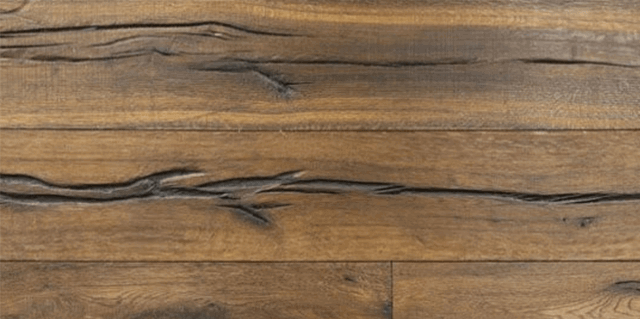
Take a Closer Look at Wood Grains
Each floorboard will have a unique pattern in the wood grain, but there are some basic identifiers in the most common species used in hardwood flooring; one may be more appealing to you than others.
Maple, for example, has a fine, light pattern. Oak tends to have a classically beautiful grain pattern that resembles flames. Hickory grains generally have an interesting, jagged, peaked structure that resembles watercolor paintings. Cherry and mahogany, though unique in many other ways, usually have similar grain patterns in that they are non-directional and subtle. Walnut looks like someone painted long, straight brush strokes with various shades of brown on a flat surface. Each is gorgeous in their own way.
While this section is informative about hardwood species and their looks and qualities, this is not inclusive of everything you may want to know. Once you have an idea what you want, it is a good idea to further research species including Janka rating and how to protect hardwood floors from sun bleaching to learn more and make the best hardwood flooring decision.
Finally, Understand Your Options for Hardwood Finishes:
While the grain examples above showcase various shades of brown, red, and yellow, the final color and luster of your floor will be dictated by the finish that you choose. If you aren’t set on prefinished or laminate floors, you should explore at least a few different finish options.
One of the first questions you might ask is, ‘Do I actually need to finish my floors?’ — wood is lovely on its own after all. The answer is ‘yes.’ If you install hardwood floors, you don’t necessarily have to stain them, but you do need to finish them. Otherwise, you risk exposure to damage and early aging.
Each above item has pros and cons. Use this list to choose the best hardwood flooring finish based on your needs and wants.
Closing Self-Examination Questions to Choose the Best Hardwood Flooring:
As long as you remember that you should not install hardwood flooring in rooms where they will be exposed to water, you understand all of your options, and you are clear on your budget and preferences, you’re ready for the final self-exam. Here’s what you need to ask to make the best hardwood flooring decision:
In which rooms will you install hardwood flooring?
What will the foot traffic be like in these rooms?
Will you choose solid, engineered, laminate, or prefinished hardwood?
In which species are you most interested?
What type of hardwood finish do you want?
Does your budget match the hardwood flooring options you prefer?
And, when you know the answers to all of these questions, if you still don’t have your mind made up, consult an expert to help you make a final hardwood flooring decision. Or, check out bamboo flooring as an option. Our Denver flooring company, serving the community since 1986, provides the finest quality hardwood floors, service, and installation.
Choosing a room for your hardwood flooring is not that difficult. Hardwood flooring can withstand almost anything that you can do with it. The grains on hardwood are beautiful and can make your home look stunning. However, your floor should not take the limelight from the room itself. Hardwood should be used to enhance not to overshadow a room. But where is hardwood flooring most effectively installed? Here are some tips that you need to consider.
The Best (and Worst) Rooms for Hardwood Flooring
Before you start planning a new hardwood flooring installation, keep in mind why you might or might not want wood floors in specific rooms.
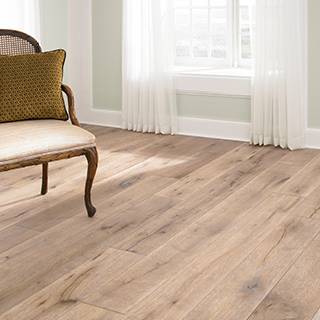
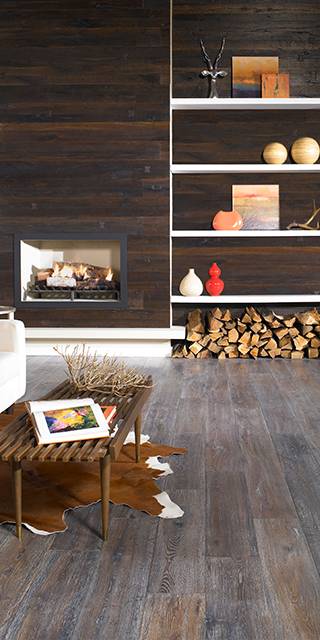
Master Suite – with its luxurious and romantic appeal, hardwood flooring will enhance the atmosphere of love in this most crucial part of your house.
Home Office – your office at home will also take a more professional ambiance if the full grains and striking colors of hardwood adorn its floor.
Dining Room – hardwood flooring is also a choice floor for dining rooms. It will lend its characteristics to whatever atmosphere you want to imbue in this section of your house. If you want a more casual ambiance, you can choose thin-grained and light colored hardwood. But if you want a more elegant and formal appeal, choose wood species with concentrated grains and darker colors.
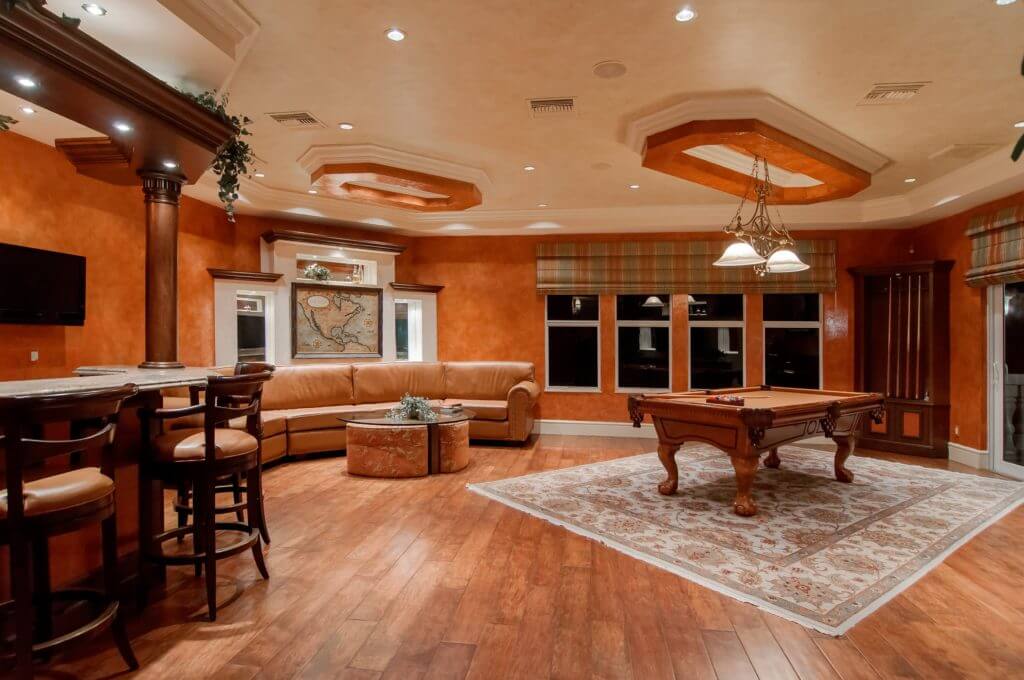
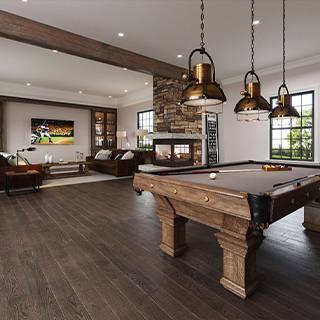
Living Room – you can also install hardwood flooring on your living room. With its wonderful play of colors and meandering wood grains, your flooring will be a conversation piece when your friends visit your place.
Den – you will be able to relax well with the soothing character and atmosphere that hardwood flooring will impart to your den. Reading a book, watching a TV show, or just plain relaxing on top of beautiful hardwood flooring will be something that you will always look forward to at the end of the day.
These are the Worst Rooms for Hardwood Flooring:
Bathroom – you cannot install hardwood flooring all over your house. There are at least two rooms where you shouldn’t install hardwood and the bathroom is one of them. Even the most durable and sturdiest exotic wood species can’t withstand the continuous onslaught of water and moisture.
Laundry Room – another room where you should avoid hardwood flooring for the same reason; this part of your house is exposed to the elements such as grime, dirt, spilled oil, detergents, and water — it is not the ideal domain for beautiful and expensive hardwood.
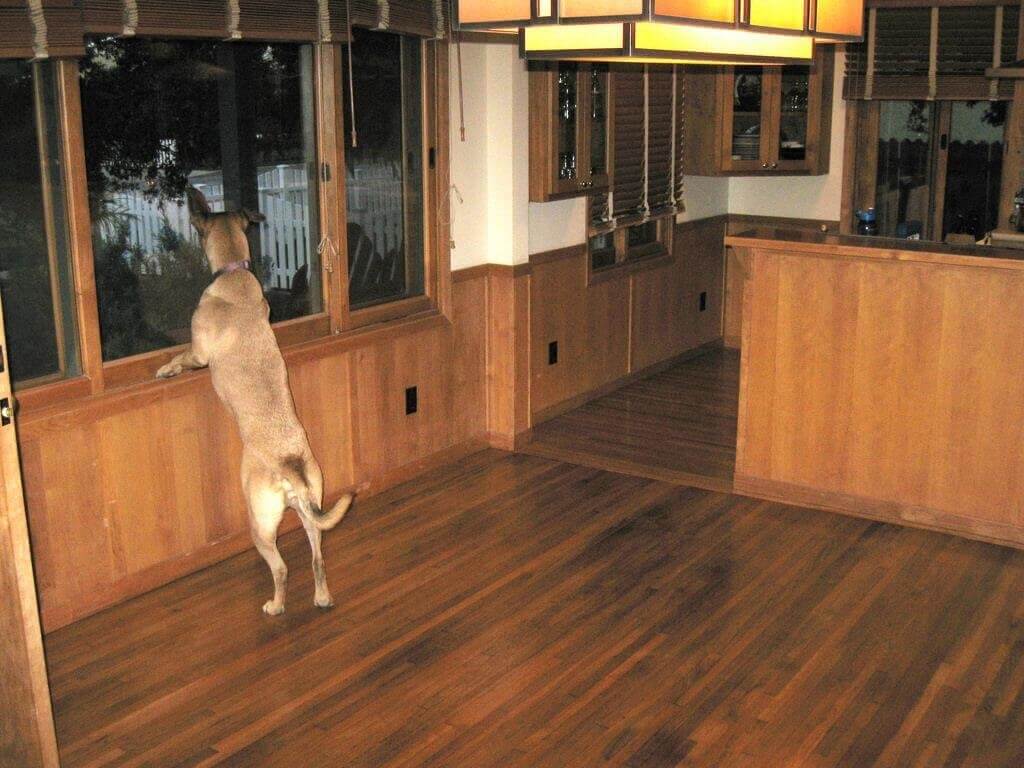
Hardwood Maintenance Tips for Pet Owners
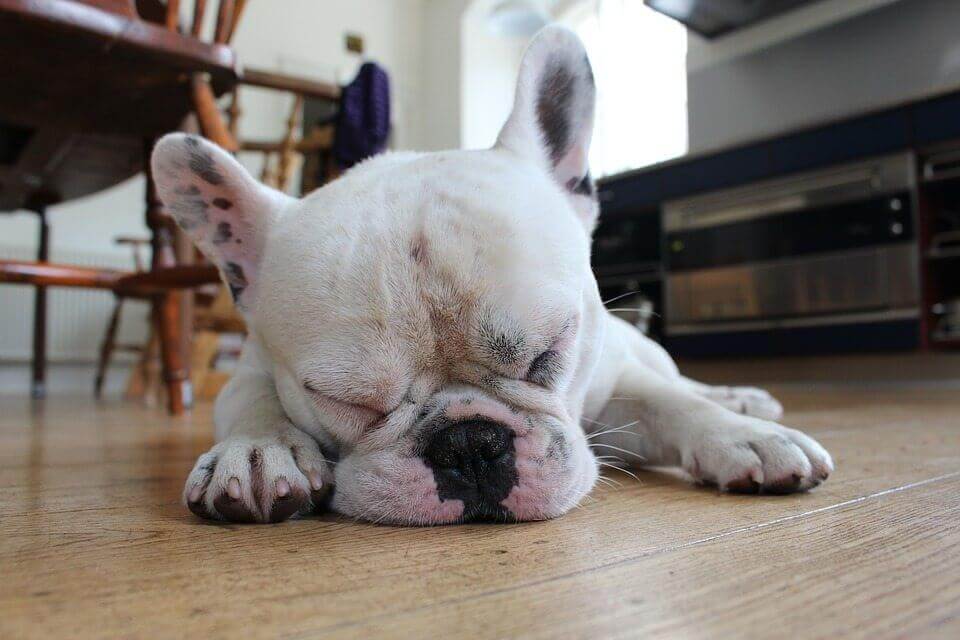
Pets are the typical house inhabitants that do damage to house flooring. Even hardwood floors are not immune to their claws and their bites. To keep your pets from damaging your flooring, follow these simple maintenance tips:
Clip your dog’s nails, and your cat’s too if necessary – Dogs and cats are unusually fond of scratching the floor and to some extent. So, if you don’t clip their nails regularly, you will be the one that will ultimately pay for the damages that they will cause.
Get your pets their own beds – Buy an appropriate bed for each dog or cat that you own. Dogs usually sleep around twelve hours each day. Cats sleep even longer than dogs. So if you will train them to stay on their bed when sleeping, you will avoid scratches and bites on your hardwood flooring.
Step by Step: How to Get Scratches Out of Hardwood Flooring
However, if your pets have already left some scratches on your hardwood flooring, you can fix them by using a wood staining marker that will conceal the scratches. Here are the steps in using this marker.
Clean the damaged spot or spots.
Perform a spot test before applying the marker.
If the spot test is successful, apply the concealing marker.
Rub the stain into the scratches with a clean rag that is soaked with a paint thinner or mineral spirit.
Whether you are planning to install flooring for the first time or just looking to refinish existing floors, there are some different hardwood finishes to consider. Choosing the right polish is crucial as it will not only determine how much maintenance your floors will need, but can also drastically change the look of them. From the traditional to the uber modern, here are five excellent choices to consider.
Hardwood Finish #1: Wax
Wax is essentially the granddaddy of all hardwood finishes as it is the coating that has been used the longest. While it is not as durable as modern poly finishes, it gives your floors a muted, organic feel as opposed to the high-gloss of most modern finishes. Since wax can be reapplied in small areas, it is the most low-maintenance type of finish over the short haul. But, it is more high-maintenance in the long run as it will need to be refinished more often.
Note: If you decide to switch from a wax finish to a polyurethane finish, the wax will need to be entirely removed before the poly finish can be applied.
Hardwood Finish #2: Polyurethane
There are two types of polyurethane to choose from: water based and oil based. Water based poly is more expensive but dries much more quickly and is easy to apply. Water based poly is also low odor and low VOC, while oil based poly has a strong smell and high VOC but also is far more durable. Water-based poly also has an excellent reputation for being far more eco-friendly than oil based and also dries clear, where oil-based poly dries with a slight amber tint. If you want a high-gloss, durable, long-lasting finish, then either oil or water-based poly is probably your best option.
Hardwood Finish #3: Acid-Cured (Swedish)
Often considered the Lamborghini of floor finishes, acid cured finishes are a professional-only floor polish. While they are supposed to be one of the hardiest floor finishes, they are also the most expensive, running between $3.75 to $5 per square foot. While they tend to dry quickly (in around 2 hours), they can take up to 60 days to fully cure. After about three days it is safe to walk on but can take up to two weeks to cure enough to lay furniture on and up to 60 days to put rugs back down so carpet fibers don’t become stuck in the finish.
Hardwood Finish #4: Moisture-Cured Urethane
Moisture-cured urethane is considered one of the hardest finishes available, but also has one of the highest VOC’s. Because it dries so fast, it’s difficult to apply, so it’s not recommended for DIY’ers. Also, because of the high VOC’s – which means fumes can last for weeks – respirators and proper ventilation are must-haves during application; you will also need to plan on vacating your home for at least two weeks following application.
Hardwood Finish #5: Penetrating Oil Sealer
Oil sealers are another more traditional finish, like wax. Oil is easy to apply but is not as durable as a poly finish. It also has a mellower sheen than poly finishes, so it’s a good alternative for those that like the look of wax, but not the labor of applying it. Since the oil penetrates the wood, it can also deepen the color, giving your floor a rich, beautiful finish.
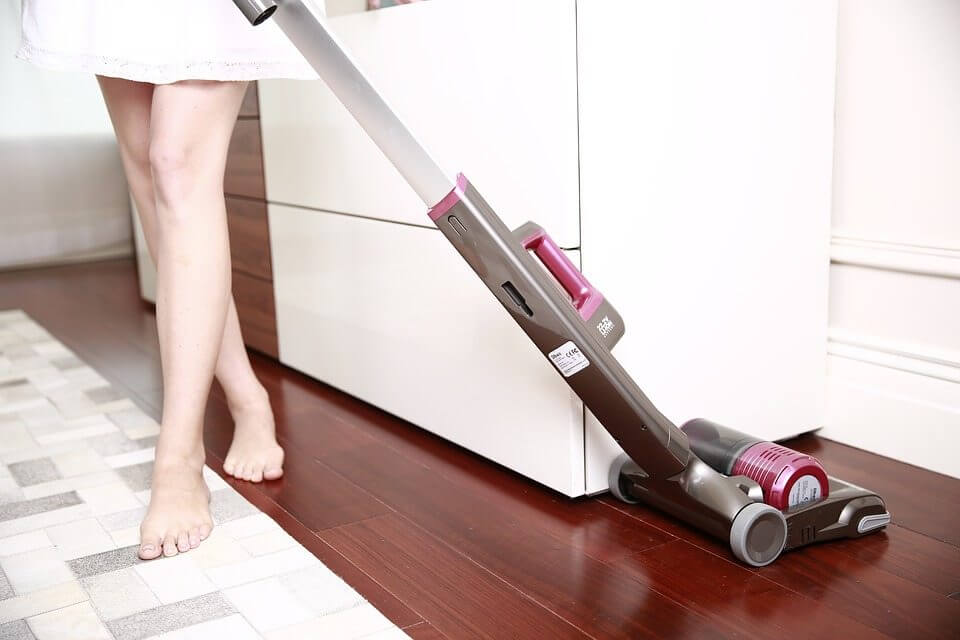
With many people opting for gorgeous hardwood flooring and carpet in their homes and businesses these days, the need for a vacuum to use on hardwood floors that also has increased power for carpet cleaning. Some people have chosen to install carpeting in some rooms while their main floors are hardwood which makes it necessary for a great vacuum cleaner that can handle both.
Hardwood floors require a vacuum that is gentle while carpeting needs a stricter approach. A vacuum cleaner that is great for both hardwood floors and carpeting present a bit of a challenge when it comes to engineering and construction but finding the perfect unit is essential for keeping your floors in tip-top shape.
How Well to Upright Vacuum Cleaners Work on Carpets and Hardwood?
When it comes to upright vacuum cleaners for hardwood and carpeted floors, the main feature to look for is a vacuum that can quickly switch for utilizing the spinning brush that you need for carpeting. A foot pedal is fantastic because it is quick and straightforward to use but a button to push is also convenient.
Upright vacuums that sport a nozzle height adjustment feature are imperative to keeping hardwood and carpeted flooring in excellent condition. The best one is an automatic adjustment feature, but a manual one will do fine too.
Stretchy, detachable hoses to clean hard surfaces, as well as stairs, drapes, and upholstery, are also crucial for a smooth and efficient cleaning experience when using your upright vacuum cleaner.
Most people opt only for an upright for the following reasons:
Easy to use
No programming required
Complete control over cleaning process
Fits easily in small spaces
Are Canister Vacuums a Good Choice for Hardwood Flooring and Carpet?
For many years, canister vacuums have been used mainly for hard floor surfaces such as hardwood, laminate flooring, and tiled floors but with the addition of features such as a brush roll, there are many canister vacuums on the market that are also great for vacuuming your carpet.
A canister vacuum that is lightweight will be easier to use than an upright and offer more maneuverability. This is even more important when you are vacuuming stairs and furniture.
What About Robotic Vacuums? Are They Your Best Choice?
In the age of technology, the advent of robotic vacuum cleaners has made floor cleaning more fun and convenient than ever before.
While most robotic vacuums work better for hardwood, tile, and laminate flooring, there are several on the market that can handle carpeting too.
The best robotic vacuums feature a rubber carpet agitator that can pull the dirt and pet hair from the carpet fibers while navigating from room to room without getting stuck. An excellent system for detecting dirt is also vital in keeping both hardwoods and carpeted floors looking clean, fresh, and pretty in your home.
From uprights to canisters to the most-advanced robotic vacuums on the market, there are plenty of incredible options to choose from to leave both your hardwood flooring and carpet looking and feeling spectacular. I prefer a robotic vacuum for daily maintenance and a canister vacuum cleaner for deep cleaning. Which choice do you prefer?
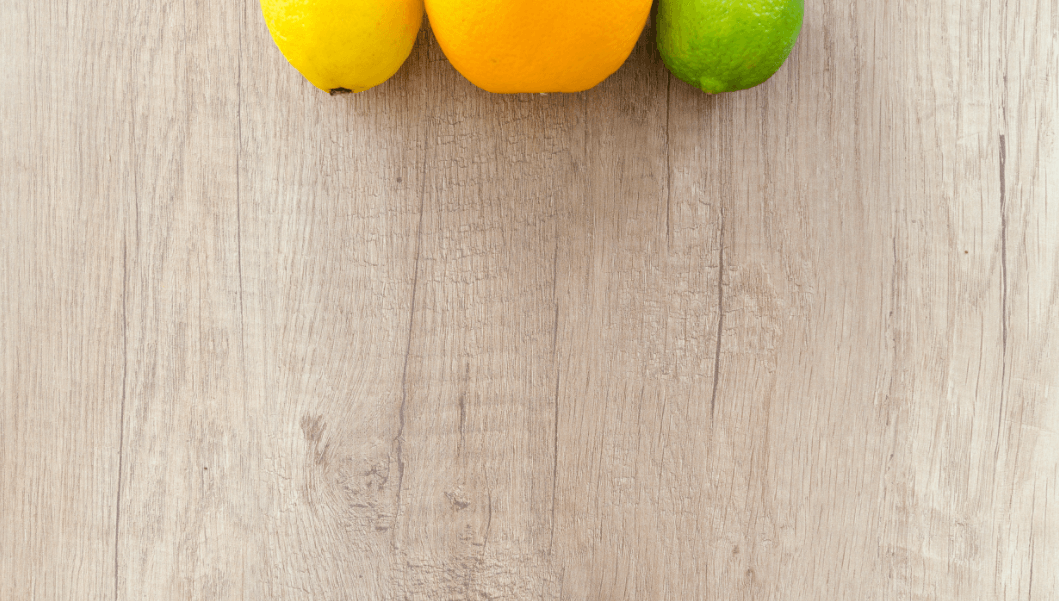
When you have hardwood floors in your home, you will want to take care of the items with the best types of cleansers. Hardwood floors require specialized care to keep the items looking beautiful, especially in a commercial setting in high traffic areas. Citrus cleansers are extremely popular for hardwood floors because these products offer a variety of benefits. Here is why you should use a citrus cleaner on hardwood floors.
Benefit # 1: Citrus Cleaners Are Made From Natural Substances
While some cleansers are made from man-made chemicals, citrus cleansers are natural substances. If your natural citrus cleanser leaves a residue on the surface of a hardwood floor, you don’t need to worry about a child or family pet walking on the floor — this isn’t the same with chemicals, which can be dangerous for kids and pets. Citrus floor cleansers are made from the juice or pulp from lemons, oranges, and grapefruits; they’re part of a healthy, effective home upkeep routine.
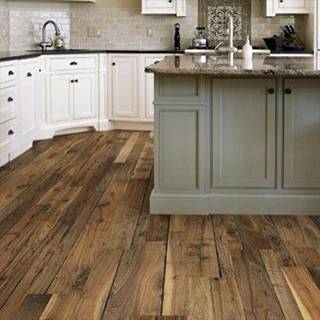
The acids from citrus fruits will cut through the grease on hardwood floors, making a citrus floor cleanser the best choice for the floors in a kitchen. While you are cooking food in a kitchen, grease floats through the air and lands on the planks or tiles of hardwood floors, but a citrus cleanser will lift this debris from the surfaces.
Benefit # 3: The Oils Impart a Wonderful Fragrance in Your Home
While chemical-based cleansers may have a strong odor that you won’t like, citrus-based floor cleansers have a delicate fragrance that smells like the juice of grapefruits, oranges or lemons. The delicious scent of citrus cleansers may float throughout your home, creating a healthy ambiance.
Citrus fruit juices and pulp contain natural substances that will eliminate pathogens such as bacteria and viruses. Lemon-based cleansers are considered the best for destroying the germs that can make you ill, but limes, oranges, and grapefruits also have sanitizing properties.
Benefit # 5: Citrus Cleaners Protect Your Floor’s Finish
If you want to protect the beautiful finish on a hardwood floor, then citrus cleansers are a perfect choice. The oil from citrus fruits will coat the hardwood floor’s surfaces to protect it from the damages of debris. This coating keeps a variety of substances from seeping into the hardwood, preventing discoloration.
Benefit # 6: Natural Ingredients Mix Easily With Water
You can buy a concentrated citrus-based cleanser for your floor, and it is easy to mix with water in a bucket before you mop a floor. With this type of cleanser, you only need to use a small amount to sanitize a hardwood floor in a few minutes.
Benefit # 7: Citrus Leaves You With a Shiny Hardwood Floor
When you want to have a shiny hardwood floor, citrus-based cleaners are a great choice. The oil from the citrus cleanser creates a gorgeous sheen on the floors, helping to make the hardwood plank’s surface look fantastic. Look for citrus cleansers at online and local stores to keep your hardwood floors in the best condition.