Categories
Hardwood Flooring Hardwood Maintenance Pets

Hardwood, Pets, and Vacuuming: General Advice

Here at MacDonald Hardwoods, we get a lot of questions about how to choose the right hardwood for a home with pets.  But what about maintaining your hardwood once you and your pets move in?

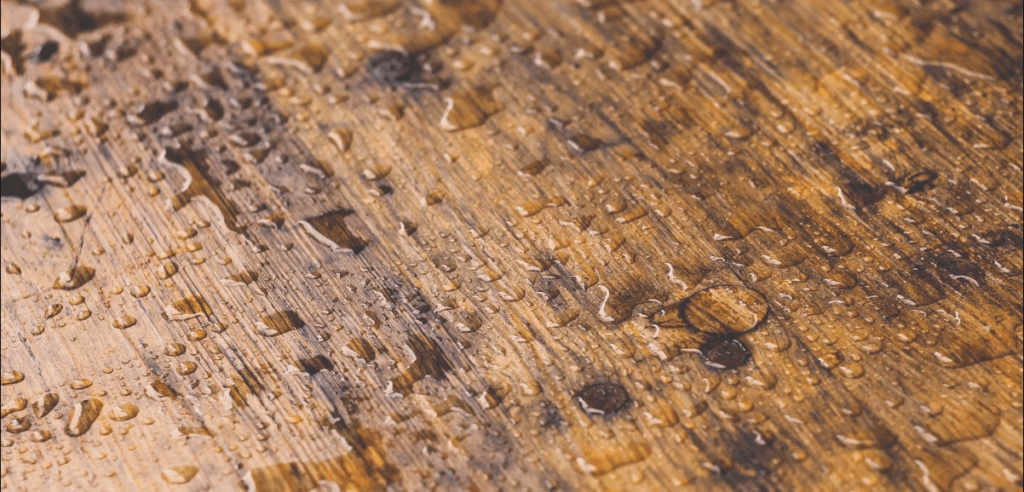
The key to keeping hardwood beautiful, pets or no pets, is keeping it clean.  When dust is allowed to accumulate on your hardwood, it becomes like very fine sandpaper underfoot, slowly rubbing away the finish and causing your floor to appear dull and uneven.  One of the best ways to do that, especially when dogs or cats are tracking dirt and dust around throughout the day, is to vacuum or dry mop several times a week.

What to use?  Well, we have a favorite dry mop that we recommend and even sell in our store, but there are a variety of options. Try to make sure that, whatever you use, the head is made of soft cotton, terry, or microfiber cloth that will attract even the smallest dust particles and will not scratch your finish.   Also, whether mopping, sweeping or vacuuming, always try to go with the grain of the wood; this will enable you to capture those little bits that may have filtered down between boards or into the ridges.

More and more often, people have started using vacuum cleaners to remove dust, dirt, and pet hair from their hardwood floors.  They can be more effective for getting the smaller particles out from between hardwood planks and for getting into the tight areas where the wood meets the wall.  Many vacuum cleaners also have filters designed to remove allergens, including pet dander, from the environment.  There are some things to be careful of when using a vacuum cleaner on your hardwood, though.

1. SAY NO TO BRUSHES.

First and foremost, never use the beater brush typical of most vacuum cleaners on a bare floor.  Not only will it scatter dust and debris away from the suction of the vacuum, the hard, but powerfully spinning bristles will also cause damage to hardwood finishes.  Most modern vacuum cleaners have a switch that allows you to raise or still the rotating brushes.  Many also have unique heads or pads designed especially for hardwood that can be attached to the vacuum hose or cleaning head.

2. BEWARE OF BAD WHEELS.

You will want to make sure that any wheels that will be rolling over the surface of your floor use higher-quality rubber, rather than cheap plastic.  The hard plastic can easily scratch hardwood.  Even rubber wheels should be checked to make sure they are free of debris before they come in contact with your floors.  It is for this reason that canister vacuum cleaners are often more popular with hardwood floors owners, as their bulk remains relatively stationary while you clean.

3. THINK ABOUT LARGER DEBRIS. 

With pets, you also want to consider whether your vacuum cleaner is powerful enough and designed to pick up larger debris like pet food, kitty litter, or the unrecognizable remains of whatever it was your new puppy just devoured.  If you try to clean these things up with a low-quality vacuum, you will end up pushing and dragging them around under the machine, leaving a mess at best and damaging your hardwood.  It is better to gently sweep debris up before vacuuming or to use a machine specifically designed with this in mind (we mention a few below).

4. DON’T MAKE A MESS CLEANING YOUR CLEANER.

An increasing number of vacuum cleaners these days utilize a bagless collection method, which allows you remove a canister, empty it out, and replace it for reuse.  Some of these, though, can cause a real mess when you open them.  You want to make sure that your vacuum’s disposal process is not going to make an even bigger mess than what you started out with, so consider machines that use bags or that have self-sealing collars or dust cups and smooth-release mechanisms.

5. CONSIDER THE WEIGHT.

When vacuuming carpeting, having the extra weight of a sturdy upright can be helpful for getting down to the grit that tends to get embedded in the pad and deep fibers.  The opposite is true for bare floors.  With hardwood, you want a machine that is light and agile.   Everything you need to clean is right there on the surface, so you don’t need the extra weight, and the heavier your vacuum cleaner, the more likely it is to cause scratches as it rolls over the floor, especially on turns.

There is a lot of information out there about which vacuum cleaners are best for hardwoods floors, and there is a lot of information about which ones are best for collecting pet hair and other pet-related debris.   Check out our Guide to the Most Recommended Machines to learn more about which vacuum cleaners seem to excel at both.


Categories
General Home Improvement Hardwood Maintenance

Winter is Coming: This is How to Keep it Outside Where it Belongs!

In our last post, we talked about ways to keep the heat inside when temperatures plunge outside.  This time we’ll talk about how to prevent the winter weather from wreaking havoc inside your home. Follow these steps to weatherize your home.

Step 1: Weather-Ready Your Roof

Before the snow starts falling, check for any buckled, missing, damaged or warped shingles and replace them before they result in a leaky roof.  Make sure flashing around the chimney, walls, skylights, and vent pipes are firmly adhered and in excellent condition and seal any joints where water might penetrate with roofing cement.

Beware of Ice dams

Ice dams result when snow that has gathered on your roof melts as a result of the heat from your home and begins sliding down your roof, then refreezes when it gets to a colder spot.  When enough snow refreezes in a given area, any snow or ice that follows gets dammed up behind it.

Eventually, this dam will back up to spaces that never get cold enough to freeze and the melted snow and ice will find another path­­—through the shingles and seams of the roof; this can quickly cause cracks through which even more water will soon seep, causing severe damage that is difficult and costly to repair.

Making sure your ceiling and attic are properly insulated can go a long way in preventing the original melt-and-freeze action that causes ice dams in the first place.  If your house is designed to have a vented roof, make sure the vents are open and free from debris.

You can also have de-icing cables installed on your roof to eliminate those spaces where ice might refreeze.  Remove pile-ups of snow after storms and keep your gutters clear to ensure that melted snow and ice have a safe place to go as they run down the roof.

Step 2: Clear Your Gutters

Clogged gutters can cause all kinds of trouble at the best of times. But, when temperatures drop below freezing, and snow and ice start piling up, it can melt all at once awhile later with nowhere to go and lead to siding, foundation and roof damage. It can also cause floods that can destroy your hardwood flooring.

Winterize Your Home: Clean your Gutters via @macwoods

While the weather is still mild, check your gutters and downspouts to make sure they are properly fastened and can support the weight of whatever ice and snow typically falls in your area.  Once the leaves have stopped falling (or periodically as they fall), make sure to clear them out of the gutters so you can start fresh when the winter precipitation comes.

Also, make sure your downspouts spout at least four or five feet away from the house, which will help prevent flooding when all that snow and ice start to melt.

Step 3: Winterize Your Pipes

Plumbing is especially susceptible to freezing, and burst pipes can cause extremely costly damage to your home, including­—altogether now—your hardwood floors.  Preventing this damage, though, is not so difficult.  Water lines that run along exterior walls and through uninsulated areas of the house that need insulation against the cold, and turn off exterior water faucets.

Right now, before it freezes, go ahead and disconnect your garden hoses and drain any water that remains in the faucets by turning them off from the inside, then leaving them on outside until the water stops running.  You can also insulate them with special faucet cozies you can get at the hardware store.  And, just in case, know how to shut off the water valves in your home.

Step 4: Trim Your Trees and Shrubs

Now is also the time to prune trees and shrubs.  They are starting to shut down for the winter anyhow, so they’ll experience less shock from the trimming, plus less surface area provides less opportunity for damage from the cold.  Be especially sure to cut away any limbs that could fall on your home when they get weighed down with ice or snow.

Step 5: Ready a Mudroom

Winter wet and muck can cause severe damage to hardwood floors.  To prevent this, create a protected space just inside (or outside) the doors you use the most where your family and guests can leave wet boots, slickers, and umbrellas.

Get a Mudroom Ready Before Winter via @macwoods

Remember, a mudroom doesn’t have to be a whole room.  If your hardwood runs right up to your front or back doors, find a rug, or even an old piece of carpet, to fill the space in front of the door, then put a proper mat on top of it.  This way you have something to trap the muck and protection against splash over.

You may also want to put a waterproof barrier underneath the carpet or rug — but, if you do, be careful that water does not get trapped underneath it (where it will have no escape but into your hardwood floors).  If you have space, add a bench with cubbies underneath and a rack where folks can hang wet outerwear; this is also an excellent way to keep bulky winter gear out of the way inside the house.

Make sure, too, that the space outside the door remains clear of snow and ice, and have a heavy duty doormat where they can knock off clumps of ice and snow before they ever even come inside.

Step 6: Enjoy More of the Cozy Indoors

Here in Colorado, we have all sorts of ways to enjoy the winter months.  But when the storms come in and the days get short, your home is your escape from the dreary cold.  If the winter weather gets to you, make sure that inside space will cheer you up.

Inspect Your Light Bulbs: 

First, make sure there are enough of them.  You may want to add a few lamps around the house to provide extra light when the sun goes into hiding.  Also, consider the quality of light.  Full spectrum light bulbs do a much better job of mimicking sunlight than your average bulb and are less expensive and less bulky than sun-simulating UV bulbs.  Also consider eco-friendly bulbs, which offer more light for the same power, giving you a brighter room even when your light fixtures may limit your wattage.

Add Some Color: 

One of the benefits of hardwood is that it goes with everything, right?  So change up your décor for the winter.  Find a few bright pillows, throws, or curtain accents to add to your rooms.  You can even find or make slipcovers for furniture with brighter patterns that will bring extra life to your indoors while the world hibernates outdoors.

Utilize More of Your Space: 

In case you’re not a skier or winter hiker, you’ll need other ways to keep from becoming sedentary through the winter.  Try creating a space where you can stay fit indoors.  If your home is small,  find a corner of a room where you could put a yoga mat or a set of weights; if you have extra space.

Ready Your Garage For Winter Indoors with Floor Tiles via @macwoods

If you don’t have to use your garage to park your car, consider creating an exercise room or playroom for the kids; the new space doesn’t need to be elaborate — just make sure you have somewhere big enough to move around and stretch out those weary winter limbs. You can easily make the makeshift room more comfortable and appealing by adding garage floor tiles or a protective floor coating.


Final Thoughts

These tips should help you get your house ready for winter.  But don’t forget, you also need to prepare your family, pets, car, and yard.  There’s a lot to do before the freeze.  That’s why it’s always best to get started early.

Categories
Hardwood Maintenance Under-Floor Heating

Winter is Coming: This is How to Keep the Heat Inside

Winter comes early up here in the Rockies, and you can’t start too soon getting ready for the cold, snowy months ahead.  One of the critical factors in maintaining the health of your family and your floors as temperatures plummet is keeping the internal environment of your home as stable and balanced as possible. Here, we offer a few tips to help you stay warm through the winter.

1. Seal leaks and drafts

In the average home, something like 30% of all heat loss occurs around doors and windows.  Sometimes they are not sealed tightly enough, or perhaps they are not thick enough to hold in the heat.  In either case, there are plenty of things you can do to prevent leakage in these areas.

Some trouble spots to watch are windows and door frames, outside vents for dryers, baseboards, electrical boxes and outlets, plumbing fixtures, ceiling fixtures, attic hatches, and places where ducts connect to outside walls.

Most leaks around doors and windows can be sealed up with caulking (inside and out), sealant, or weather stripping, and you can use foam gaskets behind light switch and outlet covers to stop the flow of air.

2. Insulate your windows

Of course, not all of the heat loss around windows seeps through cracks and gaps.  Windows themselves are pretty decent conductors of heat, relative to your insulated walls, and will conduct the heat in your home right on out to the great outdoors.

To combat this effect, many people in cold climates replace screens with storm windows and doors come the fall.  These install and uninstall fairly easily and can reduce the amount of heat lost through windows by as much as 50%.  A cheaper, albeit a less elegant version of this solution, is to cover the insides of windows with plastic sheeting (available at any hardware store) that reduces heat transfer.

Layering curtains or finding heavier drapery to hang over windows and glass doors can also help to insulate these vulnerable places.  Remember to open the drapes on south-facing windows during daylight hours, though, to pull in as much of the sun’s warmth (and get as much sunlight for yourself) as you can.

3. Maintain your fireplace

Fireplaces are another heat sucker, often draining more heat from a house when not in use than they provide when in use.  To help lessen this effect, be sure to keep the flue damper tightly in place when the fireplace is not in use.  If you feel a draft even with the damper closed, it may be warped, worn, or rusted and need replacing.

You will also want to make an examination of the fireplace inside and chimney outside.  If you notice any bricks out of place or open mortar joints, especially inside the fireplace, this is something you will want to get fixed right away.  Not only can some heat energy leak out through these spaces, but it presents a serious fire hazard.  Do not use your fireplace until these things are repaired.

If you find using the fireplace too much bother, consider sealing it up entirely.  You can do this easily using a stiff piece of something like plywood or cardboard, or even something with insulation, and using foam sealant to seal it in place.  Then just set a nice fireplace screen in front of it and check the sealant from time to time.

4. Reverse your ceiling fans

This is an easy one.  Make sure your ceiling fans are set to turn in a clockwise rotation (you can change the rotation on most fans with a switch on the base).  According to the government’s Energy Star program, this will produce an updraft, pushing warm air that has risen to the ceiling back into the room.

5. Take care of your heating system

Hopefully, by now you have run your heater at least once to make sure everything is working properly.  As the temperature drops, getting faulty furnaces and boilers fixed takes longer and longer and the discomfort you have to suffer while waiting gets much worse very quickly.

Before you start running the heater full time, you will want to replace the air filter, for your health and to maximize efficiency.  Experts also recommend cleaning the unit once a year according to the manufacturer’s recommendation.  It may even be a good idea to get the unit inspected every year or so to make sure it is functioning at its best and to ensure that it is not putting out excesses of carbon monoxide.

Also, make sure that all your air vents are unblocked and open so that the warm air can circulate through your house instead of just sitting in the air ducts.  Speaking of which, you should also check to make sure those ducts are properly insulated and not just seeping heat into the attic or crawl space in your ceilings and walls.

Since it’s generally more energy efficient to maintain a constant heat (not to mention easier on your floors and wood furniture), try setting the thermostat to turn the heat on when the temperature drops below, say, 68°F.  If you have a whole-house heating system, you can install a programmable thermostat fairly easily, and for as little as $35-40.

If you have old-fashioned hot water radiators, you can increase their heating efficiency by bleeding their valves, releasing any air that might have worked its way inside.  Once they are up and running, try putting a reflector behind them and a fan in front to help spread the warm air out into the room.

6. Make sure you have adequate insulation

All of the above is for naught if your home is not well-insulated.  If heat is leaking out through the huge surface area of your ceiling, it will matter very little how well-sealed your windows and doors are.  Consequently, one of the most important things you can do to ready your house for winter is to make sure that the insulation in your attic is thick enough (the Energy Star program recommends 12 to 15 inches) and is in good repair.  Dirty spots in your insulation can indicate air leaks, so take a look around for these and repair any leaks with low-expansion spray foam made for this purpose.  Making sure your attic insulation is top notch will also help protect your home against ice dams that can form on the roof, but we’ll talk about that in a later post.

Similarly, try to make sure your attached garage, sunroom, and other rooms that are not connected to a central heating system are kept as warm as is reasonably possible, always above freezing.  The best thing is to insulate the garage as well as your do the attic.  It may be a bit of an expense at the outset, but it will save you in the long run.

7. Use humidifiers

Cold winter air has a low capacity for moisture, to begin with, but when you pull that air inside and heat it, the relative humidity can get dangerously low. This can cause respiratory problems for your family and unsightly gaps and cracks in your wood.  Last month, we looked at some creative ways to raise the relative humidity in your home as the air starts to dry.  One of the most reliable and consistent ways is to use a humidifier.  With a humidifier, it is much easier to maintain that healthy RH range of 40-60%.   And, of course, if you have a whole house humidifier installed with your forced air system, now is the time to clean its parts, replace the evaporator pad, and get ready for that sucker to fire up.


Categories
Hardwood Maintenance Home Decor

How Do I Raise Relative Humidity in My Home?

As winter approaches, hardwood households throughout the northern hemisphere are starting to think about how to prepare for the coming months.  With temperatures cooling, outside air can hold less and less moisture, and when that already dry air gets pulled inside and heated, the relative humidity (RH) within your home can drop to dangerous levels—for your health and your woodwork.

By now, you are probably aware of the adverse effects of dry winter air.  Chapped lips, cracked skin, worsened asthma symptoms and respiratory infections become more frequent as the dry air takes its toll on your body.  Static electricity generates annoying shocks, crazy hair and unexpected appendages to your clothing. The plants start to shrivel, the wood starts to crack, and unsightly gaps appear in your hardwood floors, and the air sucks the moisture out of organic materials to make up for its deficit.

Fortunately, there are some things you can do, from temporary, localized fixes to long-term, whole-house alterations to combat the dry winter air and reclaim your health and comfort.

Plants

If the RH in your home is just a little low in certain places, you may find that items already in your house are all you need to bring a room back to comfortable levels.

  • If you have houseplants, find a mister or spray bottle and mist the plants every day; this will help them to get the added moisture they need (plants typically like about 10% more moisture than people and wood) and will add a small amount of moisture to the ambient air.  Some people also use a spray bottle to spritz a light mist throughout a dry room, but this requires that the mist be fine enough and in a small enough volume that the moisture does not settle onto floors and furniture.  We think this seems a bit labor-intensive, not to mention risky for your hardwood.
  • Another quick fix often used by folks with plants is to fill a shallow tray with small, decorative stones or pebbles and fill the tray about halfway with water, leaving the tops of the rocks exposed; this will allow for slow evaporation throughout the day and the basin can double as a tray to catch extra water from houseplants.  Depending on what they are made of, you can also set these trays near heat sources or in sunny windows, to encourage evaporation.  Of course, this method requires some maintenance, as you will need to refill the tray regularly and you will want to wash the stones from time to time to prevent mold.
  • Plants, in general, can also help to increase the RH in a room, as there is bound to be some excess moisture at each watering.  You will naturally want to take care that pots are not placed directly on wood floors or in areas where watering is likely to cause drips or overflow that could cause damage.

Around the house

Certain daily activities naturally generate large amounts of humidity.  Small adjustments can make these activities work to your advantage, and cut down on energy costs to boot.

  • If you have space, consider setting your clean clothes out to dry on racks rather than tossing them in the dryer.  As they dry, that pure, fresh-smelling moisture will be directly absorbed into the surrounding air, leaving clothes dry and air moist, at least for a time.  If you don’t want to wait, you can even use a fan to help speed up the process—the result will be the same.
  • A similar principle applies to the dishwasher.  Most modern dishwashers allow you to stop the machine at the end of the wash cycle and air dry rather than bake drying the dishes.  If you open the dishwasher door for the drying process, all of that warm, moist air can escape into the dry air in your home.  Because the dishes will be hot from washing, they will usually dry reasonably quickly and without spots, just as though you had baked them, but the valuable moisture will raise the air quality in your home instead of getting siphoned off outside, where it is not needed.
  • Like a steaming hot shower to push out the cold winter?  Your house might like it, too.  Instead of clearing the bathroom with a vented fan after a shower, try opening the door and letting the moist air blend with the drier air in the hall or bedroom.

Single-room humidifiers

Room humidifiers are just what they sound like—humidifiers, usually reasonably portable, designed to raise the amount of moisture in the air of a single room (about 12’x12’ with a 10’-12’ ceiling).   They come in several varieties and are usually quite affordable, with decent models starting at $30-40, though the fancier ones, which can, for example, be set to operate automatically depending on RH levels, can be as much as $1,000 or more. That’s why many people opt in for humidifier and air purifier combo units to get the best of both functionalities.

  • Ultrasonic, or cool mist humidifiers, are currently among the most popular options for adding moisture to a room and are generally recommended for families because they do not involve any heating implement or steam that could cause injury to a curious child.  In an ultrasonic humidifier, a small metal diaphragm vibrating at ultrasonic frequency breaks water into tiny water droplets that are then blown by a fan into the air.  Though the water in these humidifiers must be changed frequently to avoid microorganism growth, they are quieter than some other types of humidifiers and use only a little electricity.  An alternative to the ultrasonic is an impeller humidifier which uses a rotating disc to fling water at a diffuser that, in turn, breaks the water into minute droplets that then diffuse into the air, for a similar effect.  Distilled water is recommended for either style, as tap water tends to be rich in minerals that can create unwelcome deposits after a time.
  • Vaporizers, or warm mist humidifiers, are essentially steam machines.  They consist of a reservoir of water and a mechanism for heating the water to its gaseous form, which then takes its natural course into the air.  Vaporizers are often the humidifier of choice because the heating process kills many microorganisms that might otherwise be released into the air and the steam leaves behind heavy minerals that could, over the long term, leave residue around the room.  They are also nice for combating winter-time respiratory infections and can be enhanced with medicated inhalants and natural essences to improve respiratory health.  On the other hand, a vaporizer requires a heating device, which always poses a risk of injury and fire (though these are usually minimal) and entails somewhat higher energy usage.
  • Evaporative humidifiers are the most basic of the single-room machines, and work on the same principles as some of the quick fixes described above, though they are, of course, more consistent.  These simple mechanisms draw water from a reservoir in no small wicking surface from which the water can evaporate.  The fan then blows air onto the surface to encourage evaporation. Evaporative humidifiers are relatively inexpensive and easy to use, and these humidifiers can typically cover larger areas than other styles of room humidifiers.

Whole house humidifiers

As you might guess, there are also humidifiers that can be connected directly to your forced air heating and cooling system, so you can use your existing ductwork to raise relative humidity for wood floors.  Like room-style devices, whole-house apparatus work in a variety of ways.

  • Drum humidifiers are one of the more cost-effective whole-house humidifiers to install and maintain.  Inside the unit, a rotating evaporator pad called a drum wicks water from a pan and moved it into the air stream of your heating system, which evaporates the water then carries the moisture as air circulates. The container is automatically refilled from a pipe in much the same manner as a toilet tank. You will need to replace the pad of a drum humidifier regularly, and the pan cleaned from time to time to prevent mold and mildew, but the system itself will run automatically, activated and deactivated by a humidistat, which monitors your home’s relative humidity.
  • Disc wheel humidifiers operate in much the same way as drum models, only instead of a sponge-like pad, a group of plastic, grooved discs carry the water into the air stream; this can be preferable because the plastic resists mold and does not need to be replaced very often, and the output is somewhat higher because of increased surface space for evaporation.
  • Bypass flow-through humidifiers use fresh water rather than a water reservoir as their water source, eliminating the need for frequent cleaning that a standing-water pan entails.  With these units, an electronically controlled valve opens when the humidity drops below a certain point, causing fresh water to flow across a porous aluminum and ceramic evaporator pad.  The pad is placed, so that warm, dry air is forced through it by the furnace blower, evaporating the water, which it carries with it as it circulates throughout the house.
  • Spray, or mist, whole-house humidifiers, like the drum and disc-wheel styles, are activated by a humidistat.  As its name would suggest, the unit releases a fine mist of fresh water into the heating system’s ductwork, which distributes it evenly throughout the home.  Often smaller in size, spray models can fit in spaces where other styles are not an option.  And, because it has no water pan, maintenance for a spray unit is relatively low, though spray nozzles (custom sized according to the volume of air in your home) can get clogged by hard water deposits.
Categories
Hardwood Flooring Hardwood Maintenance

Should You Use Vinegar, Baking Soda, or Hydrogen Peroxide on Hardwood Floors?

Which DIY Cleaners are Safe for Your Hardwood Floors?

So, in our post Keeping Your Hardwood Floors Beautiful, we gave you some advice about general maintenance of your wood floors—vacuum or sweep regularly, never damp mop, clean up spills right away—but there are some messes that take a little something extra and there is a lot of advice on the internet about how to clean them.  Below are some things you should consider before trying any of these DIY remedies.

Tip #1: When trying something new, always remember to test it out in a small, less visible area before tackling the whole stain.

You will probably also want to wait a few days between testing and wider application to allow any chemical reactions to take full effect and to ensure the test spot has dried.

Tip #2: Seek advice from the experts.

If you know where your floor came from, the first step is always to find out from the manufacturer what products they recommend for your particular floor.  Because the exact composition of finishes and other treatments varies from floor to floor, the manufacturer is your best source of information on what products are least likely to cause damage.

In some cases, of course, it is difficult to know the origin of a hardwood floor, and, occasionally, even if you know, you may be unable to contact the manufacturer.  In these cases, try to find a product recommended by hardwood floor­—not cleaning—experts.  Many of the products on the shelves, even many of those that specify “safe for hardwood floors”, can actually cause damage or leave very stubborn residue on your floors.  Likewise, there are many cleaning solutions that, while effective at removing stains, can also remove finish or cause damage that will only become noticeable over time.

Talking to a hardwood floor expert can save you time, hassle, and money and will often spare you the pain of further damage.  Plus, many hardwood floor distributors and installers have used their years of experience with all manner of flooring to develop cleaning products, like MacDonald Hardwoods’ Easy Hardwood Floor Cleaner, that has been tested again and again and proven safe and effective on a wide range of flooring.

Tip #3: Know the risks.

Of course, here at Macwoods, we are best qualified to tell you about the risks to your floors.  For information on the impact of specific products on your health and the environment, you can check out the Environmental Working Group’s Guide to Healthy Cleaning or the U.S. Department of Health and Human Services’ Household Products Database.


Baking Soda on Hardwood Floors

  • Common uses: Removal of pet odor, prevention of pet stains when urine is fresh
  • Risks: Low-risk for dry baking soda, though it can be abrasive and must be thoroughly removed after use; many cleaning sites recommend a wet baking soda solution, but this carries with it all of the drawbacks related to moisture.
  • Recommendation: Can be very effective for soaking up potential stains; not recommended as a wet solution

Verdict: Use with Caution


Vinegar/ Ammonia on Hardwood Floors

  • Common uses: Mixed with water for general cleaning; used in higher concentration to removes stains.
  • Risks: Can dull the finish on the hardwood over time; can leave a subtle odor that may encourage pets to use the spot again.
  • Recommendation:  Not recommended.

Verdict: Unsafe


Hydrogen Peroxide on Hardwood Floors

  • Common uses: Removal of pet urine stains and odor; removal of soaked-in stains from blood, wine, etc.
  • Risks: Will almost certainly cause discoloration to finish, stain, and possibly the wood itself.
  • Recommendation: Can be used to remove stains prior to sanding and refinishing if the original wood is not too dark or some visible discoloration is acceptable.

Verdict: Use With Caution

Learn more about the pros and cons of hydrogen peroxide on wood flooring.


Bleach (Including Wood Bleach) on Hardwood Floors

  • Common uses: Stain removal
  • Risks: Any bleach is almost certain to cause discoloration.
  • Recommendation: Can be used to remove stains prior to sanding and refinishing if the original wood is not too dark.

Verdict: Use with Caution


Mineral Spirits on Hardwood Floors

  • Common uses:  Removal of wax, glue, carpet backing and similar substances
  • Risks:  Tends to leave residue on finished flooring.
  • Recommendation:  Can be used effectively to clean up small spots; always clean the area thoroughly with hardwood floor cleaner after use.

Verdict: Safe

Some people love using Danish oil on Maple flooring.


Citrus-Oil Based Cleaners on Hardwood Floors

  • Common uses:  Removal of sticky residues
  • Risks: Often leaves filmy residue and can dull finish over time, but is great for floors that aren’t exposed to sunlight through a large window or door.
  • Recommendation:  Preferable to use mineral spirits.

Verdict: Safe

For related information, read about the benefits of using citrus oil on hardwood floors.


Floor Polish on Hardwood Floors

  • Common uses:  Creation of high-gloss shine
  • Risks:  Residue will build up over time creating a layer of sticky film that becomes increasingly difficult to keep clean and almost impossible to remove.
  • Recommendation:  Do not use floor polish, even those labeled for use on hardwood floors, on finished wood flooring.

Verdict: Unsafe


Tri-Sodium Phosphate (TSP) on Hardwood Floors

  • Common uses: Heavy-duty cleaner used to remove residue like that left by non-recommended cleaners and polishes
  • Risks:  Will often remove finish as well.
  • Recommendation:  Should only be used in preparing a floor for sanding and refinishing, preferably by a professional.

Verdict: Use with Caution

Learn more about the right way to use TSP on hardwood floors.


Scrubbers (Steel Wool, etc.) on Hardwood Floors 

  • Common uses: Removal of stuck-on messes or set-in stains
  • Risks: Will scratch finishes and, potentially, wood if the finish is thin.
  • Recommendation:  Best to avoid if possible; can be used for removing stains from floors that are to be refinished.

Verdict: Use With Caution


Steam Cleaners on Hardwood Floors 

  • Common uses: General cleaning, cleaning surface stains
  • Risks: Causes rapid and frequent changes in the moisture content of flooring, causing grain ridges, cracking, and separation of finish from wood.
  • Recommendation:  Never use steam to clean a wood floor, even if the product claims to be safe for hardwoods.
According to Riley Ellis, a cleaning professional from London, most manufacturers will say anything to convince you in buying a steam cleaner and you should always figure out if the type of material you have could or could not stand the moisture, especially steam. 

Verdict: Unsafe


Final Thoughts

The experts at MacDonald Hardwoods are always available to answer your hardwood questions.  Give us a call to discuss your project at 888- 459-4735.


Categories
Hardwood Maintenance

Demystifying Relative Humidity

When it comes to flooring, hardwood is one of the most enduring choices you can make, both in terms of style and durability.  But, like anything of quality, it takes a bit of tender loving care to keep it looking its best.  We have discussed in another post the basics of how wood responds to water, and you know that too much water will cause wood to expand in damaging ways.  It is also true that if wood is allowed to get too dry it will contract significantly, creating unsightly gaps and sometimes cracks.  These conditions, though, are extremes.  In many cases, just maintaining your home at a temperature and humidity level that is comfortable and healthy for you and your family will create the right conditions for your hardwood.

Modern homes are designed to keep the air inside the house comfortable and healthy.  These homes are relatively air tight, meaning that the moisture content inside the house will fluctuate far less than that of the outside air.   Plus, newer homes have central heating and air conditioning units that will also help to keep the relative humidity at a comfortable level.  If your home is older, it may be prone to “leakiness”, meaning more outside air comes in around windows, fire places, doors, etc.  These leaks can often be minimized, however, and there are a number of ways to compensate for the reduced stability.  Keep reading!

What is the right amount of moisture for the air in my home?

The Environmental Protection Agency recommends that relative humidity for wood floors be kept below 60% in the summer to keep away mildew, rot, and physical discomfort that can come from humidity levels that are too high.  In the summer, the agency suggests levels between 25% and 40% to avoid air that is too dry, which can lead to sinus infections and other illnesses.  Now if this seems like a pretty wide range, that’s because it is.  These are the outside limits of healthy relative humidity within your home and, especially if your hardwood is engineered, it should be ok within this range if you don’t push the limits.  However, you and your family, and your wood floors, furniture, doors, etc., are all going to be more comfortable in an environment with closer to 35%-45% relative humidity.

So what is relative humidity and how do I know if mine is good?

At any given temperature, air is able to hold a certain amount of moisture without starting to give some up in the form of precipitation, dew, or condensation.  Relative humidity (RH) is the amount of moisture in your air relative to the amount of moisture it can hold at its current temperature.  The closer RH gets to 100%, the more saturated the air and the more moisture remains in your skin, wood, walls, etc., preventing sweat from evaporating to cool you off, causing undesirable expansion in your floors and doors, and inviting mold and mildew.  The closer RH gets to 0%, the more moisture the air is able to draw out, leading to dry skin, cracked wood, etc.

Warmer air is able to hold more moisture than cooler air.  For example, air at 95°F can hold twice as much moisture as air at 75°F.  As air cool and its capacity for moisture decreases, it eventually reaches the “dew point”, where it becomes so saturated that it can’t hold the moisture already in it, causing the water vapor to become liquid, forming dew or condensation.  Of course, well-maintained homes will be airtight enough to prevent this from happening indoors.

To prevent air from reaching critical levels of dryness or saturation before you start to see cracks in your furniture or water running down your walls, you can use a hygrometer to measure the relative humidity in a given room.  A hygrometer is a small, inexpensive instrument with a display that tells you what the RH level is in the room where it is located.  They range from a simple single device that you can move from room to room (about $10-$25) to systems that monitor several rooms continuously ($50-$150).

If the RH in my home is too high, what should I do?

If you find that there is too much moisture in the air in your home, it is fairly simple to return it to ideal levels.  If it is winter time, it may be as simple as turning on the heat.  Remember that higher temperature air can hold more moisture, so this is often an effective way of reducing your relative humidity.  In the summer, centralized air conditioning units can remove some moisture from the air altogether.

It may also be worthwhile to purchase a simple dehumidifier.  These can be acquired at any home improvement and most home goods stores and will cost generally from $40 for a simple portable model to $200 or more for a larger, more sophisticated model.  Depending on the severity of the problem, you may want to have a dehumidifier in each room of the house, but often one or two portable units will be sufficient to balance out those rooms where, for whatever reason, the RH tends to get a little high.

If the RH in my home is too low, what should I do?

Your house and its inhabitants and their activities—people, plants, pets, bathing, cleaning, cooking—all add some moisture to the interior of your home, providing a little bit of buffer to excessive dryness.  If, however, conditions in your home fall below ideal RH levels, you can purchase a humidifier for the areas of concern.  Like dehumidifiers, humidifiers come in several sizes and levels of sophistication and range in price from around $50 to about $200.

Is there something I can do so I don’t have to think about RH?

While you should always be mindful of the environment in your home (after all, the most advanced gadgets will fail from time to time), there are a few devices that can make maintaining ideal RH levels pretty low maintenance.  Some of the more sophisticated humidifiers and dehumidifiers have integrated hygrometers that allow them to turn on and off as needed.

It is also possible to incorporate into your home an in-line humidity system parallel to your central air conditioning and heating that will maintain ideal RH throughout.  These systems can be built in as a home is being constructed or added afterward and tend to cost $200-$400, depending on the level of sophistication.

If you are not sure whether your home will need extra RH attention, talk to one of our MacDonald Hardwoods staff.  We will be happy to share some steps you can take to help figure it out.


Categories
Hardwood Flooring Hardwood Maintenance Home Decor

How to Prepare your Hardwood Floors for Gatherings

As we look forward to hosting gatherings throughout the year, it is important to consider how extra foot traffic may affect your hardwood floor. Although there are several ways that your floor may be damaged, there are an equal number of preventative measures that can help you keep your mind on the party. Let’s walk through some of the ways you can protect your floors during parties.

Slipper Gallery

If you find that some guests hesitate to remove their shoes in your home, you might try making it part of your party theme. By providing a shoe rack full of new slippers of many different styles and colors, your guests will embrace the practice and enjoy the gesture. You might even offer the slippers as gifts as a memento of your party.

Rugs

Investing in a few runners to place in high traffic areas will considerably decrease scuffs and scratches. These can be easily rolled up and stowed away or they can be used year-round to accent your home décor. Large area rugs can also add color and design and brighten up a room while protecting your hardwood flooring.

Towels

For rainy days when the kids leave umbrellas on the floor or snowy days when people or pets track slush into the house, it is helpful to have heavy rugs and towels at your entryways. Removing your shoes on a rug will prevent excess moisture from damaging your floors. If any type of moisture is left on the floors, it may cause dark stains. Some substances, such as rock salt, can ruin the finish itself.

Cleaning

Although it may seem like a good idea to wax your floor before a gathering, it will actually make it more slippery and increase the likelihood that drinks or food may be spilled. A dry mop should be sufficient to keep your floors free of debris. In case an accident should occur, be sure to leave tissues or napkins on around to make it easier to wipe up any spills immediately.

Enjoy

Take time to enjoy yourself at your gatherings. When you prepare in advance, you can trust that your hardwood floors will survive. Your friends at MacDonald Hardwoods are happy to recommend cleaning products and supplies or offer advice about repairing or replacing your floor. For the best prefinished hardwood floors in the Greater Denver area, visit MacDonald Hardwoods.

Categories
Hardwood Flooring Hardwood Maintenance

Water and Hardwood Flooring

Where does wood come from? Trees of course. What do trees need to grow? Sunlight, water and soil. If any of these elements is absent, the tree will not survive. If water is so critical to the survival of a tree, why should it be avoided with hardwood flooring?

Well, let’s think about the cycles an oak tree goes through. Every year, new growth pops out in the spring; it continues to grow throughout the summer; its leaves change color and fall in autumn (due to declining sunlight), and then it becomes dormant during the winter.

In each of these stages, the needs of the tree are a little bit different. When it is growing, it needs more nutrients than when it is dormant. Like any living thing, its needs change gradually over time.

One reason we like to use wood in our homes is because it creates a feeling of natural warmth. Although the material is no longer living, it does continue to respond to changes in temperature and humidity. When wood swells, our doors become harder to open and close and the spaces between planks of flooring are reduced. When wood contracts, the spaces between the planks become more pronounced. The degree to which the wood swells or contracts depends on the local climate and the type of wood.

How does this relate to the rooms in our home? We want to avoid using wood flooring in rooms where significant changes in temperature and humidity occur. Although we are constantly using water in the kitchen – increasing the chance that the floor will become wet – it is not risky to install a wood floor in the kitchen. If there is a spill in the kitchen it will likely be cleaned up quickly. We are most attentive to the use of water in the kitchen then we are in other rooms where plumbing is present.

If we do not usually spill water in the laundry room, why is it strongly discouraged to use wood flooring there? The laundry room is a small enclosed space and the level of humidity fluctuates with each load. For example, the average family may clean 5 loads of laundry in a week. At least one of those loads will be washed in hot water and probably several will be washed in warm water. The steam from the hot water will greatly increase the humidity in the room and the effects of the warm water will be amplified because it is an enclosed space.

Bathrooms are the most common rooms that wood floor enthusiasts may risk using wood flooring, even if they understand the risks. If the bathroom is a half-bath, meaning it does not have a shower or tub, a wood floor would not be at risk. If however, there is a tub or shower, wood flooring should be avoided. The reason is that it is possible that the tub could overflow onto the floor at some point and the steam from the shower or tub would greatly impact the humidity in this small enclosed space. Taking household size into account when planning your space is an important step to determining what kind of flooring is best.

What happens if wood flooring becomes completely saturated? It depends on how much water is spilled and how long it is left untreated. The local climate and type of wood are also factors, but to a lesser extent.  The worst case would be that the wood would bow, split and crack because of the sudden change in humidity. It also may cause a stain without harming the integrity of the wood. If it were to split, that portion of the flooring would need to be replaced. Depending on how recently it was installed, it may be difficult or impossible to match. If it were stained, it may require refinishing or replacing the entire floor.

With the investment of time and effort that goes into installing hardwood flooring, it makes sense to avoid using it in rooms that are small enclosed spaces where the temperature and humidity changes rapidly and often. For more inside information about hardwood flooring, contact our customer service staff at MacDonald Hardwoods at 303.625.9780.

Skip to content