Categories
Hardwood Flooring Hardwood Maintenance

Best Maintenance Practices for Your Hardwood Floors

Hardwood floors can be both visually pleasing and increase the value of your home; they are durable, add warmth to a room and offer great stain resistance. However, keeping your floors looking like new for years to come you will need to do some routine maintenance. The following practices will ensure that your hardwood floor will always look great.

How to Keep Your Floor Clean

Sand and dirt can scratch your hardwood floor, so it’s important to sweep, dust or vacuum your floor regularly. This will prevent sand and dirt from harming your floor. If you have children or pets who track in lots of sand and dirt, you may have to sweep or vacuum your floor every day. When vacuuming your floor, use the attachment or setting for bare floors. If you use the beater bar, it may scratch your hardwood floor.

Every week, you should wipe your hardwood floor with a damp mop or a clean cloth. This will help to clean any dirt that you missed when sweeping or vacuuming.

Periodically, you should clean your floor with a cleaner made specifically for hardwood floors. Never use soapy water or a wet mop on your hardwood floor.

Cleaning up Spills and Stains

Hardwood floors are very stain resistance, however, if you allow liquid to stay on a hardwood floor for an extended period, it may cause damage or stains. To prevent damage or staining, wipe up any spills immediately. Always use a clean soft cloth to prevent scratching of your floor.

If you have a tough stain like paint, ink, lipstick or oil, you can try cleaning the stain with acetone nail polish remover on a soft cloth. When you have removed all traces of the stain, be sure to clean the area with a clean cloth that is dampened with water.

If you get candle wax or gum on your hardwood floor, apply ice to harden the wax or gum. Then use an old credit card to scrape off the wax or gum. Once you have all of the gum or wax removed, you can clean the area with a clean cloth that is dampened with water.

Things You Should Avoid with Hardwood Floors

Only use cleaning products that are designed for hardwood floors. Do not use any type of abrasive like scrubbing pads or scouring powder. These can scratch and destroy your floor. Don’t use ammonia, bleach or oil on your floor because they could stain or discolor the floor.

If you have high traffic areas, like hallways or entryways, you may want to use floor protectors to prevent your hardwood floor from being scratched or scuffed. Don’t use rugs with a rubber backing because they may cause stains on the floor. They may also stick to the hardwood floor and leave behind residue that is very difficult to remove.

Place furniture pads under any heavy furniture and they will help prevent scratches and indentations from your furniture. If you move furniture take care not to slide it across the floor. Either pick up the furniture or place it on a piece of plywood or carpeting before you slide it across the floor.

Learn how to select the best hardwood floors for your home.


Categories
Hardwood Flooring

This is How to Care for Hardwood Floors & Make Them Last

Not all of us are contractors or have the ever convenient hardwood flooring expert cousin or friend of a friend. And, for those of us who own homes, we would love to magically have a few of those skills sets now and then. We need to know how to care for hardwood floors.

From major disasters (like not knowing what to do about your foundation being rotted out by termites) to smaller issues (like how to turn off the water when leaving the house for your much earned month-long vacation) knowing how to care for your home is critical. Unfortunately, hardwood flooring care is not always as “common sense” as we might like to think.

Here, we are hoping to make caring for your home a little bit easier with some helpful tips and small things you can do to ensure the quality of your hardwood flooring remains long after the kids are grown up and the dogs have gone to heaven. So if you are wondering how to care for hardwood flooring, from pine to beech to oak, this article is for you.

In most cases with caring for hardwood flooring, the little things to ensure longevity pertain to proper cleaning and regular maintenance of your home. Here are some tips to keep your hardwood floors pristine.

1. Keep Your Hardwood Floors Dry

Keep Your Hardwood Floors Dry Like the Desert

If you think you can slop water mixed with pine-sol onto your hardwood flooring when you need to clean up the dried mud stain in the living room like you are high school janitor think again. The wood will absorb the water, and you will drastically decrease the quality of your flooring when the wood begins to warp and cup or depending on the conditions possibly rot.

Instead of Mopping, Try This:

Try to stick to sweeping hardwood floors when they begin to get dirty. In high traffic areas that are at risk of getting dirty from muddy shoes or accidentally have a sticky drink spilled, get creative with your decor and put down rugs and mats in those areas. Place a rubber lattice mat underneath to avoid slipping or the rug moving out of place. If you must use a little moisture to get up a mess, use a cleaner that is formulated for hardwood and mists onto the surface, using a slightly dampened rag to help get up more stubborn messes.

While we’re on the subject, other cleaning products to avoid cleaning hardwood flooring with are:

  • Soap-Based Detergents
  • Wax-Based Detergents

These products do nothing but cloud your finish and create build up on the surface of the wood.

2. Wood Floors Require a Gentle Touch

Be Gentle With Your Hardwood Floors

Perhaps you do not enjoy mopping anyway and were planning on getting the vacuum as your cleaning implement of choice. Sure we’ve fixed the moisture issue, but most traditional vacuums have metallic elements that can easily scratch right through the finish and eventually start damaging the hardwood itself.

Instead of Vacuums and Steam Cleaners, Try This:

Invest in a microfiber cloth; it will easily attract and pick up dirt, allows access to hard to reach nooks and crannies when cleaning hardwood floors. They are wonderfully washable, so if you encounter something particularly nasty no cleaning out a vacuum bag for you, chuck it in the wash and let the bad memory of that dead beetle covered in cobwebs behind the sofa wash away too. And, most robotic vacuum cleaners are gentle enough for wood floors, so don’t be scared if this is what you’re using.

3. Get to Polishin’ Your Floors!

Polishing may sound like something you would need to call an expert in for, but nay my fellow it is simple. Just follow the instructions below and watch your hardwood flooring shine again.

How to Polish Hardwood Floors:

Think of it like when you are painting a room, except you are trying to get it on the floor.

  • Remove all the furniture in the room.
  • Give it a good cleaning just before applying the polish
  • Apply the polish with an applicator – both polish and applicator are typically readily available in most stores (polish cans give directions for what kind of applicator
  • Allow the polish to set, if there is a lot of traffic in the area plan to leave the polish to set for at least a day undisturbed before returning it to use. Places that are less frequented can be back in use typically in an hour or two.

Tips for Technique:

  • Don’t pin yourself into a corner: Make sure you are working towards the exit, not away from it.
  • To ensure evenness in the polish make sure you apply in strokes that are feathered (crisscrossed, for us non-painters). This technique also guarantees no spaces are left bald.

Polishing fills in all the cracks and scrapes from the regular wear and tear of life. Polishing hardwood floors can be done every few months or so depending on how much wear and tear the area experiences.

Strip it and Refinish it

As you learn to care for hardwood floors, one day, you may need to ask, ‘Should I refinish or replace my floors?‘ Refinishing hardwood flooring is the biggest job of our short list of little tips. But, it’s easier than replacing them.

The process of refinishing hardwood flooring isn’t impossible. Some determination, a little elbow grease, and a Saturday should get the job done.

Now, you don’t technically have to strip off the existing finish to refinish hardwood flooring, roughing it with sanding will allow the new coat to stick just fine to the existing finish. Products like polyurethane work very well for this project, though in older homes some of the waxes and finishes used won’t work with modern finishes. In that case, you are probably better off stripping it off and completely replacing it. If you are comfortable with power tools, an electric sander will be your ally in this project.

Refinishing floors yourself follows the same process as polishing does, with the addition of the sanding or stripping, depending on your needs before applying the fresh layer. Refinishing hardwood flooring only needs to be done every few years, rather than every few months.

Find out how to select the best hardwood floors for any home.

Categories
Hardwood Flooring Hardwood Maintenance

Tips for Cleaning Your New Hardwood Floors

Hardwood floors are often the most attractive feature in any room. Hardwood flooring in good condition can add warmth to your home and contribute to the total value of the house; keeping hardwood floors in good condition, however, is vital to bringing out the glowing qualities that make this true.

At MacDonald Hardwoods, a Denver hardwood flooring company, we understand what an asset hardwood floors can be. We also understand that flooring is often subject to constant dirt and grime, sliding furniture, and the scuffling paws of household pets. In order to help protect your hardwood flooring, we provide Denver customers the safe and effective wood floor cleaning products and also offer the following tips.

A Matter of Maintenance

We realize that the majority of maintenance for hardwood floors is done by the homeowner. For this reason, we provide easy-to-use cleaning products that are fast and efficient. A regular cleaning routine is a key to keeping the floor free from dirt and other materials that can potentially scratch the finish. Our MacDonald Hardwood Floor MacVac is the perfect tool for quick removal of this kind of debris.

Protection Where It Counts

Wood floor cleaning is also about prevention. We recommend:

  • Placing mats and rugs over high-traffic areas of the house such as hallways and entrances.
  • Placing small pieces of felt padding beneath all surfaces that come in contact with the wood, as this can prevent accidental scratches caused by inadvertently shifting furniture.
  • Cleaning all spills as soon as they occur and maintaining everyday dust with a robotic vacuum.
  • Maintaining a relative humidity between 45% to 55% saturation to prevent swelling, shrinking, or cracking in the flooring.

Our MacDonalds Hardwoods Easy Floor Cleaner will assist in quickly removing damaging liquids while restoring the protective finish in the area.

Knowledge is Power

Our specialists are able to assist customers with every aspect of the maintenance and cleaning of their wood flooring. From cleaning product recommendations to environmental risk factors, our knowledgeable staff is always available for assistance. Call MacDonald Hardwoods at 800-639-3006 for more valuable tips and training on how to take care of your hardwood floors.

Categories
Eco-Friendly Flooring Hardwood Flooring Species

Bamboo Flooring vs Hardwood: Which Should You Choose?

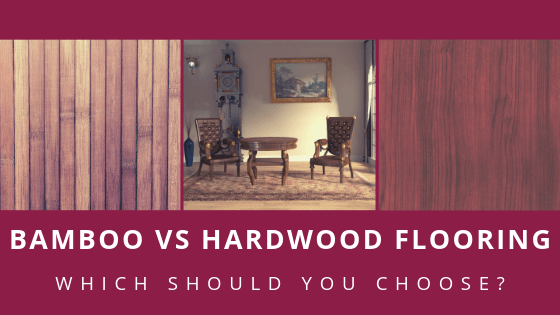
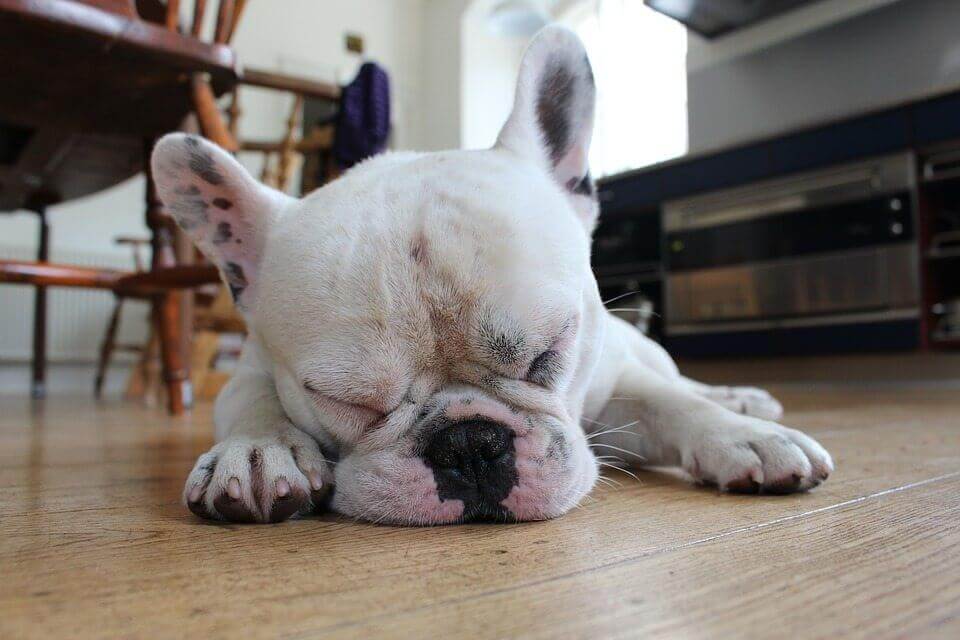
If you look at your home as a body, you will begin to understand that each area is like it’s own organ; every part must work together to create a functioning organism. Your floors are like the palms of your hands or the soles of your feet. They’re crucial for everyday living. So, making the right flooring choice is vital. This guide explains the differences between hardwood and bamboo flooring to make your decision easier.

When remodeling your home or building a new one, you have many things to consider. Choosing the type of floor you will use is just one of your responsibilities, and not everyone knows what steps to take to achieve their desired results. Like most major areas of your home, your floor is an investment that will affect your life for years to come.

First, What is the Pricing Difference Between the Two Flooring Types?

As you choose a path, the price of your flooring should always be near the front of your mind. Even a difference of a few dollars adds up when you consider the size of your floor and the number of materials you must use to finish the job. Depending on where you buy bamboo, you will pay about $2 to $5 per square foot.

You notice a relationship between price and quality, and spending more usually means you get a higher quality. In the $2 to $5 price range, quality does not change a lot, so you won’t have too much about which to worry. If you go below $2 per square foot, you will run into quality issues over time.

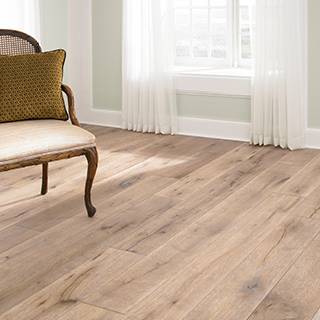
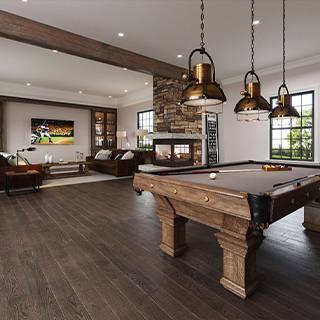
It’s now time for you to review the price you pay when buying hardwood flooring, and this information is excellent for protecting your budget. Knowing the cost in advance saves you a lot of trouble and helps safeguard your bank account. Standard hardwood will cost between $3 and $5 per square foot, which is a fair price.

You get decent quality and materials that can last for years with proper care when you take this path. On the other hand, you can find exotic hardwood flooring for more than $10 per square foot. Consider your budget and long-term goals when choosing your flooring material.

Installation for both types of flooring should run around the same price.

Next, Here’s a Quality Comparison of Hardwood and Bamboo Floors:

The quality of your floor should play a central role in your decision if you want your floor to last for as long as possible. If you have your eye on bamboo flooring, you should keep in mind that it does not have an official rating system. In other words, you never know what you are going to get when buying bamboo flooring for your home. Your best option is to search for reputable dealers with a record of customer satisfaction.

Quality is much easier to predict when you use hardwood because of the National Wood Flooring Association and other groups rate hardwoods on their size, hardness, quality, moisture tolerance, evenness and more. Look at the rating when you buy hardwood floors, and you will know what you are getting.

Now, the Durability of Hardwood vs Bamboo:

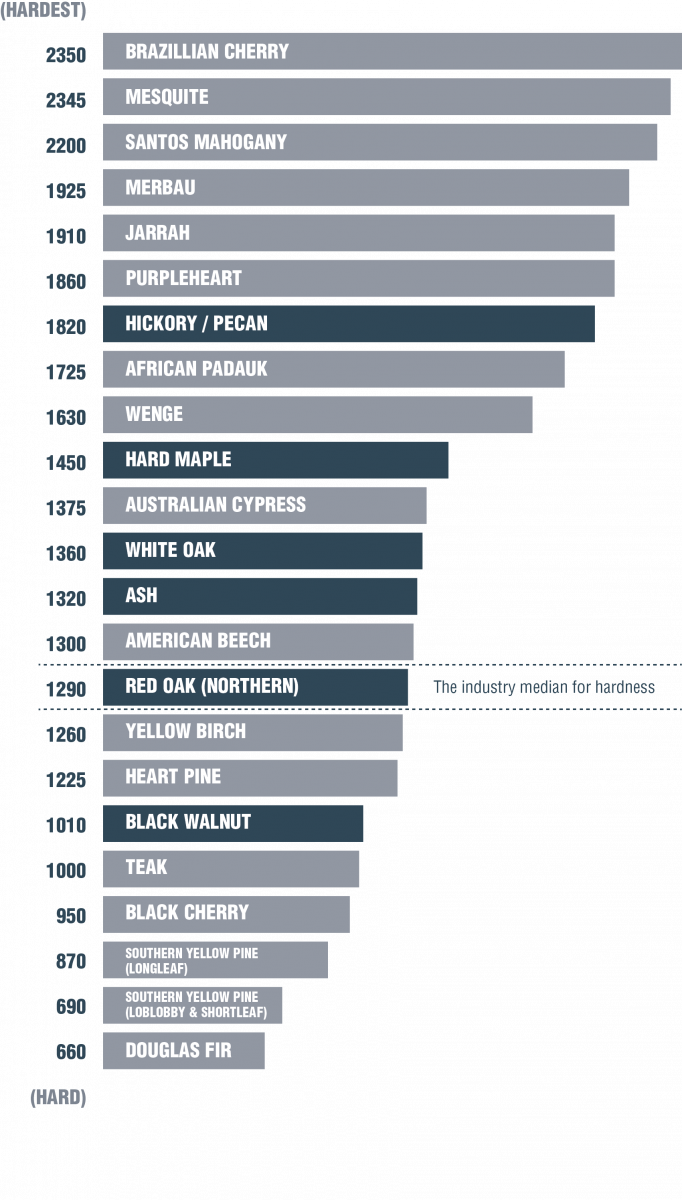
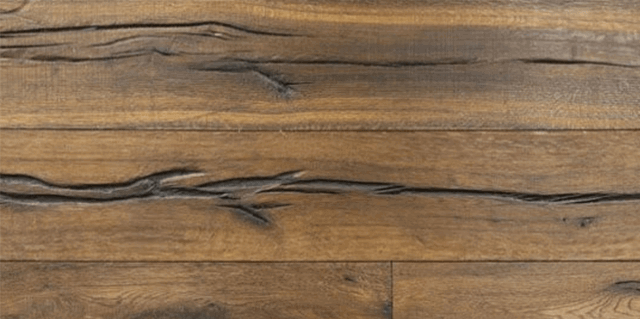
Hardwood is a popular flooring choice and gives you plenty of fantastic advantages you won’t want to overlook. People use some of the strongest trees available when making hardwood, such as oak, hickory, and cherry. The Janka rating measures the hardness of wood, and the hardest is 3,500. While cherry is ranked 950 on the scale, red oak is 1,220. So, hardwoods vary tremendously Keep in mind that some hardwoods are softer than others when making your choice.

To build upon this, let’s take a look at bamboo flooring. On the Janka scale, bamboo scores around 1,762. So, in most cases, bamboo is the more durable choice. Although most people think of bamboo as wood, that is not the full picture. Bamboo is a woody grass that looks and feels similar to wood. Natural bamboo is as hard as or harder than the highest quality hardwood floors. But, keep in mind the fact that treated bamboo loses a lot of its hardness.

Finally, Do You Have Environmental Concerns?

Both hardwood and bamboo are biodegradable and won’t contribute to the global construction waste problem. This is one of the main reasons why homeowners choose to use either of these materials on their floors. By 2025, construction waste is expected to nearly double, making sustainability a priority.

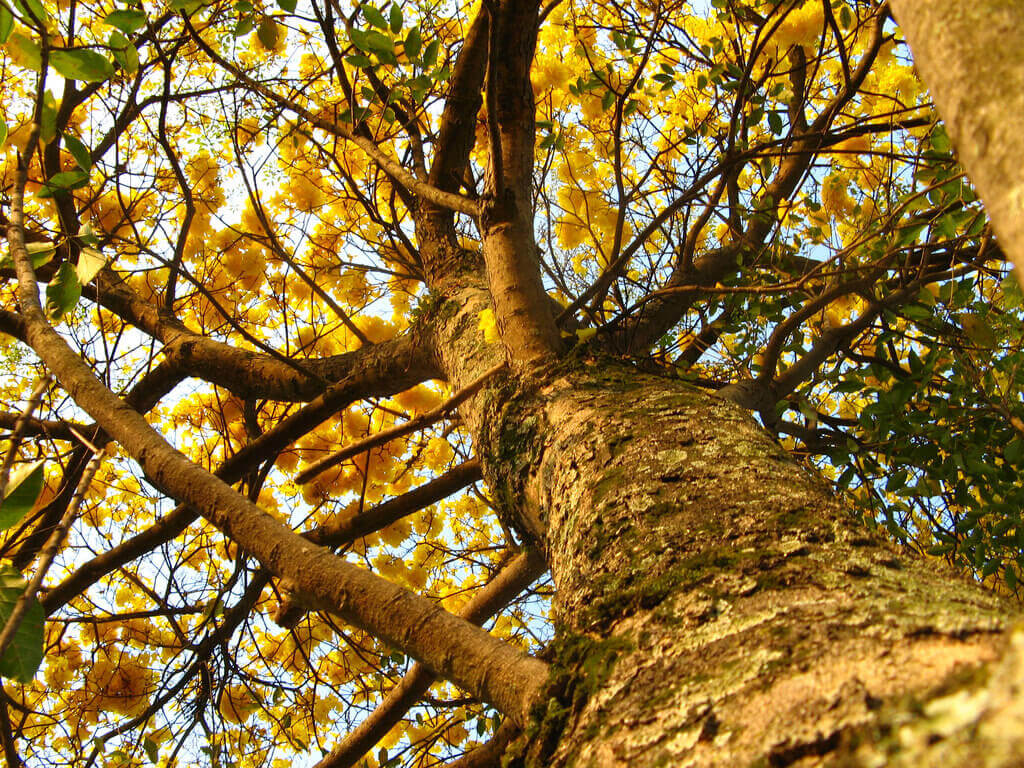
But, they have varying features where the environment is concerned. For example, bamboo grows much faster than trees. In addition, during the harvesting process, bamboo roots don’t need to be removed. The stalks are simply cut, and they later regrow from the same spot. Since you don’t need to replant bamboo, farming requires less fuel than hardwood per harvest. If you care about the planet and want to reduce your carbon footprint, bamboo flooring won’t let you down.

Some people view hardwood as not being environmentally friendly, but that is not usually the case. While it takes most hardwood trees 20 years to grow, they produce a lot of materials in that time. Plus, you don’t have to harvest wood as often as bamboo. When you compare them both, though, it’s clear that hardwood trees use more resources than bamboo flooring. When it comes to our carbon footprint, the way companies operate plays a major role in the amount of waste they produce.

What Can You Do to Decrease Your Footprint when Building or Renovating?

Do you want to know, with certainty, that you’re making a sustainable flooring decision? A trustworthy hardwood flooring expert will support the Lacey Act, which outlines North American laws to protect endangered species and their environment. The act pertains to both hardwood and bamboo suppliers. So, be sure to find out if your flooring installation company supports these laws prior to making a decision between exotic hardwood and imported bamboo.

Not only do you need to make sure  your suppliers and builders are conscious of the environment — there are steps you can take to ensure an eco-friendly home improvement process as well:

  • Learn to practice source reduction — generate less waste by using fewer materials.
  • Try to salvage what you can from your own deconstruction and check out thrift stores like Habitat for Humanity for building supplies and materials before you begin a renovation or construction project.
  • Educate yourself about how various building materials can be recycled rather than thrown in a landfill.
  • Motivate yourself by understanding the advantages of used, recycled, and salvaged supplies.

Conclusion

When it comes to bamboo flooring vs hardwood, the choice you make impacts your home (and the planet) for years to come, so getting it right the first time is critical.  Some people are split down the middle and have no clue what path they should take. If you can relate to that, stop thinking about it and call a flooring expert to help you make a final decision. If you live in the greater Denver area, contact us — we are happy to help find the best hardwood floors for you.

Categories
Hardwood Flooring Hardwood Maintenance

Refinish or Replace Hardwood Floors? How to Determine the Fate of Your Flooring

Refinish, refinish, refinish! In almost every case it is preferable to refinish rather than replace hardwood floors. Part of the appeal of hardwood is that it lasts so long. A quality hardwood floor can be sanded down and refinished at least six times, and up to ten times before you need to replace it. You can change the color, closely match and replace warped, stained, or termite ingested planks, silence squeaky boards, and fill gaps or patch knots. With all of these easy solutions, why would anyone choose to replace hardwood floors? Well, here are the cases when a complete rehaul becomes a better option.

How Much Time Do You Have to Refinish or Replace Hardwood Floors?

Refinishing a floor takes a lot of time. You’ll need to remove all of the furniture from the room. The wood needs to be sanded bare. If you need to make a structural or cosmetic repair, you must do so before staining and coating. During the week that all of this is going on, nothing else can happen in that room. Dogs cannot walk through and sniff everything, children cannot bounce their balls, dust is everywhere, and the smell is enough to kill you. Well not really, but you get the idea. All of this time and trouble is reason enough for some homeowners to prefer having the old floor ripped out to put in something fresh and new.

Consider the Aesthetics of Your Current Flooring

The number one reason homeowners choose to replace hardwood floors is to change the overall look. But, maybe you like your flooring. Or, maybe you’ve got plain, old, oak planks and you’d like to upgrade to an exotic species. Here are some crucial aesthetic factors to consider:

Are Your Hardwood Floors Aesthetically Appealing?


  • Fashion – Parquet kitchen tiles that once were cute aren’t very fashionable today; the modern approach involves using wide planks to make a room seem more spacious.
  • Species – The oak that is prevalent in American homes pales in comparison to designer applications of Brazilian Tigerwood and cork.
  • Artistry – Implementing a creative herringbone border, an artistic inlay or pattern warrants laying down a new canvas.
  • Direction – Many installations feature diagonal placement of the wood making the room seem more spacious.

Are you attached to the look and feel of your home, other than some cosmetic damage to some of the flooring? Then, you may want to refinish your floors rather than go to the trouble of replacing them.

Can All Hardwood Floors Be Refinished?

You may be on the fence about your decision to refinish your hardwood floors because you wonder if your floors are a candidate for refinishing. The truth is, not all hardwood floors can be refinished. Although most common problems can be addressed and fixed without replacing the entire floor, there are some exceptions. Consider the following to make an informed decision.

What Flooring Damage Can’t Be Refinished Away?

  • Structural Damage – These problems need to be addressed directly, which usually requires ripping up the floor to get a good look at the frame of the floor. If you think you may be looking at underfloor damage, you may not be able to sand, stain, and refinish your existing flooring.
  • Movement – Refinishing the floor with boards that wiggle and move around a lot will only make things worse. You’ll end up with even bigger gaps between the floorboards and an unsightly mess.
  • Severe Flooring Damage – If more than 30% of the boards have sustained damage such as warping, chipping, ugly stains, or termite infestation, the time, effort, and money spent replacing that much of the floor would be exceedingly cumbersome — a replacement would make more sense.

“Termite treatments are one of the costly pest control jobs due the urgency and great damage involved.”

-Alexander Crawley, Australian pest professional and entomology consultant

  • Extreme Wear – If the floor has been refinished too many times before, you will begin to see the grooves in the planks and nails. Even if this is only visible in some areas, sanding the wood down will no doubt reveal more problems, making replacement more of a requirement than a choice.

If you’re still not sure, consult a flooring professional who can tell you whether or not it’s time to toss out your old flooring.

How Much Will a New Floor Cost?

The advantages of hardwood flooring are limitless. At the top of the list is comparable cost over time. Although a significant investment may be required to install hardwood flooring initially, it is unlikely that you will ever have to replace it.

It can be sanded down and refinished five, six, even seven times. And, if maintained properly, you won’t have to do it for 20 years. Refinishing a floor may be messy and troublesome, but most homeowners learn to live with it. After all, it costs five times as much to replace hardwood floors than it does to refinish them. For some people that is reason enough.

Here’s How to Replace Your Hardwood Floors:

If, after considering everything above, you have made the decision to replace rather than refinish your hardwood floors, here’s what you can do.

How to Replace Your Hardwood Floors

What You Will Need to Replace Hardwood Floors:

  • Vacuum Cleaner
  • Broom
  • Mop
  • Tar Paper or Roofing Felt
  • Hardwood Planks
  • Pneumatic Flooring Stapler or Nail Gun
  • Rubber Mallet
  • Miter Saw
  • Awl
  • Hammer
  • Baseboard

Pre-Installation Preparation for Hardwood Flooring Replacement:

  1. Hardwood planks should be allowed to adjust to the temperature and humidity of your house anywhere from 48 hours to 2 weeks. Learn more about Humidity for Wood Floors.
  2. Remove any and all debris from the subfloor that cannot be vacuumed up. Check for any nails or staples left over from the previous flooring.
  3. In order to remove dust, vacuum the subfloor. Follow up the vacuuming with sweeping and mopping the subfloor.

Hardwood Flooring Replacement Steps:

  1. Install a moisture barrier between the subfloor and the wood planks. The tar paper or roofing felt should be stapled to the subfloor.
  2. Do a dry run. Lay out your wood planks, but don’t nail anything down. In addition to getting a feel for how the flooring works, a dry run will enable you to avoid sudden color shifts and figure out which planks need cutting in order to fit properly.
  3. Lay the first row of planks 3/8 in away from the wall, tongue side facing the wall. Staple or nail the planks down every 6-8 inches.
  4. The next rows should go down about the same as the first. Tap the planks on the groove side with the rubber mallet to make sure you get a good fit.
  5. Use an awl and hammer to tap down any raised nail heads.
  6. Install baseboard around the walls to finish up

For more instruction or education in the Denver area, check out Macwoods’ hardwood flooring installation classes.

Final Thoughts

In the end, the decision to repair and refinish or replace hardwood is up to you, the homeowner. Using the advice above, the hope is that you will be confident in your choice, no matter what route you take. Let us help you select the best hardwood floors for your home.

This post was originally published on August 13, 2013, and has been updated to be more informative for readers. 

Categories
Hardwood Flooring Hardwood Maintenance Pets

This is How to Choose the Best Hardwood Flooring for Your Dog

Rocky Mountain region residents love dogs. Your friends at MacDonald Hardwoods are often asked which types of wood flooring will fare the best with dogs. There are many suitable options available but there are a few rules of thumb that will help you select the best flooring for you.

Choose Hardwood Flooring

First of all, it is important to mention that hardwood flooring has many advantages over other flooring options. It is completely natural. The wood is harvested from forests in a specific pattern and process that ensures its long-term sustainability. There is no better option for hygiene, air quality, and protection from allergens. Engineered hardwood is durable, but solid hardwood flooring is better for homes with pets.

Available Options

Years ago, the options available for hardwood flooring were very limited. A homeowner could select one of a handful of colors that had little or no grain or texture. This traditional look is still popular today but now it only represents a small segment of the options available. There are many different types of hardwoods in a full range of colors – some are naturally occurring while others are stained or whitewashed.

Dog Lovers

Dog lovers need to be concerned with three issues when choosing a hardwood floor: color, gloss, and species hardness. Experienced dog owners recommend that you choose a hardwood species that is very hard so that it will resist scratches and dents. They recommend a light color so that animal hair will not be easily visible. And, they recommend against using a glossy finish because it tends to shows the scratches more easily in reflected light.

Hardwood vs Softwood

The Janka Hardness Scale shows the hardness of each species of wood. While a softer species would not hold up well in a house with pets, a harder species will not be impervious to scratches and dents. In our 2015 survey of designers from around the U.S., more than 50% of them recommended Oak to their clients with dogs.  Other popular choices were bamboo and Hickory.  To determine which hardwood species is best with pet concerns and the Denver area climate, consult one of the experts at MacDonald Hardwoods.

Avoiding Scratches

A typical nail trimmer cuts dogs’ nails but leaves a sharp edge. If a dog owner also files the dog’s cut nails, the nail surface will not scratch as easily. Some dog owners use Soft Paws, vinyl nail caps that glue on to the dog’s nails. Problem solved!

Moisture

Dog lovers also need to be concerned with avoiding moisture on the hardwood floors. It is very important to avoid the possibility of the dog urinating on the wood flooring, especially when no one is home to clean it up right away.

The dog’s food and drink should be placed on a waterproof surface to avoid any moisture reaching the wood floor. Even homes without a dog should have an absorbent rug by the entrances to avoid tracking rain, snow, or dirt into the house. Having a rag handy to wipe off paws is very helpful as well.

Assistance

We all understand that sometimes accidents do occur. Visible scratches can be easily remedied with a new coat of finish applied periodically. Damaged or stained sections of hardwood flooring can be repaired or replaced. Learn more about the best hardwood flooring to consider other aspects of your lifestyle before making a final decision.

Categories
General Home Improvement Hardwood Flooring Hardwood Maintenance

This is How to Install Hardwood Floors Over Concrete

When you install hardwood floors, concrete is one of the best bases to work from — there are only a few steps to take. Follow these steps with care to safely complete the installation yourself. Whether you’re planning on renting out your home or looking to increase its value, using concrete as a base is a great idea.

To get you started we put together this do-it-yourself guide. Follow these steps with care to safely complete the installation yourself.

1. Remove Anything Standing Between You and the Concrete

While pulling up carpet, laminate, or any other flooring is the obvious first step, existing flooring isn’t the only thing that needs to be removed before you can install hardwood floors. Your baseboards will need to be taken out, as well, to ensure the new flooring has no gaps around the edges of the walls. If you’re careful while removing the baseboards, you should be able to reuse them. You can even spruce them up by sanding any paint off or staining them the same color as the new floor.

Look to see if your concrete has paint or not. If it is, the varnish may prevent the adhesive from working correctly. Don’t worry, though. You can rent a concrete grinder from most big-box home improvement stores. You can even call around your local tool rental shops or hardware stores to see if they offer concrete grinder rentals.

Strip Existing Glue, Finish, or Paint from Concrete Before Installing Hardwood Floors

Once you have the hardware you need, carefully grind the pain, glue, or finish from the concrete. You’ll want to wear protective gear, like goggles and a mask, while you do this. You don’t want to inhale any concrete dust or get some in your eyes. Make sure you remove all the paint and sweep up any dirt or debris that might be left behind.

2. Protect Your Floor From Moisture

Moisture and moisture vapor is your hardwood’s natural enemy. To combat these villains, you’ll need to apply a moisture barrier to the floor before the flooring can be laid out. You will need a barrier that is appropriate for the flooring you choose:

  • Floating Floors – Typically, these moisture barriers are made from plastic.
  • Nailed Floors – You will need a moisture barrier that protects the subfloor as well as the flooring.
  • Glued Floors – A heavy coat of moisture barrier will be required since the flooring is glued directly to the subfloor.

Before you begin, open any doors or windows in the room to provide proper ventilation. You will not likely want to inhale the fumes from your moisture barrier because it is likely to contain chemicals that are harmful to your lungs. As a precaution, it’s a good idea to wear a mask. If you are using plastic sheets, this step isn’t crucial.

Next, start at the side of the room opposite the door, and follow any and all instructions on the barrier’s packaging. Once the barrier is applied, you do not want to step on it. If you do, there’s a chance you’ll have to start over, so take care to move your materials with you as you work your way out the door.

Finally, let the moisture barrier set for 24 hours. This should be plenty, but before you take a chance and step back in the room, lightly touch the floor – if it’s still tacky to the touch, it has not set all the way and will need to be left alone a little longer. Some areas are more humid than others and will require more time to dry. In this case, check back every four hours or so.

3. Lay out the Flooring Materials

It’s time to start laying down your floorboards. Depending on the type of flooring you chose, your method for completing the next part will be different. Do this in one of two ways:

Method #1: Lay out the Materials for Floating Floorboards:

If you will use floating floorboards, you don’t need to worry about using an adhesive (If you’re unfamiliar with floating floorboards, they’re the boards that fit together like a jigsaw puzzle). The edges of each board click into place with the boards around it, creating a solid floor.

After you’ve measured the room and made sure you have the correct amount of flooring, the installation can commence. You can lay down a foam layer as you go, but you don’t have to. The foam will help if you want a cushion between the boards and the concrete, which can help muffle sound and create a more pleasant walking experience, depending on your preference.

Method #2: Lay out the Materials for Conventional Floorboards:

If you decided to use any boards that don’t click together, you need to apply adhesive while you place the boards. Just like when you apply the moisture barrier, start at the back of the room and work towards the door. Don’t administer all the adhesive at once. Instead, work in small sections. Let the adhesive dry for 24 hours after you install the flooring.

No matter the type of hardwood you’re using, be sure to cut the boards as you work. Don’t measure the room and assume how many boards need to cut, or you’ll likely run into trouble. You will also want to leave a small half-inch gap between the flooring and wall. Wood doesn’t stay one size, and you want to make sure it has room to expand.

4. Finally, Add the Finishing Touches

Now it’s time to finish up. Reinstall your baseboards and trim, then clean up the room. Be sure to take a moment to admire your work. There’s nothing like a job well done!

Let us teach you how to select the best hardwood floors for any home.

This post was originally published on December 15, 2017. It has been updated for clarity.

Categories
Hardwood Flooring

What is a Janka Hardness Rating and How Important is it?

A Janka rating is a hardness estimate given to wood. In hardwood flooring, the score is used to determine the durability of hardwood species that it might be suitable for a home. No matter what species you’re interested in, chances are, it has already undergone the Janka hardness test. Use this guide to understand precisely what each rating means for a better likelihood of choosing the right hardwood flooring.

First, Who Created the Janka Rating?

The Janka system is named after an Austrian man named Gabriel Janka who worked for the Forest Products Lab of the U.S. Department of Agriculture (USDA). Tasked by the Department with scientifically measuring the hardness for U.S. hardwoods, he developed the wood rating scale now used around the world. The American Society has since formalized the Janka hardness test for Testing and Materials (ASTM).

Similar indentation hardness tests are used throughout engineering to discover the hardness of various materials. By understanding the hardness, manufacturers know how much wear and tear different materials can take, which applications to use them in, and can thus create high-quality tools, building materials, and other products.

Next, How is the Janka Hardness Test Done?

The Janka hardness test was designed to measure the resistance of a sample of wood to denting and wear. The method is now standardized and anyone can duplicate it in the case that new species need to be analyzed. Not that you’ll have to perform this test yourself, but here’s a summary of how it works:

How is the Janka Hardness Rating Test Done?

  1. A sample plank of solid, unfinished, knot-free wood with a moisture content of around 12% is placed on the ground.
  2. An 11.28 mm steel ball is placed on top of the wood sample.
  3. Precisely-measured force (in lbs) is then placed on the ball until it is embedded halfway into the wood sample; this leaves a 200 sq mm hemispherical indentation on the plank.
  4. The process is repeated because two areas on the face of each specimen must be tested.
  5. All of the collected data is recorded and averaged.

A species’ Janka rating is a measurement of the amount of force (usually in pounds of force, or LbF) required to create the 200 sq mm indentation on the surface. There is a standard deviation associated with each species. In a nutshell, the more pressure a wood species can take, the higher it’s Janka rating. Softer woods will require less pressure to create an indentation than harder woods.

Then, What is a Good Janka Rating for Wood Floors?

For flooring, one of the most important criteria in choosing the right wood is its resistance to denting as a result of pressure from, say, a stiletto heel, the tip of a small chair leg, a pet’s toenail, etc.  The Janka hardness test, to some degree, replicates such.

Important to note is the fact that during the Janka hardness test, specimens contain about 12% moisture. Wood flooring, however, has been milled at about 6-9% moisture content and, by the time you walk on it, has been treated with several layers of protective finish. Furthermore, with engineered wood flooring, different materials exist underneath the top hardwood layer — these layers significantly affect the floor’s overall hardness. So, there is a variation between the Janka rating and the final hardness of any hardwood flooring.

With that said, as a general rule of thumb, wood species used in flooring should generally have a Janka rating of 1,000 or higher; this isn’t to say that wood species with a Janka rating in the hundreds will not work. Lower ratings do indicate that the wood is softer and more prone to damage from furniture, foot traffic, and pets.

Now, Look at a Hardness Chart Showcasing Some of the Most Common Hardwood Flooring Species

In reality, all flooring is subject to damage and wear.  In the end, the primary factor in how well your wood floors hold up over the years is how you treat and care for them.  While it is advisable to start with a harder wood if you anticipate high traffic and rough use, Janka rating is not the only factor to consider. You should keep your floors clean, protect them with rugs in high-traffic areas, and choose woods and finishes more likely to mask scratches and dents; this can be just as, if not more important. Still, this chart can be used to help you make a species choice based on hardness.

The above chart showcases the typical Janka side hardness for some of the wood species commonly used in flooring. Some woods like Snakewood have Janka ratings of nearly 4,000 LbF, which is too hard to comfortably cut and otherwise work with when installing floors using traditional methods. Other species are as low on the scale as Balsa at 70 LbF; this, in its raw form, is too soft to withstand typical foot traffic in a home. But, in home decor, the only time you’ll see black and whites is if you’re an Ansel Adams fan.

Final Thoughts

While the Janka hardness test and rating scale are an excellent way to determine what wood species might work for the floors in your home, it’s not everything. You will need to take other matters into account such as how the Sun will affect the color of your floors over time, what type of finish you want to use, and the aesthetic appeal of various wood grains. Come back often to learn more about hardwood flooring.

If you have questions about the hardness of a species not listed here, contact a hardwood flooring expert who can answer your questions in detail.

This post was originally published on the Macwoods blog on March 29, 2014, and has since been updated for clarity.

Categories
General Home Improvement Hardwood Flooring

What you need to Know about Prefinished Hardwood Flooring vs Unfinished

For many years, unfinished hardwood flooring was the backbone of this particular niche of the flooring industry. But prefinished hardwood flooring has been rapidly becoming more popular among both residential and commercial customers in recent years. If you’re going to run a tally and go by popularity alone, prefinished selections would probably have the edge over unfinished flooring these days.

Of course, the ultimate decision about which unique type of hardwood flooring is right for your home or business will be determined by factors beyond contemporary consumer popularity. To help you make a well-informed choice, here’s a closer look at what you need to know about prefinished and unfinished hardwood flooring.

Unfinished Hardwood Flooring

“Unfinished” hardwood is flooring that is raw hardwood. You must install, sand, and refinish flooring on site. There are some notable pros and cons associated with this type of flooring to consider as you explore your flooring options.

The Pros of Unfinished Flooring

From various hues of oak and cherry to stunning shades of maple, pine, and mahogany, there are many different wood species and natural color variations available with unfinished hardwood flooring. Because wood floor installation requires on-site finishing, you can customize your floors any way you want. Add personalized touches to your inlays, borders, and other flooring features.

You can even choose your finish system, stain color, and sawn profile. These customization options can be especially appealing if you have a specific look you want to achieve for your kitchen, living room, hallway, entryway, or office. Some other significant pros associated with unfinished hardwood flooring include:

  • There’s a more natural ability to resand and refinish your floor as desired.
  • You will add inlays after you sand the floor, which makes them perfectly flush with the rest of the floor.
  • You will “sealed” the entire floor since you will finish after installation.

The Cons of Unfinished Flooring

The most significant con associated with unfinished hardwood flooring is the time it takes to complete the installation process. However, the reason why this flooring takes more time to install is that it has to be sanded and finished manually. Often there’s a staining step in between these processes. Plus, you’ll have to give the finish time to cure fully.

Prefinished Hardwood Flooring

“Prefinished” hardwood floors are factory-finished.  Each board is coated with polyurethane before it hits the shelf. There are also notable pros and cons associated with this particular type of flooring.

The Pros of Prefinished Flooring

The biggest pro associated with prefinished hardwood flooring is the ability to complete installation fairly quickly since the sanding and finishing process is complete. And, once the floor installed, you won’t have to worry about being overly-cautious to avoid scratching your new floor during the curing process. Instead, it’ll be ready to use and enjoy immediately. Prefinished flooring also has the following beneficial things going for it:

  • It’s a more convenient option for some renovation or improvement projects.
  • Pre-applied finish is exceptionally durable.*
  • There are more uniformity and consistency with the coloring and staining in the boards.

*Some manufacturers also add an anti-scratch coating that makes the floor more resistant to minor surface damage.

The Cons of Prefinished Flooring

The main downside with prefinished hardwood flooring is the limitation of widths, lengths, colors, grain, and other common customer preferences. Also, the durability of the finish on prefinished flooring can make it difficult to remove these surface layers should you want to refinish or re-sand your floor in the future.

So, What’s the Final Verdict?

When it comes to the prefinished vs. unfinished debate, there’s no clear winner. Both options can have some pros and cons worth considering when you make your decision. Some people love the natural imperfections in unfinished flooring and the ability to conveniently refinish it. However, others appreciate the convenience of choosing perfectly prepared, flawless, ready-to-install flooring.

Whatever your preference, there’s no denying the fact that a top-quality hardwood floor will add beauty and value to any room, home, or business (for many years if you properly care for it). Let us help you choose the best hardwood flooring for your home.

Categories
Eco-Friendly Flooring Hardwood Flooring Species

Species Profile: Brazilian Walnut (Ipe)

“Ipe” or Brazilian Walnut (Ocotea Porosa) is a favorite hardwood flooring option often seen in higher-end decor. Because of its beauty and durability, it’s a dearly beloved hardwood species. Despite the name, it has no relationship to the true Walnut tree — and, that’s just one fun fact. Now, let’s take a closer look at one of our favorite wood species:

  • Where does it come from?
  • What is it known for?
  • Why do homeowners and flooring experts love it?

The Ipe Tree

The Brazilian Walnut tree grows throughout South and Central America, in parts of Mexico, and on a few islands in the Antilles.  The name is used to encompass an entire genus of tree, Handroanthus. Handroanthus includes at least 30 distinct species, each called by a different name depending on where they grow.  The Ipe tree is the national tree or flower of several countries.  It is popular in its native lands for the solid wood it produces and its gorgeous flowers — they look like tiny trumpets.

Just How Durable is Brazilian Walnut?

Boardwalks in Coney Island Made from Brazilian Walnut
Did you know that Brazilian Walnut makes up most of the boardwalks in Coney Island, NY?

People love Brazilian Walnut lumber’s density and seeming immunity to the forces of nature. It is so dense that it does not float in water, The wood has a hardness that measures at the very top of the Janka rating scale, upwards of 3,500 (more than 2.5 times the hardness of Oak). It is one of the most durable flooring options available.

Moreover, the wood is so durable that you can leave it unfinished in outdoor settings like saunas, decks, and patio furniture.  And, like most woods, it will fade to a brownish-grey color in these circumstances. Still, it has been known to last for more than 25 years this way.

Also, Ipe displays an inherent resistance to rot, mold, and insect damage. And, get this – it rates with steel and concrete concerning fire resistance. There’s no wonder why it is famous for boardwalks and other outdoor communal areas along the East Coast.  It can withstand decades of abuse from foot traffic, ocean air, and extreme weather. In the end, it will look hardly the worse for wear.

How Can You Spot Brazilian Walnut Flooring Based on Appearance?

The heartwood of Brazilian Walnut tends to vary in color from reddish brown to a sort of yellowish olive or even darker blackish brown. You may see bundles of boards of various shades sold by hardwood retailers.  And, the wood displays a fine to medium texture, with grain varying from straight to irregular or interlocked. Over time, the color will fade somewhat under the sun.

Deck Made From Brazilian Walnut

Brazilian Walnut is an oily wood with a moderate luster. Because of this, it is an excellent candidate for natural oil finishes. The inherent oiliness, combined with the wood’s density, make it difficult for a urethane finish to cure properly. Fortunately, its natural durability accommodates as much wear as most polyurethane finishes.

Tip: If you desire extra protection or a certain sheen, choose a factory-finished Ipe over a site-applied finish. The species’ unusual hardness makes it difficult to work with anyway.

Recommended Reading:

What you Need to Know About Prefinished Hardwood Flooring vs Unfinished

How Much Does Brazilian Walnut Flooring Cost?

Because of its exceptional qualities and comparatively scattered growth in the wild, Brazilian Walnut tends to be pricier than many other species. So, you can expect to pay anywhere between $4 and $9 per square feet of flooring. While this may seem steep, you will likely enjoy Ipe floors much longer than if you choose a less expensive species. Of course, this depends on the type of wear and tear you plan to put on your floors or deck.

Why You Must Keep Sustainability in Mind

One potential drawback to Brazilian Walnut is the traditional harvesting practice. Because this species grows sparsely, spread throughout forests — not in tight groves like many domestic species — it was once common practice to clear-cut vast rainforest areas for small harvests, a practice that leads to deforestation. While this sort of clear-cutting is now illegal in most countries, it is crucial to confirm that your Brazilian Walnut flooring originates from a sustainable source.

Deforestation due to clear-cutting in South America
Example of a deforested hill in Rio de Janeiro, Brazil

The Amazon Rainforest, arguably the most devastated natural habitat on the planet, rests at the center of Brazil. Many times, when you hear a term like “Brazilian Walnut,” “Brazilian Cherry,” “Brazilian Maple,” etc., it can reference wood from unsustainable harvesting practices. So, choose a source that grows/ farms trees specifically to create new timber resources. Ask your flooring manufacturer or retailer if they support the Lacey Act, which works against illegal logging practices to ensure the safety of endangered species and ecosystems.

Final Thoughts

To date, Brazilian Walnut flooring remains among the top flooring species used in homes and outdoors. Moreover, it is particularly well-suited to our climate here in Colorado. Many people feel like flooring that will withstand the worst you can throw at it (for decades to come) is worth the extra cost. Then again, it may not be the right choice for you. Are you still trying to make a flooring decision? Let us help you choose the right hardwood flooring for your home and lifestyle.


First published on Nov. 5, 2015.


Skip to content