Categories
Hardwood Flooring Hardwood Maintenance

Is Hardwood Flooring Expensive?

What makes hardwoods expensive? What’s the perceived value vs. real value? The answer to the title question is relative to the reader, but indeed hardwood flooring is more expensive than other flooring alternatives. But what it comes down to for the consumer is whether they are willing to pay a premium for the vibrant, beautiful tones of hardwood to grace their floors or settle for a cheaper alternative.

When looking at real hardwood flooring for your home, you have to decide on one of two options for your flooring: solid wood or engineered wood?

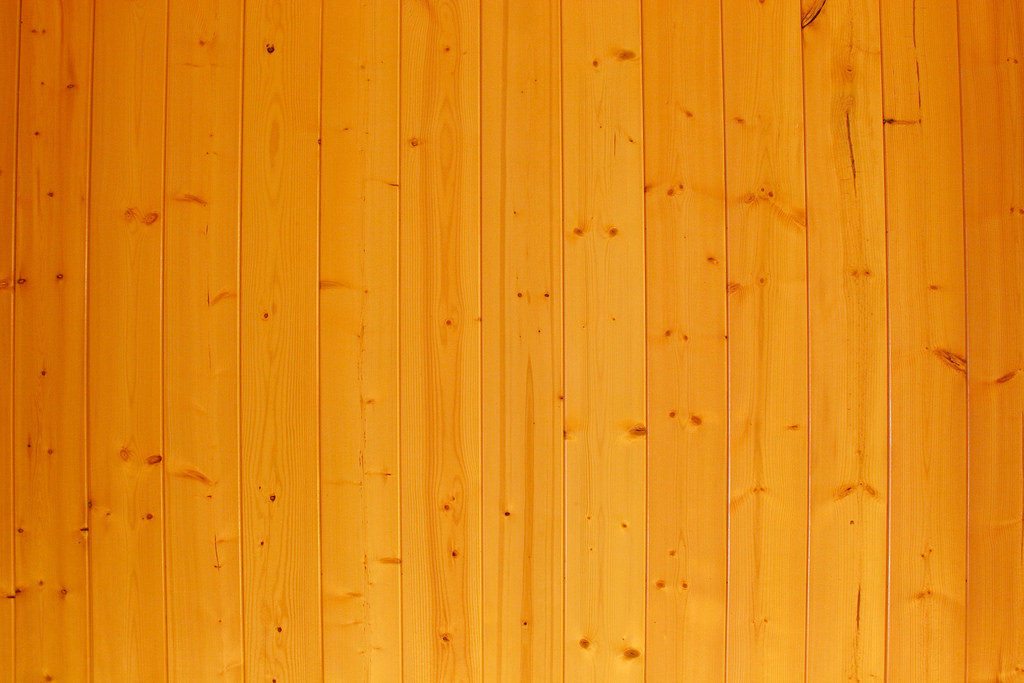
Solid wood floors are as advertised: one solid piece of wood through the whole plank.

Engineered wood consists of a top layer of real wood with cheaper plywood layering the bottom portion of the plank.

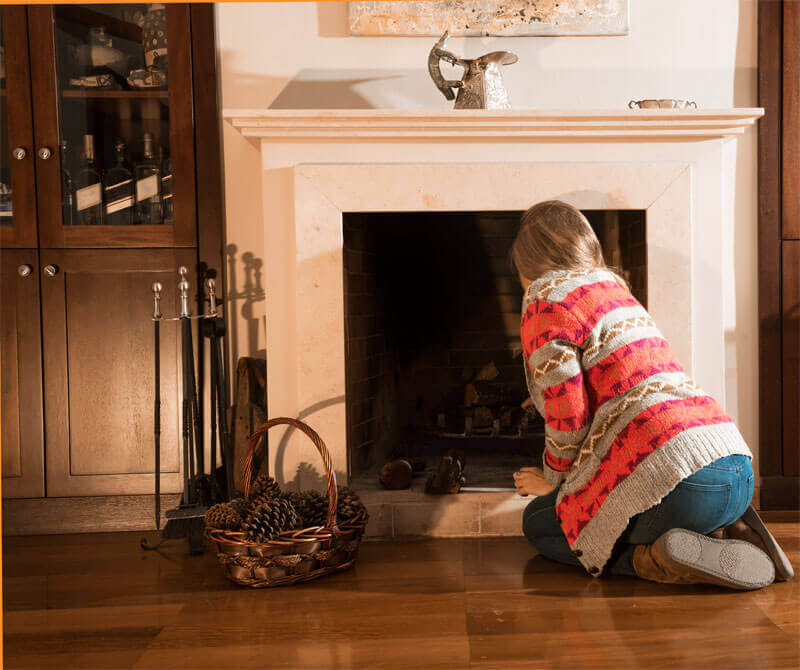
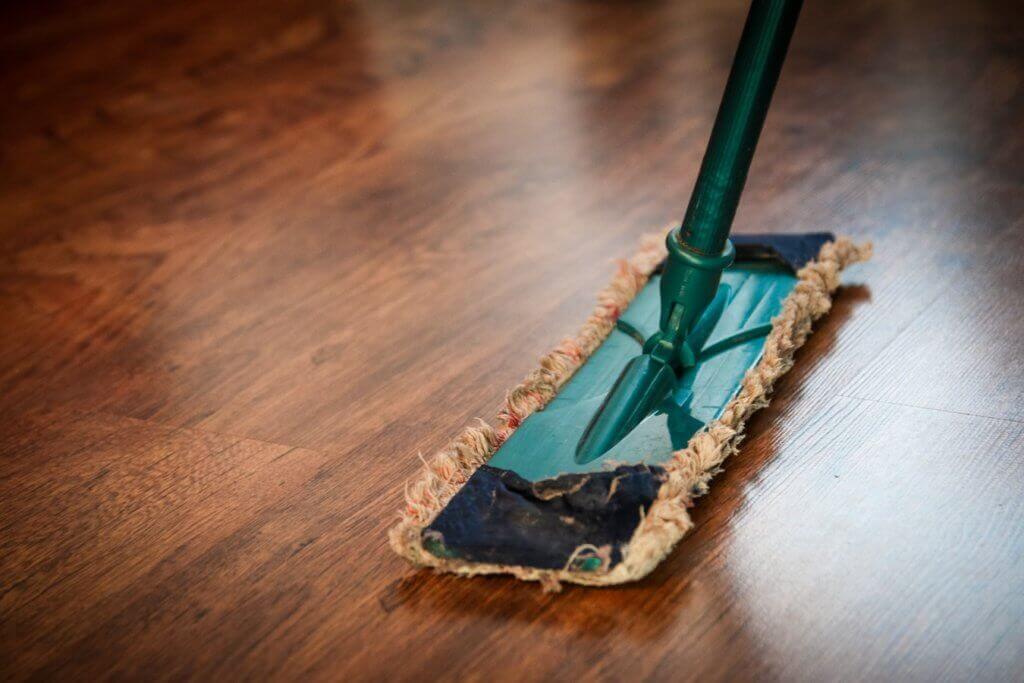
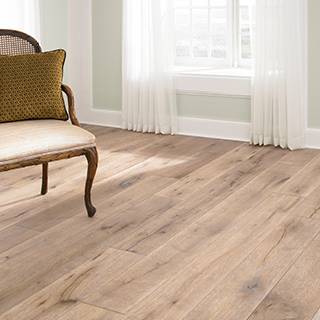
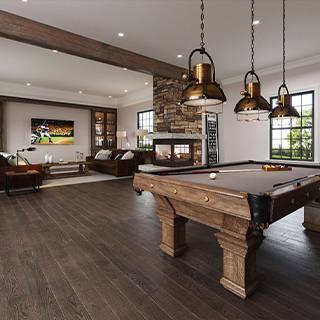
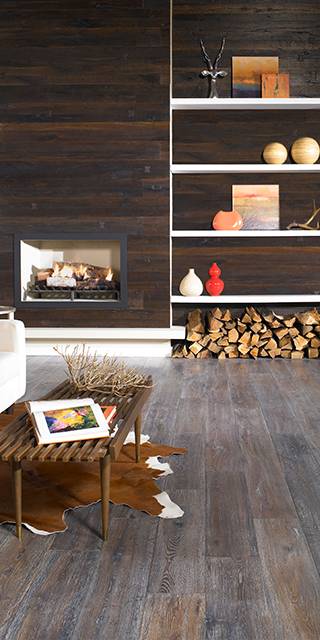
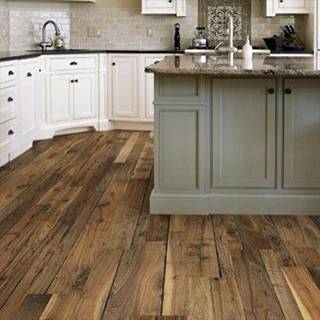
There are many benefits to a homeowner in opting for hardwood floors in their home. The first advantage is the beauty that hardwood brings to a home. The tones of the grain of wood selected for your flooring can match furniture and cabinetry. Wood floors are simple to maintain and clean, and you can refinish it multiple time rather than replace it as carpet requires frequently.

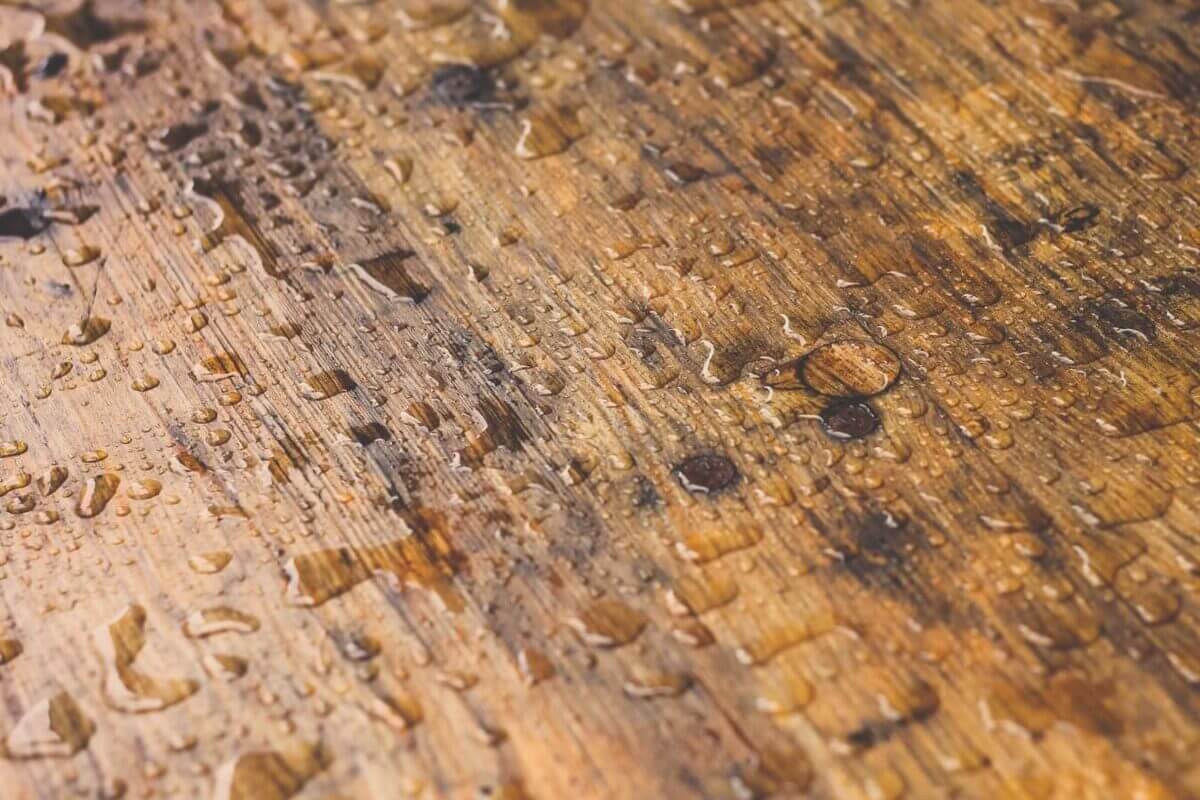
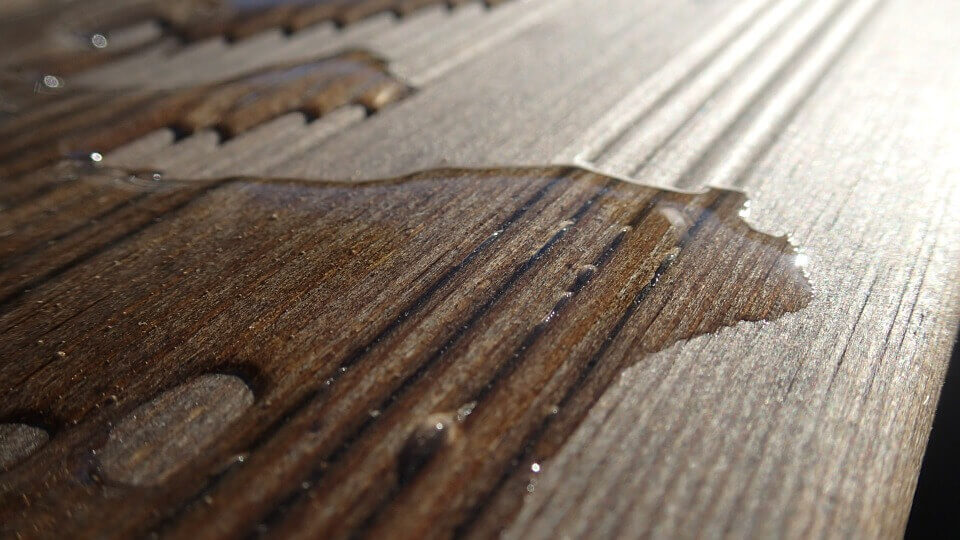
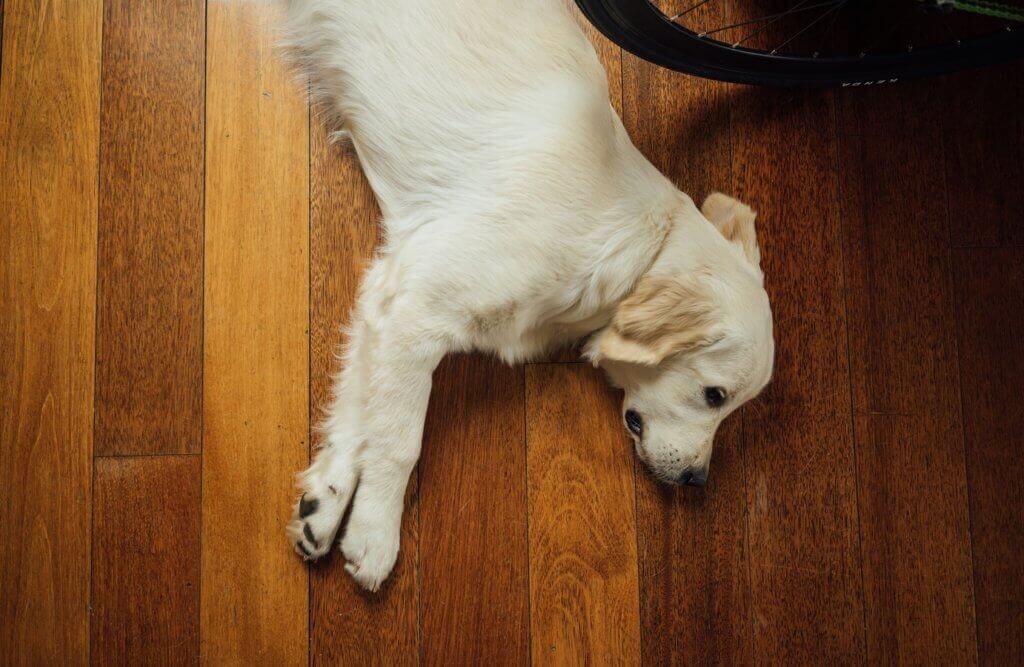
But, before opting for hardwood, consumers need to consider the downside of the product before they decide if it is the right flooring for them. Hardwood is very sensitive to humidity and moisture in the home and the slightest bit of water, if left untreated, can cause damage to the wood. Because of this reason, areas where water tends to get on the floor, like bathrooms, are not recommended for hardwood. Hardwood can also be quite noisy if on an upper level of a home when walked on.

When the decision is made to go with hardwood floors in a home, many factors will come into play in determining what the final cost will be for the project. The first significant impact on the final price is the type of wood used.

Popular Hardwood Flooring Options

• Hickory

• White Ash

• Maple

• Brazilian Cherry

• Red Oak

• Cork

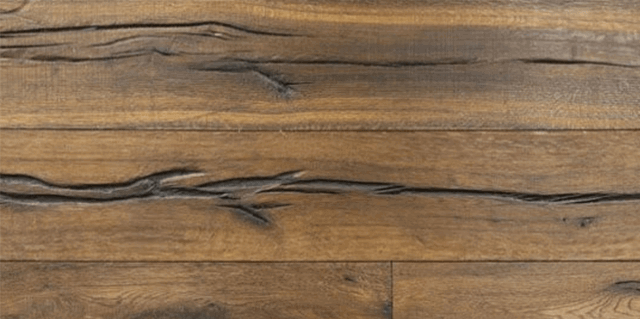
The looks all vary significantly between the types of wood as do the costs. Consumers need to shop around for the look and price that matches their needs.

The Cost of Hardwood Flooring Installation

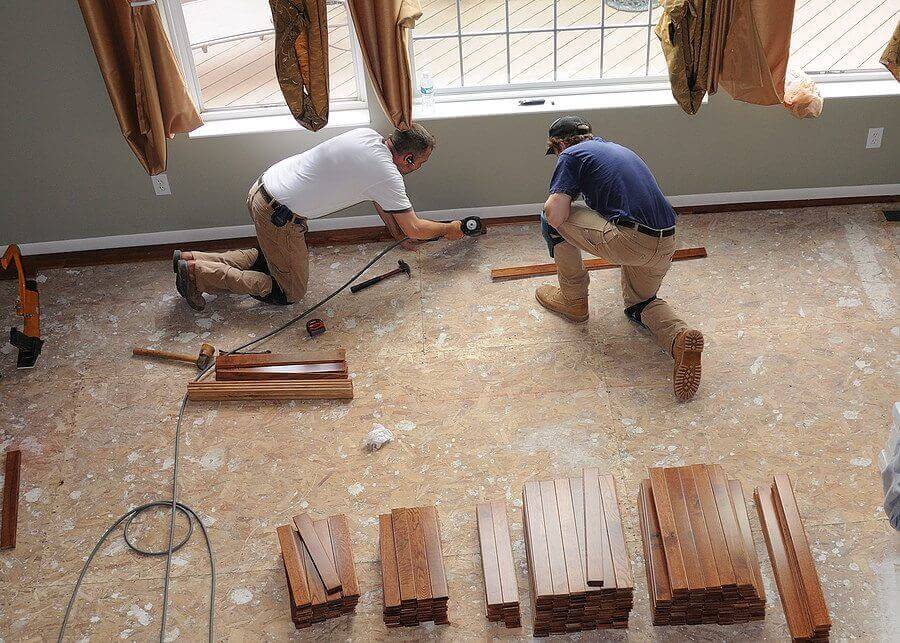
Another factor in the final cost of the flooring is the installation of the flooring. For people looking to save costs, the installation can be done by yourself with some help, but it requires fundamental carpentry skills and tools.

Tools needed include:

• Tape measure
• Staple Gun
• Variable speed drill and bits
• Hammer
• Table Saw
• Chop Saw
• Chalk line
• Safety goggles

If you’re looking to save the work and have the installation done professionally, you can expect to spend a little more. Carpenters and contractors are a large part of what make hardwoods expensive. Some retailers that sell the flooring may offer deals on installation, so shopping around is essential.

Some factors that can influence final cost are the distance to your home, the amount of work around electrical, plumbing or HVAC systems and any applicable permit fees for the flooring. If you want to know how to choose the best hardwood flooring, consult the experts today.

Categories
Hardwood Flooring Hardwood Maintenance

Danish Oil on Maple Flooring: Keeping Your Hardwood Beautiful

Once you’ve invested in high-quality, maple hardwood flooring to make your home more elegant and comfortable, you may want to consider applying Danish oil to protect your hardwood flooring from moisture (which can cause unsightly discoloration, rot, and deterioration). Using Danish oil on maple flooring is one way to be proactive about protecting the shine and beauty you so admired when your new hardwood floors were first installed.

What is Danish Oil?

Danish oil is an excellent product for finishing wood, comprised of tung oil or polymerized linseed oil. Because Danish oil dries hard to the touch, it provides a satin finish that is water resistant. Often it is used as a primer coat applied to bare wood before paint or varnish. Danish oil on maple flooring gives a lustrous sheen to hardwood without being glossy or slippery.

How to Apply Danish Oil to Your Floors

Applying Danish Oil on maple flooring is a relatively simple operation. It is similar to using a coat of varnish. Vacuum the floor first, then wipe it with a dry mop to remove any additional dirt or dust particles. You should avoid cleaning it with water or other liquid as this will prevent the wood from adequately absorbing the oil and may even change the color of the wood.

Soak a dry cloth in the Danish Oil so that it is damp, but not dripping. Apply it first to a small corner section of the floor as a test to see the results. Then rub your oil-soaked cloth into the maple wood, using a steady back and forth motion that goes with the wood’s grain. Use caution not to rub the wood flooring against the grain as this may cause unwanted rough spots on your floor. Wait about five minutes for the danish oil to be thoroughly soaked into the wood before removing any excess with a clean, dry cloth.

Go across the room, applying the danish oil plank by plank. Lighter sections of maple flooring may need additional applications of oil to better blend in with natural dark sections. When finished with your initial application, wipe up any oil that the floor has not fully absorbed. If can be helpful to use a buffing machine to assure uniformity of oil across all of the flooring surface. Do not walk on the floor or use the room for at least 24 hours, allowing the oil to dry completely. If you want a darker surface to your maple flooring, apply an additional application of Danish Oil.

The Benefits of Danish Oil on Wood Flooring

You’ll need approximately 1 gallon of danish oil to cover 600 square feet of maple flooring. But by following the above tips, your reward will be a maple hardwood floor that has cured to a hard satin finish. Applying Danish Oil does a beautiful job of preventing liquid and other spills from ruining your delicate maple hardwood flooring.

Categories
Hardwood Flooring Hardwood Maintenance

The Right Way to Use TSP on Wood Floors

Your hardwood floors aren’t going to clean themselves, and if you have troublesome stains, it can be challenging and annoying to try to clean your wood flooring. Nevertheless, there is a way to take the stains out without too much elbow grease: TSP.
TSP (trisodium phosphate), is a robust cleaning option that not only helps the stain stick to hardwood better, but it also removes grease, stubborn junk, and mildew from both painted and unpainted wood. When it comes to your wood flooring, you want the best clean. Here’s how to properly clean your wood floors with TSP.

Step 1: Gather Your Supplies

The first step to cleaning with TSP is just that: finding the right gear. You should wear rubber gloves and goggles to protect your hands and your eyes. Cover nearby flooring as well as tile or laminate since TSP can react adversely to other floor types. Remove all furniture from the room and use plastic sheeting to cover anything that cannot be removed from the room like fireplaces. Also, wear old clothing that you do not mind getting dirty.

Remember that TSP is a toxic and powerful cleaning agent. When you are using it to clean, you need to take precautions to keep pets and kids away from the flooring until it is fully dried, and you need to wear the correct gear to protect yourself while cleaning. You also want to gather the right materials.

To use TSP on wood floors, you want first to collect the following supplies:

  • Two buckets large enough for a gallon of water
  • Two soft sponges
  • Goggles
  • Rubber gloves
  • A wooden stirring stick (paint stirrers work)
  • TSP powder
  • Towel or terry mop

Step 2: Prepare Your TSP Mixture

Next, you’re going to prepare your mixture for cleaning. Grab two buckets about the same size. Fill the first bucket with a gallon of warm water while stirring in a ¼ cup of TSP powder. You will want to use a wooden stirring stick to mix this use to prevent plastic or metal from breaking down. In the second bucket, you are going to fill it with warm water about the same temperature as the mixture. For cleaning purposes, you are going to want to use a soft sponge to get the job done.

Step 3: Clean Your First Section of the Wood Floor

Grab your sponge and dip it in the solution of TSP. Very carefully you are going to wipe only a two-by-two-foot portion of the wood with the saturated sponge to help detach the mildew and other grime. You will want to clean in small sections just to make it easier on you.

Step 4: Rinse the Section of Wood You Just Cleaned

Take a second small sponge and drench it in the bucket of warm water only. Squeeze out the excess water in the bucket, and slowly wipe it over the area you just cleaned with the TSP solution. You want to ensure that you are thoroughly rinsing the wood.

Step 5: Repeat the Process Until You’re Finished!

Continue cleaning the entire floor surface as described above, one space at a time. Since TSP can be difficult to work with, take your time and avoid spills or mishaps. When  finished cleaning your floor, you need to dry the wood entirely with your terry towel or mop. Some people even choose to dry as they apply the TSP on their floors, just to keep too much water from soaking into the wood.

If you’re looking for the best product on the market for wood flooring, try MacDonald Hardwoods Easy Hardwood Floor Cleaner today.

Categories
Hardwood Flooring Hardwood Maintenance Under-Floor Heating

Fireplaces and Hardwood Flooring: How to Protect Your Investment

Hardwood flooring looks beautiful in many homes, but, being wooden, it is also susceptible to damage. One particular concern is fireplaces that are near hardwood flooring or in contact with it; not only does this represent a potential fire hazard, but sparks and bits of burning wood can also scorch and damage your hardwood floors. However, this doesn’t mean that you have to replace your flooring if it’s near a fireplace. Here are a few tips to help you protect the investment that your hardwood floors represent.1. Purchase a Hearth Extension

1. Purchase a Hearth Extension

Hearth extensions do exactly what the name suggests: they are placed outside the fireplace and act as an extension of the hearth, specifically to protect flooring from scorching and fire damage. They are often made of slate, brick, or stone, but you can also use hearth extension pads made of other non-combustible materials. Some homeowners choose to create a raised section of the floor with a surface of brick or stone, which can work for either traditional fireplaces or wood stoves.

2. Have a Working Grate or Cover

Another essential to protect your floors from fire damage is to have some grate or another cover for all fireplaces. The type depends on the specifications of your hearth, but it should, of course, be non-flammable. Also, although it must have openings to allow smoke to filter through, they should be small enough to prevent sparks or burning wood from falling through; otherwise you risk damage to your wood floors.

3. Don’t Overuse Fireplaces

While the material used to build fireplaces is of course designed to withstand heat, overusing fireplaces or over-building fires risks damaging the structure, which could cause damage to your flooring in the long run. Don’t keep a fire going for excessive periods of time, as extreme heat can melt even metal. Overfeeding your fire is of particular concern with a wood stove, as their enclosures are often smaller.

4. Only Burn Wood

Whether you use traditional fireplaces or a wood stove, burning only wood is another way to protect your floors. Other flammable materials, such as paper and plant matter, may cause fires to burn hotter and cause damage to your hearth over time; these more frequently send out sparks or potentially hazardous scraps. And, of course, never use grease, oil, lighter fluid or other highly combustible substances to start a fire, as this can present a danger to both you and your floors.

As long as you take precautions and follow these crucial pieces of advice, it’s possible to have beautiful hardwood floors in the same room as a fireplace. Make sure that if the wooden flooring is near any fireplaces or wood-burning stoves, you have a hearth mat or other type of barrier made of non-flammable materials. In addition, always start and maintain fires responsibly, burning only wood and never leaving a fire going for excessive periods of time.

Categories
Hardwood Flooring Hardwood Maintenance

This is What to Do Before You Install Hardwood Floors

Genuine wood is a hard-wearing and aesthetically appealing flooring choice for virtually any room. It features a high-quality appearance and is both attractive and durable. Hardwood also adds warmth and beauty to any room. Fortunately, if you are handy with do-it-yourself projects, you can install your hardwood floor. Below are some tips to help ensure your project is a success:

Gather the Proper Tools

You should collect the proper tools to prepare for the installation of a hardwood floor, and these include the following :

  • Plastic Wedges
  • Pry Bar
  • Knocking Block
  • Ratchet Floor Clamp

Once you have your primary tools in place and have selected a floor, you should prepare the room for the installation.

Eliminate Dust

Although it may seem like a minor issue, dust is a problem (unless, of course, you’re a fan of doing extra cleaning once your project is complete). The best way to contain dust is to seal off the room by covering the doorway with plastic and masking tape. You can also opt for plastic curtains or something referred to as a ”ZipWall” to ensure you contain any sanding dust.

Remove Doors

It is virtually impossible to correctly install a hardwood floor without removing any doors that lead in or out of the room. Carefully remove them and stack each entry under a separate blanket to avoid scratches. Take the doors to an entirely different area of the home, rather than trying to move them from one end of the room to the other during the installation process.

Remove Baseboards

Because the flooring should be placed under baseboards for best possible results, you should remove them and then reinstall them after you lay the flooring. Although it may seem more comfortable to allow them to stay in place, you will likely regret taking this shortcut after the fact.

As long as you are already changing the floor, you may even decide to install new baseboards, unless your current ones are unique in some way, which is probably not the case. Baseboards can also be cut with special saws and flooring inserted underneath, but attempting this as an unskilled worker is not a good idea.

Additional Preparation Tips

Do not lay wood tiles in areas where high humidity is expected, such as the bathroom, laundry room, or kitchens. Always refer to the manufacturer’s instructions regarding the highest level of moisture your floor materials can withstand. Learn more about humidity for wood floors.

Make Sure Your Subfloor is Stable

Wood should only be laid on subfloors that are stable and in excellent condition. If you think your subfloor needs work, or you suspect issues such as slab leaks, foundation abnormalities or other problems, seek the advice of a professional or you may live to regret the fact that you continued with the project, despite evidence of such issues. Jim Oursler of Granite Foundation Repair in Plano says:

“There are several reasons why your home’s foundation may crack. Common reasons include settling, poor drainage, and unstable soils. In the U.S., about 60 percent of houses are constructed on clay soil. Out of these, about 60 percent experience foundation issues.”

Although the tips above are beneficial for do-it-yourselfers, there are certain times professionals should install hardwood floors. If you are unsure that you have the skills to complete the project successfully, do not take chances with your home. Instead, hire skilled workers to ensure that the job gets done right. Whichever option you choose, the installation of a new hardwood floor is sure to add beauty and value to your home.

Categories
Hardwood Flooring Hardwood Maintenance

What’s the Difference Between Commercial & Residential Wood Flooring?

Commercial and residential floors are all susceptible to the same harshness, but because of the higher traffic in commercial setups, the wood flooring might need more attention than in a home. More people access a commercial building meaning that more pressure is exerted on the floor. Other than this, there is the likelihood of placing or even dropping heavy equipment on the floor and spillage. To ensure the floor remains strong and durable, different measures than those employed in a residential setup are needed.

The Need for a Stronger Floor

A commercial floor should be stronger than a residential one because of the amount of weight it is exposed to every day. Solid wood might be an excellent choice for the home floor but not ideal for commercial floors. A stronger alternative is required. Engineered wood flooring might be a better choice. It is stronger and can handle any amount of pressure even from heavy machinery. The wood is not made from one solid piece but multiple layers of veneers that make it more stable and strong. The wood does not expand quickly and can withstand harsh temperatures and humidity.

Commercial Flooring is Prone to More Moisture

Spillages and functions in the commercial building mean that the floor is prone to more moisture and humidity. Wood does not perform well in humidity or when exposed to too much moisture for a prolonged period. It will swell and start rotting. Floors made from engineered wood tend to withstand moisture and humidity more than solid wood. Its stability means that it expands and contracts less and does not swell.

Cleaning

Because of the higher traffic commercial flooring requires more cleaning than residential. Mud, debris, and spillages are common in a busy commercial set up. For this reason, the floor should be easy to clean. Sweeping and dusting are some the cleaning procedures you can employ. For stains, wipe with a wet clothe. There are detergents specifically made for wood floors you can use to clean occasionally.

Maintenance

Commercial floors require more care and maintenance practices than a residential floor. For this reason, a more stable material should be used. You do not want to change the flooring soon after installing it because it cannot withstand the pressure or it is too costly to maintain. One of the issues to consider is the ability to expand and contract when in different environments. This destroys wood floorings faster than any other cause.

Final Thoughts

There is a need for an engineered wood flooring to curb the effects of changing environmental conditions and moisture. When exposed to moist conditions, choose a surface finishing that is water resistant. You will also find that commercial and residential floors require different finishes. The commercial one can go for an acrylic impregnated finish that hardens floors but is not recommended for residential setups. The finishing is applicable in high-traffic areas. Wax and oil can also be applied to the finished floor in a commercial setup. These are just some of the differences you will encounter in commercial and residential floors.

Categories
Hardwood Flooring Hardwood Maintenance

4 of the Best Robotic Vacuum Cleaners for Hardwood Floors

Once upon a time, you had to use a broom to clean your hardwood floors. This wasn’t complicated, but it was very tedious and inefficient as it would scatter dust around the house. If you had allergies or pets, forget it – sweeping just wasn’t sufficient. Fast forward to present day, and there are so many options for hardwood floor vacuums, the list can be overwhelming at first. Below is a list of four of the best robotic vacuums for cleaning hardwood floors that will assist in keeping your hardwood floor free of dust, precisely the tough areas under furniture.

Why is a Robotic Vacuum Cleaner the Wisest Choice for Cleaning Your Hardwood Floors?

Are you curious why a robotic vacuum is the best choice? These machines can automate almost all of your home dusting chores. If you find yourself too busy to keep dust and allergens off your hardwood floor, then why not go for an alternative that would do the work for you. I’m not referring to hiring a house help – I’m talking about getting a robotic vacuum cleaner that will assist in cleaning hardwood floors with a push of a button without you lifting a finger. All you need to do is learn how to operate and maintain the machine. 

#1: Neato Botvac Connected

NEato Botvac Connected Robotic Vacuum Cleaner for Hardwood Floors

Amazon Price: $799

The D-shape of the Neato Botvac Connected robotic vacuum cleaner allows it to reach corners and edges in your house hence thoroughly cleaning hardwood floors. It is equipped with lasers that map your floor cleaning it in parallel lines at speeds four times faster than other robot vacuums. Sensors automate cleaning, allowing the machine to avoid obstacles in the house while doing its job. A powerful brush and suction unit clean your hardwood floor spick and span. As a bonus, WiFi connectivity allows you to control the cleaning through a mobile app.

#2: iRobot Roomba 860

iRobot Roomba 860 robotic vacuum cleaner for hardwood floors

Amazon Price: $499

The iRobot Roomba 860 is ranked among the best robotic vacuum cleaners for hardwood floors. It is equipped with iAdapat navigation feature and Aeroforce vacuuming technology making it capable of cleaning all types of hardwood floors. An advanced range of sensors and software ease its mobility around your floor and can clean almost all parts of your home (including your staircase and wall edges). Using debris extractors rather than main brush means the Roomba requires less maintenance than other models.

#3: The bObi Classic

bObi Classic Robotic Vacuum Cleaner for Hardwood Floors

Amazon Price: $295

The bObi Classic is designed to clean easily and faster. It operates with three buttons name GO, Juice, and Waffle. Go buttons initiate the normal cleaning mode with the use of proprietary algorithm to clean the floor. Use the Waffle button when you want to clean a small spot such as milk, sugar, or chocolate powder. Instruct the robot to resume its inactive charging position with the Juice button. Remote control operation schedules a cleaning program with your choice cleaning mode. This machine is highly recommended for individuals with allergies and asthma because it has HEPA filters that trap micro dust particles and both a mopping and a strong suction function for quiet cleaning.

#4: iRobot Braava Jet 240

iRobot Braava Jet for Hardwood Floors

Amazon Price: $199

iRobot’s Braava Jet 240 is the smallest in size and least expensive among robotic vacuum cleaners for hardwood floors. It’s best designed to sweep up spills on the hard floors and suction it dry. The battery lasts quite a long time before requiring a recharge. The best part is that it’s capable of using water when it comes in contact with a surface that’s not a wood floor. How’s that for intelligent?

Learn how to select the best hardwood floors for your home.

Categories
General Home Improvement Hardwood Flooring Hardwood Maintenance

Best Moisture Barriers for Hardwood Flooring

When you are preparing to lay down your hardwood flooring, you want to ensure that you are getting everything right. Let’s face it; you don’t want to put in all this time and money on your beautiful hardwood floor and then have it messed up in a few months from buckling. Since moisture is the number one enemy of hardwood flooring, you should do all you can to prevent moisture from slipping in unannounced.

By adding a moisture barrier, you can protect your hardwood flooring and protect your investment in that flooring. While many choose to have a professional lay the flooring, some want to do it themselves. For all you DIYers, here is a little more information about the different flooring types and which kind of barriers are suitable for them.

Floating Floor Barriers

Floating floor barriers are just like the name implies. They are barriers that are made to protect floating floor types like laminate or tile. Since there are wooden tiles and laminate flooring nowadays, this is an option for many people. These barriers are typically made from plastic to protect against moisture. The plastic is simply laid before the flooring is placed on top.

If you intend to use wood subflooring, you do not need a floating plastic barrier because the subflooring needs room to breathe. Since your flooring will not be nailed or glued down, your barriers do not have to be thick, either. However, if you have other subflooring like cement, you should use plastic or paper to protect against the moisture that often accumulates in these conditions.

Nailed Floor Barriers

When you are installing nailed flooring, you want a barrier that will protect the subfloor as well as the flooring. By installing plastic sheeting on top of the dirt under the subfloor, you can protect your subflooring from getting too much moisture. Between your subfloor and your new hardwood, you can lay a special felt paper that helps to eliminate moisture from getting to the topmost layer of flooring.

Since you need to purchase two different types of protection in this situation, your budget might need to be raised to accommodate the extra expense. You can purchase this felt paper and plastic at most stores that sell flooring, like hardware stores or home improvement stores. Most stores will be able to cut the plastic and felt paper to your required length, making it easier on you. If you are unsure about what is needed for a project, check with a reputable flooring dealer first.

Glued Floor Barriers

Glued flooring is often installed to concrete subfloors. These subfloors typically gather a lot of moisture especially in moisture-rich areas where humidity or heavy rain is common. If you are preparing to glue down your wood flooring to a cement subfloor, you will need a heavy moisture barrier product. These work to protect your subfloor from sweating during humid days or accumulating water from heavy rain or spills.

The most common barriers for glued flooring is epoxy or resin to help seal out the moisture and prevent more from soaking through. You can buy the correct epoxy at home improvement stores or hardware stores. Usually, the epoxy is laid with a trowel, but you can DIY it by using special tools to lay the epoxy. Remember to give it plenty of time to dry completely before laying your flooring.

Conclusion

Some flooring comes with a built-in barrier that is great for different floors, especially floating flooring. You can even purchase barriers that have noise absorption like cork, which might even help to insulate your flooring. Before you purchase flooring or barriers, you should check for built-in barriers and also look at the subflooring to see which would be the better option for your home. If you are unsure take pictures and consult a reputable flooring professional to avoid expensive mistakes and learn more about choosing the best hardwood floors

Categories
Hardwood Flooring Hardwood Maintenance Home Decor

The Best (and Worst) Rooms for Hardwood Flooring

What are the best rooms for hardwood? Is there anywhere it shouldn’t be installed? Hardwood flooring is classic, beautiful, and allergy-friendly, but it should not be ubiquitous! As you plan to upgrade your floors, here’s where hardwood flooring belongs, where it should be banned and why each is true. 


The Best Rooms for Hardwood Flooring

You’ll love the rich beauty of wood floors in these rooms, and you can install them without performance worries as long as you take proper care of your floors.


Hardwood in the Living Room? Yes! via @macwoods

Living room: Hardwood communicates the lifestyle homeowners enjoy sharing when hosting gatherings of family and friends. It stands up well to traffic, even if you forego a no-shoes policy when entertaining. The occasional oopsie spill won’t pose a threat when cleaned up promptly. 


Hardwood in the Dining Room? Yes! via @macwoods

Dining room: Whether your dining room is quite formal or has a casual vibe, there’s a hardwood flooring style that will enhance your room’s design maintaining durability over time. Adding soft pads to your chair and table feet reduces noise while protecting the hardwood finish.


Hardwood in the den? Yes! via @macwoods

Den: Hardwood floors accented with a large, comfy rug create a calm and cozy setting for unwinding with a book, casual conversation or a favorite show. It is safe to set your bookshelf on top of hardwood floors, and, as long as you don’t spill your wine on the floor, it will likely remain stain-free. 


Hardwood in your home office? Yes! via @macwoods

Home office: New Worker Magazine recently discussed the “increase in productivity attributed to hardwood floors,” and quoted TV producer Paula Rizzo saying, “Hardwood flooring generates positive emotions that help boost productivity.”  So, you never know! 


Hardwood in the Master Suite? Yes! via @macwoods

Master suite: Resisting the temptation to refer to our comments on the home office, we’ll say the obvious, that hardwood is rich, appealing and romantic. Throw in a toe-snuggling rug, love seat, and Barry White music, and a bodacious boudoir takes shape.


The Worst Rooms for Hardwood Flooring

Because of hardwood’s superior qualities, some have been enticed to install it everywhere… and have sorely regretted their rash choice! That is to say that you can install hardwood flooring in these rooms, but we would never recommend it.


Hardwood in the Bathroom? No! via @macwoods

Bathroom: Water is your floor’s nemesis. The results of letting these two face-off in the same room will not be pretty; neither will the bill to repair or replace. If you throw caution to the wind and choose hardwood for the bathroom, plan to repair and replace your floors often.


Hardwood in the Laundry Room? No! via @macwoods

Laundry room: If you never throw wet towels on the floor, never hang clothes to dry, never spill liquid detergent or cleaning fluids, can promise your clothes washer will never leak… oh, and the important one: you love to entertain in the laundry room,  go with laminate or tile in this room. Please!


Hardwood in the Foyer? No! via @macwoods

Foyer: “Mom and Dad, I want you to meet Tyler. He’s a cook at Taco Clown.” Hello hugs and goodbye kisses are exchanged here; The foyer or entryway is highly regarded space. But, NOTHING good happens to hardwood here: gritty sand is tracked in, moisture from wet shoes seeps into cracks… 


What About the Hardwood Flooring in the Kitchen?

Should You Install Hardwood Flooring in the Kitchen? via @macwoods


Kitchen: Homeowners who love hardwood flooring, especially those with open floorplans. Everyone wants to know if hardwood is OK for the kitchen.

We say, “Go for it… with a couple of caveats.”


  • Consider engineered hardwood because its plywood base layers handle moisture better than solid hardwood
  • Clean up spills promptly, like an NFL lineman diving on a fumble
  • Seal your floors with the regularity recommended by the manufacturer or installer
  • Never use a steam mop on hardwood (wherever it is installed)

Final Thoughts

Hardwood has a place in every fine home, but just not everywhere for everyone. Practicing these tips for the right and woring rooms for hardwood flooring should produce a fulfilling long-term relationship with nature’s most beautiful floors. Now, learn how to choose the best hardwood flooring for any home

Categories
Hardwood Flooring Hardwood Maintenance Pets

Pets and Hardwood Flooring: Conflict or Coexistence?

Can pets and hardwood floors coexist? Well, both have been mainstays in homes for centuries, and experience has produced a wealth of wisdom about the pets vs hardwood conundrum. These tips for integrating pets and hardwood flooring will keep you happy, your floors looking fantastic and your pooch from sporting that sheepish, “Uh-oh, I’m in the doghouse now” posture.

Choose Hard Hardwood

That sounds like a brief stutter, but we mean exactly that. The hardness of hardwoods varies quite a bit on the Janka Hardness Test that engineers use to measure the force needed to dent wood with a small steel ball. As you see, some jobs are more fun than others.

The Janka rating of each flooring is usually listed in the marketing materials for hardwood sold in stores and online. Here’s a brief sampling of the hardness of available hardwood floors. The higher the Janka rating, the tougher the wood is and the better it will stand up to pet’s nails and potential stains, chair feet and dropped cast iron pans.

Janka Hardness Test for Hardwood Flooring
Original source: What is a Janka Rating and How Important is it?

If your floors are already installed, the softer your wood species is, the more precautions you need to take.

Add a Coat or Two of Finish

Keeping scratches out of the wood is the key to delaying the need for refinishing your floors. Your local flooring specialist will recommend the right coating or tough sealer that won’t change the appearance of the wood.

Now that we’ve prepared the floor for the introduction of a furry friend or two, these methods for how to integrate pets and hardwood flooring will make the mix pleasant.

Keep Pets Off Hardwood Until House Trained – or if Unwell

Until your cat decides the litter box is not beneath its dignity (rabbits will use a box too) and the dog learns to hold it until you open the back door, keep them off the hardwood. Use gates and closed doors for location control. Unpleasant warning: If any of your critters pee, poop or puke on the floor, clean up the mess promptly with a mild detergent solution, rinse with a damp cloth and dry the floor completely to prevent staining and moisture damage.

Trim Sharp Claws

The heavier your pet is, the more important it is to keep their nails trimmed. Squaring off sharp claws is more important than cutting them short, so trim gently. Note that rabbit nails get very sharp quickly, so frequent trimming might be necessary.

Reduce Romping on Hardwood

Hardwood will age fast if you frequently throw a Frisbee for Fido to fetch on it. Discourage kids from frolicking with the pets too. Excited kids and pets running, jumping and skidding around corners on the hardwood are… hard… on… the… wood. Outside is best for this type of play.

Improve Their Comfort Too

Perhaps you’ve placed a throw rug where you stand on your hardwood for long periods during duty kitchen duty or food preparation. To encourage your pets to be your kitchen companions, be sure to place a rug nearby for them. Just a little bonus tip to help your pets feel at home on hardwood without causing troubles for you.

For more tips on protecting your space while making your pets feel at home, check out this puppy-proofing guide from Apartminty.

Skip to content