Categories
Hardwood Flooring

2014 in Hardwood Flooring Take Us Back to a Bygone Age

Hardwood is always a solid choice when you’re looking for flooring that will withstand the test of time.  But you also want a floor that fits the look of your home, something that suits your particular sense of style here and now.  These days, this is easily achieved.  With the huge variety of finishes, stains, plank sizes, and species of hardwood now available, you get the best of both worlds—versatility and longevity.

So what’s trending in hardwood flooring?  Well, while traditional hardwood floors never go out of style, there are some interesting alternatives popping up in design and trade magazines of late.

A hearkening back to old school, vintage styles can be seen in everything from clothing to brand logos right now, and home design has not been left behind.  All over the country, people are eager to create a more natural, “authentic” look and feel in their homes and businesses, recalling a time when the world around us had fewer moving parts.  Designers are finding that hardwood floors (and walls and ceilings) suit this purpose perfectly.  After all, what’s more natural and “real” than wood?

The Natural Look

bella-cera-estate-collection-300x200
From the Bella Cera Estate collection 

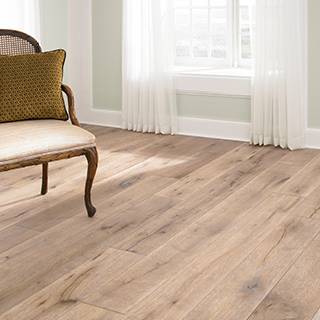
Getting back to basics, folks are choosing species like pine, maple, and hickory that have naturally rich grains and color, and are dressing them up very little, accent the woodsy origin of the floor.  The high gloss finishes popular in the earlier part of last century have given way to satin and, in some cases, even matte finishes.  In some cases, people are even opting for oil rather than polyurethane finishes to keep the grain of the wood as exposed as possible.  Today’s floors are designed to retain and display as much of their natural beauty as possible, to stunning effect.  Wood products are now available with gloss levels as low as 30%, and even lower-luster finishes are expected as the trend continues.

Wider Planks

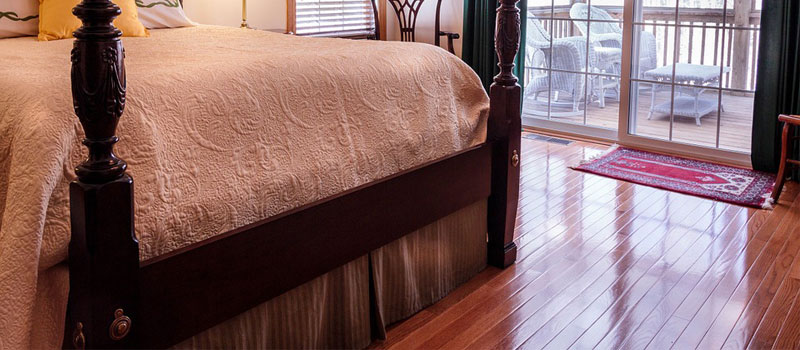
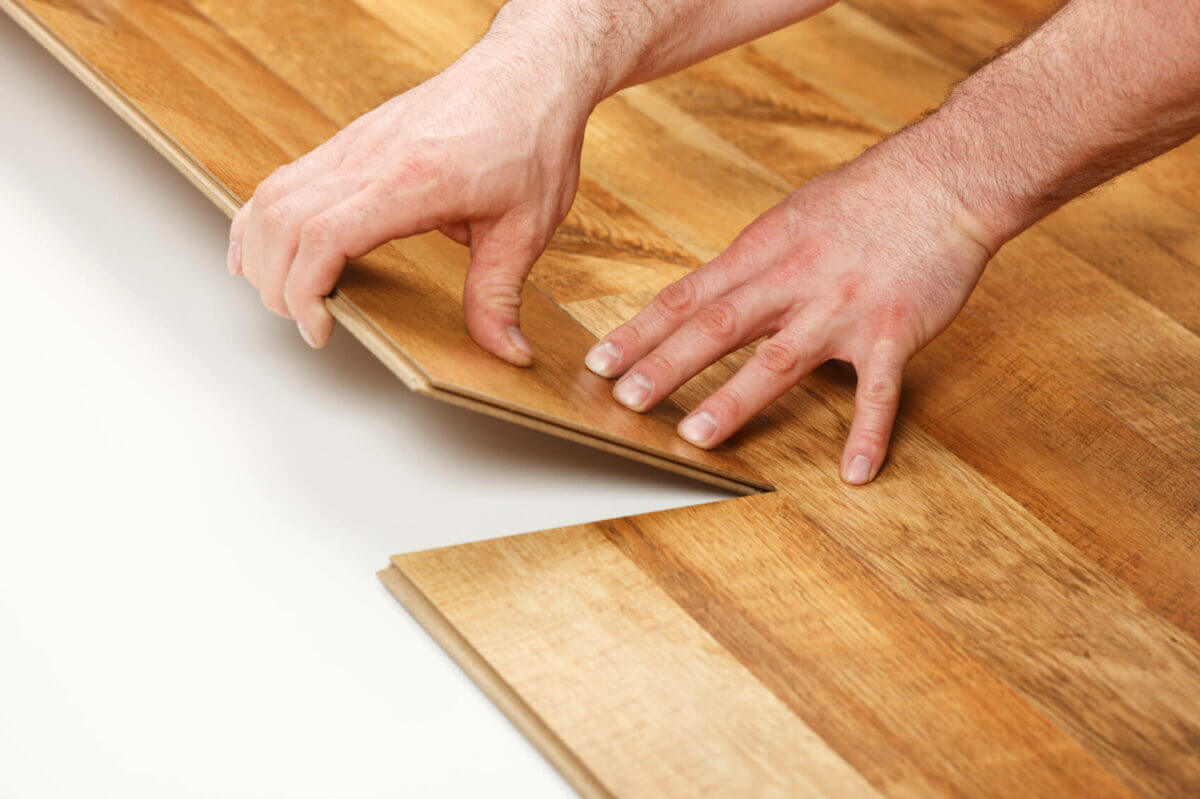
Another way folks are showing off the grain in their wood is by opting for wider planks than the 2 1/4” to 3 1/2” boards used in most homes through the 20th century.  5”, 6”, or even 7” planks are becoming common in modern homes and flooring is even becoming available in planks as wide as 10” and 12”.  In addition to displaying the natural beauty of the wood, the wider planks tend to open up smaller spaces, a desirable quality in cramped city dwellings.  They also create a smoother, less interrupted look, which has been enhanced in some homes by using boards as long as 6 feet, producing an even smoother-looking floor with few seams.

Chippenham-Large-176x300
Chippenham from the Castle Combe Collection 

The Long-Standing Look

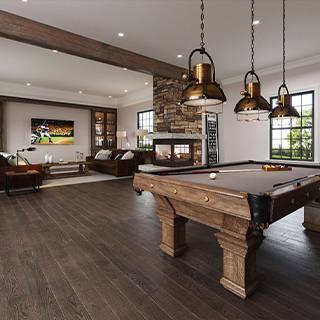
In many spaces, from 18th-century townhomes to modern boutiques, owners want to create or enhance the feeling of a place that has been around for a while.  Consequently, distressed and hand-scraped hardwoods continue to gain in popularity.  Recalling a time when hand-scraping was the only option for an evening out a floor, planks can now be purchased from the factory “pre-scraped” and installed like any other hardwood floor.  Of course, for vintage purists, it is still possible to get a floor scraped by the hands of actual people, but this is a very labor-intensive and accordingly expensive process, and since so few people can tell the difference, few consider it worth the extra time and expense.

Wire-Brushed Woods

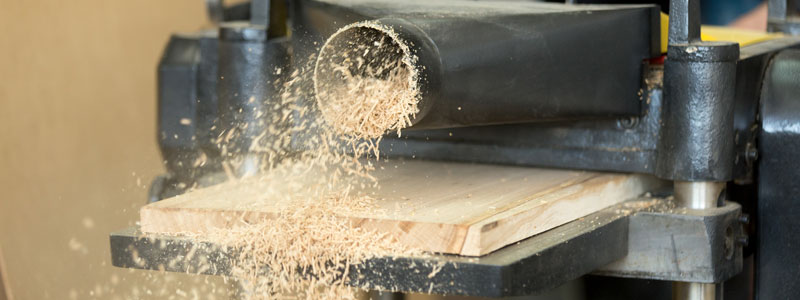
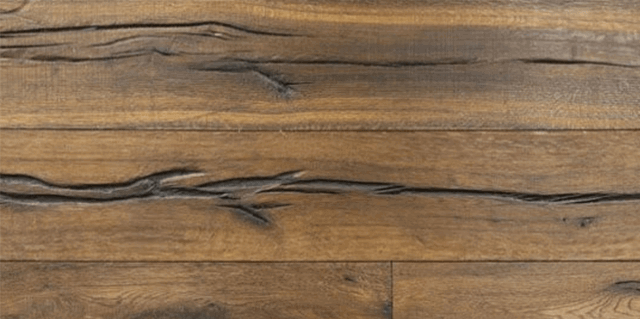
One of the ways boards are sometimes distressed is by a method called “wire brushing”.  Just what it sounds like, the technique uses a wire-brush to scrape off the soft top layer of the wood, leaving tell-tale marks that at once make the wood look pleasantly worn and less likely to show chips, scratches, and scrapes.  Plus, wire-brushing leaves only the hardest wood exposed, revealing more of its natural grains and texture.  It’s no wonder, then, that wire-brushed wood is on the rise—it provides a natural and vintage look all at once.

Reclaimed Wood

One surefire way to achieve the vintage look is to use wood that is actually old.  In many cases, the wood used is flooring, usually pine, oak, or maple that has been removed from an older home gently enough that it can be refinished and repurposed.  In other cases, the wood may come from an old barn or farmhouse, wood barrels, even salvaged logs.  This wood tends to have not only a more “broken-in” look, but, because of its age and changes in milling practices, it will often have more knots and heavier graining than new wood, as well signs of its previous life, such as nail markings and fading, all of which give it a unique character that many are finding irresistible.  Plus, it’s a great way to keep wood out of a landfill and conserve natural resources.
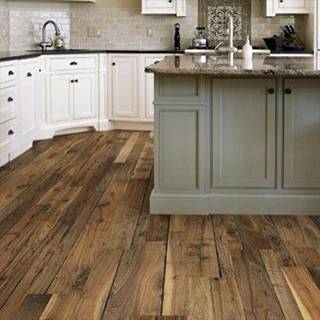
Varied Board Widths

When wood first became a common material for flooring, many centuries ago, resources were fairly limited, and boards of varying width were sometimes used because that was what was available.  These days, varied width boards are used to recreate this homey, old-world feel in new and remodeled homes.

Color

The one area where things seem to be veering away from the old days is color.  While these three trends in staining and finishing are by no means new, they have rarely seen the popularity that they do today.

Gray Tones

This is a preference that began on the beaches of the West Coast.  It has now reached the East Coast as well, where it has been met with equal if not greater enthusiasm.  Most successful on maple or birch floors because of their close-pored cellular structure, the gray “stain” brings out the grain and texture of natural wood.  Achieved with a combination of whitewash and ebony stain, its popularity probably stems from the trend toward natural and understated design.  Until recently, it could be rather costly to finish floors in this way because it was only available as an on-site option and could be quite difficult to do properly.  But with its rising popularity, more and more manufacturers are offering gray prefinished options.

Lime-Washed Woods

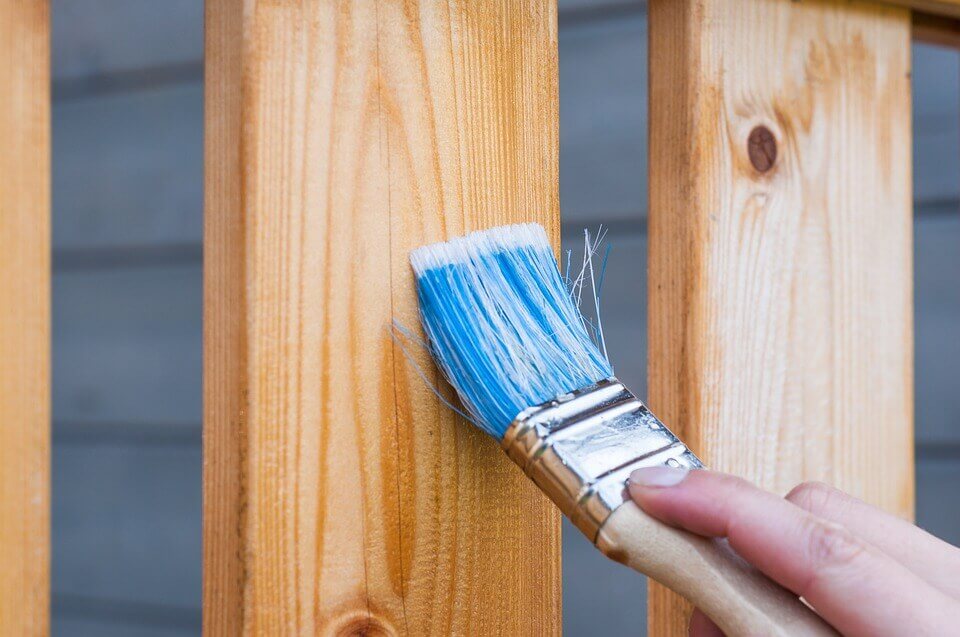
Lime washing is actually a very old technique that originated in high-end European flooring in the 16th century to protect against woodworm.  Originally, this involved washing the wood with a mixture of lime (the mineral, not the citrus fruit) and water, the by-product of which was a soft, white-washed appearance.  These days, a much less stringent liming wax is used, but the visual effect is the same—a sort of breezy, coastal feel perfect for brightening a room subtly and naturally.
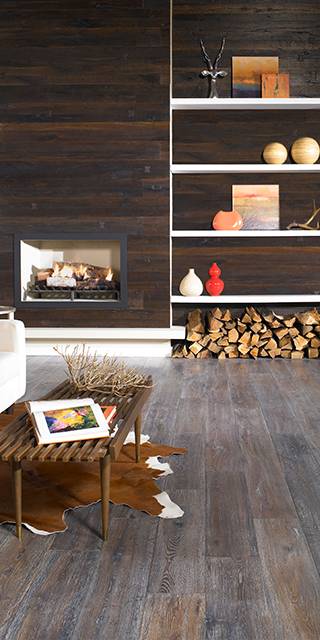
Darker Stains

Those seeking a more modern, dramatic look that maintains the class and respectability of traditional hardwood have started opting for darker stain colors like rich, contemporary ebony, warm and dark Jacobean, or deep, red Royal Mahogany.  Usually applied to darker woods like oak, cherry, and walnut, these stains create a sleek, upscale look.

For more insights on how designers are using hardwood, check out our recent survey of designers from across the U.S.

Categories
Hardwood Flooring

How does a log become a floor?

If our post in May about where wood for flooring comes from left you wondering, “But what happens next?” fear not—your long-awaited answer has arrived.  In that post, we explained how a tree becomes a log and how this is done while still preserving our forests.  Now, we’ll tell you how a log becomes your hardwood floor.

Once the right logs have been selected and safely harvested, they make their way, usually by truck and sometimes train, to the saw mill.  These days, most saw mills, especially the ones that mill wood for floors, are highly automated and use sophisticated machines to transform round logs into flat boards.

STEP 1:  Debarking

debarked logs
Logs waiting to become lumber at the Hull Oakes Lumber Company in Oregon

The first machine the log meets is the debarking machine.  It does exactly what it sounds like it would do—it removes the bark from the outside of the log, from one end to the other, all the way around in one continuous motion.  In most mills, the bark is collected and used as fuel in the kilns used to dry the wood.  But we’ll get to those later.

STEP 2:  The first cut

After the log is shaved smooth, it rolls onto another machine, where an expert or, in many cases, a laser, determines how the log should be cut to produce the best and most usable boards.  Once this is determined, the first cut is made, creating one flat side.  The strip that has been sliced off is either sent to the chipper or, in some mills, sent to another machine to be made into something more delicate like crown molding or trim.

STEP 3:  Slicing

As we mentioned in our post about floor movement, wood for lumber is generally categorized in one of three ways—plainsawn (flatsawn), riftsawn, or quartersawn—depending on the cut of the wood.  This does not mean, however, that there are only three ways to saw a log.  In fact, there are some cuts that yield more than one kind of board.  The classification is based on the angle of the grain once the board is cut, and each yields a board with a distinctive surface pattern.

In some cases, for instance, the log is sawn flat across from the first flat side to the bottom.  This will yield several boards of each type.  If the goal is to produce mostly plainsawn boards, the log will be turned 90 degrees after the first few cuts to keep the grain at the correct angle.  When more quartersawn or riftsawn boards are needed, the log may be cut from four “corners” of the log, yielding some riftsawn and some quartersawn boards or may be cut at an angle from the outside edge to produce only boards with a specific grain.  Each of these sawing methods produces progressively fewer usable boards per log, which is why rift- and quartersawn boards tend to be more costly.

Plainsawn boards are identifiable by the familiar “cathedral” pattern on their surface and by the fairly horizontal grain when viewed from one end.

 hemlock-endgrain-plainsawn plainsawn White-oak-wood-specie1-300x300

The grain of riftsawn boards is more diagonal, about 30-60 degrees from the face of the board.  The surface of these boards tends to display a narrow, straight, and relatively consistent grain pattern with few irregularities.

hemlock, rift 1 end grain closeup s25 plh RIFT WHITE OAK

Boards with grain 60-90 degrees from the surface are called quartersawn (because they are often produced by first quartering and then sawing a log).  These yield boards with very distinctive markings on the surface called “figure” or “flecks”.  These are much more prominent in certain species than in others.

quartersawn_endgrain_marked  cherry, misc japanese flowering 1 quartersawn surface s50 plh

All three of these “cuts” can be used for hardwood flooring and, in some instances, you will see all three in one floor.  More often, though, a hardwood floor will be made from either plainsawn or a mix of rift-and quartersawn boards.

STEP 4: Trimming

Now the logs are the right thickness and roughly the right size, but they may still have some rough edges.  Until, of course, they get to the machine number four, the edger.  Named as descriptively as its debarking brother, the edger does exactly what one might think—it slices the edges of the boards to create square corners and standard sizes.

STEP 5: Customizing

Once the boards are of a desired width, they go to a rough rough knot saw where major defects are removed.  It also cuts excessively long pieces down to more usable lengths.  The sawyers that operate these machines are careful to choose cuts that will produce the best yield.

The second machine in this part of the process is the sidematcher (sometimes an endmatcher), which planes the boards to an exact thickness and creates the tongues and grooves that will enable them to fit together so precisely.

STEP 6: Grading

Here in the U.S., logs are graded into four categories: Veneer, the highest quality, and Grades 1, 2 and 3.  Veneer grade wood is essentially free of defects and considered of high enough quality to be used for surfacing high-quality furniture, etc.  Grade 1 lumber is typically used for furniture, cabinets, and, sometimes, flooring.  More commonly, hardwood flooring is made from Grade 2 or 3 lumber, while Grade 3 lumber is set aside for use in pallets and similar products.

STEP 7: Drying

800px-Photograph_of_Worker_Piling_Two-by-Six_Red_Pine_Lumber_-_NARA_-_2128845
Lumber out to dry at a sawmill in Minnesota in 1940.
Though most lumber is stacked by machines these days, the finished piles look very much the same.

As the lumber is graded, it is separated onto pallets which are then either set outside to pre-dry for several months or put directly into a kiln.  Depending on what the wood is to be used for, the wood will remain in the kiln, typically at temperatures of 100 to 180 degrees, until it reaches a specific moisture content between 6 and 9 per cent.  For hardwood floors, the moisture content will be on the lower end of this range.

STEP 8: Finishing

Once the wood is dried, it leaves the mill, either to be sent to a distributor or to a hardwood floor manufacturer.  If the floor to be finished onsite, this is the last step before it reaches its final home.  If it is to be pre-finished (factory finished), it will go first to a flooring manufacturer, which will apply a unique polyurethane finish and whatever stain may be desired.  From there it will be sent to a distributor like MacDonald hardwoods, which will make sure it finds a good home.

Image credits:  Debarked logs, wikimediaRiftsawn surface“MountainAshFloor” by Mark Anthony Boyle; quartersawn surface, hobbithouseinc.com

Categories
Hardwood Flooring

Hardwood Finishes, Part 2: Non-Urethane Finishes

As promised in our post last month, in this post, we will look at some of the basic properties of non-urethane finishes, including penetrating sealers, wax finishes, and some of the surface finishes like shellac and lacquer that were popular before the advent of polyurethane finishes.

Penetrating Sealers

Since a natural look for wood floors has been coming back into style, let’s start with the finishes that are designed to protect wood while maintaining as much of its natural appearance as possible.

Most penetrating sealers have a base of either tung or linseed oil, which are both plant derivatives.  There is also variation called “Danish oil”, which is a mixture of tung oil and varnish and is a bit more durable. These solutions fill the pores in the wood, bonding with the cells and then hardening as they dry, strengthening the wood’s surface.  This means that, when you look at the floor, you are actually looking directly at the wood itself, modified though it be at a microscopic level.  This is appealing if you are going for a natural look.

Of course this also means that wear occurs directly to the wood, rather than to a protective coating as with surface finishes.  However, because the surface is less “polished”, the effects of heavy traffic tend to be less apparent and there is less likelihood of chips or scratches, which can also be repaired more easily.  Additionally, restoring a floor finished in this manner can in some instances be as simple as applying another coat of the same sealant.

whats-on-your-floorPenetrating sealers are available with or without stain, but it should be noted that even those without stain will change the color of the wood somewhat, as the oils used in the sealers have a natural hue.  You also have the option of applying the stain of your choice prior to applying the sealer.

With a penetrating sealer, the highest gloss you can expect is a satin finish.  You can, however, apply wax once the floor is sealed to achieve a pretty high gloss.  Of course, once you do this, the degree of maintenance required increases significantly, as wax tends to attract and trap particulates and requires frequent rejuvenation.

Wax

Like penetrating sealers, wax finishes bond with the cells of the wood and harden, but they also form a layer of protection over the surface of the floor, which does a fairly good job of protecting the wood from normal moisture.  Also like the sealers, these finishes can be applied over a stain and tend to have a slightly amber tint, regardless.

Wax has been used to beautify and protect hardwood floors for centuries and is still common in older buildings where there is a commitment to maintaining the original flooring.  As mentioned above, it requires quite a bit more maintenance than more modern finishes, and, like penetrating sealers, wear impacts the wood directly, rather than a hard protective coating.

Though a wax finish can be effective in protecting wood from moisture, the finish itself tends to discolor when exposed to spills, requiring the area to be buffed and sometimes recoated.  Any owner of a wax-finished floor will generally always have wax on hand, as wax floors, which are especially susceptible to scrapes and scratches, need to be recoated and refinished much more often than floors with other finishes.  Fortunately, wax finishes are fairly inexpensive, low odor, and easy to store, usually coming in the form of a paste that is rubbed into the wood and buffed.  Periodically, the layers of wax that build up over time will also need to be scraped off down to the bare wood and the finish applied anew.

Varnish

Though you will sometimes hear the word “varnish” used to indicate anything used to seal wood, varnish is in fact a specific product based in oil or, in modern times, resin that was particularly popular as a finish for hardwood flooring during the 1960s era.  Varnish was more resistant to wear than its contemporary, shellac, but proved no match for polyurethane and fell out of favor as urethane-based finishes became widely available.

Varnished flooring can be found with both matte and glossy finishes and tends to show more ambering over time than other surface finishers.  People liked it because it was inexpensive and could be tinted a variety of colors.  Unfortunately, compared to what we are accustomed to now, it scratches quite easily and quickly shows signs of wear.  This is a particular problem because worn or damaged areas cannot be repaired easily without leaving visible lines where the old meets the new.  It is also somewhat difficult to apply and emits a fairly high volume of volatile organic compounds (VOCs), which are unhealthy for people and the environment.

Shellac

Shellac is a resin made from secretions of the female Lac bug, native to the forests of India and Thailand.  The resin comes in many different colors, all orange and brown in hue, and is sold as flakes that are dissolved in ethanol.  The solution is then brushed on to create a high-gloss finish.  Though shellac is still a popular method of finishing wood pieces like furniture and musical instruments, it is rarely use on floors any longer because it is highly susceptible to water damage and, like varnish, is not as durable as urethane-based surface finishes.  It is, however, quite inexpensive and easy to apply and does not tend yellow like other surface finishes.

Lacquer

Like shellac, lacquer has traditionally been used to produce a high-gloss finish with any one of a variety of tints.  Because it dries very quickly, it is typically applied with a sprayer rather than a brush, to ensure more even coating.   Unfortunately, lacquer tends to be brittle and scratches easily, so it is rarely, if ever, used for flooring these days.  Additionally, lacquer finish, which is made by dissolving nitrocellulose or other cellulose derivatives and plasticizers in a mixture of solvents, has high levels of VOCs and tends to emit hazardous fumes.

There are, of course, other options like acrylic impregnated and epoxy finishes, but these are primarily used for commercial purposes like, you know gyms and malls, where literally thousands of people will be walking on them and very few will be stopping to appreciate the beauty of the wood flooring.  For our purposes, the finishes covered here and in our previous post should give you a good idea of what’s out there so that you can make an informed decision about how to finish your new floors or how to care for the floors you already have.  And, as always, our hardwood experts are always happy to answer your questions.

Categories
Hardwood Flooring

Hardwood Finishes, Part 1: Urethanes

Finish is a major factor when it comes to both the appearance and the maintenance of your hardwood floors. Whether you are installing a new floor and trying to choose the right finish or are getting familiar with a hardwood floor in an older home, having a basic understanding of what’s out there can be a big help.

For a long time, the trend in the U.S. was toward high-gloss floors, an effect achieved either by frequent buffing and waxing or by specially formulated urethane coating.  Nowadays, more natural looks have gained popularity, as have hand-scraped and distressed effects, and satin and matte finishes, better suited for these, have become more common.

There are basically two categories of hardwood finish—penetrating sealers and surface finishes. The first, as can be guessed by its name, essentially soaks into and bonds with the wood, strengthening its surface. The latter, as you might assume, forms a hard protective layer right on the surface of the wood.

Since surface finishes, in particular polyurethane finishes, are the most common in modern homes, we’ll discuss those first. But not to worry, we’ll get to the less common finishes in Part 2.

Helpful note: The term “polyurethane” refers to any material that incorporates a number of chemicals from the urethane chemical group. All urethane-based finishes fall into this category. So, though some labels may use the term “urethane” and others “polyurethane”, they are, for our purposes, one and the same.

Polyurethane finishes are especially appealing to homeowners because they are highly resistant to moisture, traffic, stains and spills.  They tend to have a longer life than other finishes and are generally quite easy to maintain. Of course, this durability comes with a price—when it does finally come time to revive a surface-finished floor, a full refinish is usually required, involving sanding the entire floor down to fresh wood and beginning anew.

Floor finish

The variety of options for surface finishes in general is quite a bit broader than it is for other finishes, and this holds true for urethane finishes as well.  For one, while other finishes can only be applied onsite once a floor is installed, a polyurethane finish can be applied onsite or can be applied by the manufacturer before delivery.
Though factory-finished flooring can initially be more costly, modern factories often make use of aluminum
oxide in the finishing process, rendering finishes that are exceptionally durable, some guaranteed for 20 years
and longer. Thus far, nothing that can be used for onsite finishing can even come close.


As the term implies “surface finish” implies, polyurethane finishes coat the surface of the boards, creating a thin but tough layer of synthetic resin that protects the floor. They can range from glossy to matte according to your preference and are colorless, though some may slightly darken or warm the natural or stained color below and can take on a slight amber tint as they age.  There are currently four varieties of urethane finishes that can be applied onsite.

1. Oil-based polyurethane has been the most common and relied-upon surface finish for some time. For non-professionals, the slower-drying oil-based finish is helpful, as it tends to flow better, causing it to level out more evenly and allowing you to correct mistakes and work at a beginner’s pace without leaving lap marks. Of course, this means a longer drying period, about 24 hours, before you can use a newly finished floor, during which time your home will likely be filled with noxious fumes let off by the finish. Oil-based polyurethane provides a durable finish at a reasonable cost and brings out a certain richness in wood that other forms of urethane finish do not.

2. Water-based finishes can actually be urethane or acrylic, or a combination of the two. These finished have gained popularity in recent years as they release far fewer volatile organic compounds (VOCs) and noxious fumes than other similar finishes. Because water evaporates much more quickly than oil, water-based finishes dry comparatively quickly (in just a few hours). This can be a plus if the finish is being applied by an experienced hand, but can lead to lap marks when wet polyurethane is applied over dried or partially dried finish. Of course, they are also thinner, so tend to require more coats than oil-based polyurethane. This can be a problem on a budget, since decent water-based finishes tend to be more expensive than oil-based. They are also not nearly as durable as other urethane finishes, so are not recommended for areas with high foot traffic or homes with children or pets. Water-based finishes are, however, non-yellowing, so they can sometimes be preferable over lighter, creamy woods.

3. Acid-cure, or Swedish, finish is a less common but especially durable formulation of urethane finish known for its impressive ability to defend against moisture. It is fast-drying and resists the yellowing common to oil-based polyurethane finish. The downside is that acid-cure finish produces even stronger fumes than oil-based and is much more difficult to work, requiring the expertise of a skilled professional, which, of course, adds significantly to its cost.

4. Moisture-cure urethane finishes provide the most durability of the urethane finishes, but, like acid-cure, it can be tricky to apply and has a strong toxic odor.  Moisture-cure is also non-yellowing and is most commonly used to create a glossy finish that can stand up to wear and tear.

Categories
Hardwood Flooring Hardwood Maintenance

Should You Use Vinegar, Baking Soda, or Hydrogen Peroxide on Hardwood Floors?

Which DIY Cleaners are Safe for Your Hardwood Floors?

So, in our post Keeping Your Hardwood Floors Beautiful, we gave you some advice about general maintenance of your wood floors—vacuum or sweep regularly, never damp mop, clean up spills right away—but there are some messes that take a little something extra and there is a lot of advice on the internet about how to clean them.  Below are some things you should consider before trying any of these DIY remedies.

Tip #1: When trying something new, always remember to test it out in a small, less visible area before tackling the whole stain.

You will probably also want to wait a few days between testing and wider application to allow any chemical reactions to take full effect and to ensure the test spot has dried.

Tip #2: Seek advice from the experts.

If you know where your floor came from, the first step is always to find out from the manufacturer what products they recommend for your particular floor.  Because the exact composition of finishes and other treatments varies from floor to floor, the manufacturer is your best source of information on what products are least likely to cause damage.

In some cases, of course, it is difficult to know the origin of a hardwood floor, and, occasionally, even if you know, you may be unable to contact the manufacturer.  In these cases, try to find a product recommended by hardwood floor­—not cleaning—experts.  Many of the products on the shelves, even many of those that specify “safe for hardwood floors”, can actually cause damage or leave very stubborn residue on your floors.  Likewise, there are many cleaning solutions that, while effective at removing stains, can also remove finish or cause damage that will only become noticeable over time.

Talking to a hardwood floor expert can save you time, hassle, and money and will often spare you the pain of further damage.  Plus, many hardwood floor distributors and installers have used their years of experience with all manner of flooring to develop cleaning products, like MacDonald Hardwoods’ Easy Hardwood Floor Cleaner, that has been tested again and again and proven safe and effective on a wide range of flooring.

Tip #3: Know the risks.

Of course, here at Macwoods, we are best qualified to tell you about the risks to your floors.  For information on the impact of specific products on your health and the environment, you can check out the Environmental Working Group’s Guide to Healthy Cleaning or the U.S. Department of Health and Human Services’ Household Products Database.


Baking Soda on Hardwood Floors

  • Common uses: Removal of pet odor, prevention of pet stains when urine is fresh
  • Risks: Low-risk for dry baking soda, though it can be abrasive and must be thoroughly removed after use; many cleaning sites recommend a wet baking soda solution, but this carries with it all of the drawbacks related to moisture.
  • Recommendation: Can be very effective for soaking up potential stains; not recommended as a wet solution

Verdict: Use with Caution


Vinegar/ Ammonia on Hardwood Floors

  • Common uses: Mixed with water for general cleaning; used in higher concentration to removes stains.
  • Risks: Can dull the finish on the hardwood over time; can leave a subtle odor that may encourage pets to use the spot again.
  • Recommendation:  Not recommended.

Verdict: Unsafe


Hydrogen Peroxide on Hardwood Floors

  • Common uses: Removal of pet urine stains and odor; removal of soaked-in stains from blood, wine, etc.
  • Risks: Will almost certainly cause discoloration to finish, stain, and possibly the wood itself.
  • Recommendation: Can be used to remove stains prior to sanding and refinishing if the original wood is not too dark or some visible discoloration is acceptable.

Verdict: Use With Caution

Learn more about the pros and cons of hydrogen peroxide on wood flooring.


Bleach (Including Wood Bleach) on Hardwood Floors

  • Common uses: Stain removal
  • Risks: Any bleach is almost certain to cause discoloration.
  • Recommendation: Can be used to remove stains prior to sanding and refinishing if the original wood is not too dark.

Verdict: Use with Caution


Mineral Spirits on Hardwood Floors

  • Common uses:  Removal of wax, glue, carpet backing and similar substances
  • Risks:  Tends to leave residue on finished flooring.
  • Recommendation:  Can be used effectively to clean up small spots; always clean the area thoroughly with hardwood floor cleaner after use.

Verdict: Safe

Some people love using Danish oil on Maple flooring.


Citrus-Oil Based Cleaners on Hardwood Floors

  • Common uses:  Removal of sticky residues
  • Risks: Often leaves filmy residue and can dull finish over time, but is great for floors that aren’t exposed to sunlight through a large window or door.
  • Recommendation:  Preferable to use mineral spirits.

Verdict: Safe

For related information, read about the benefits of using citrus oil on hardwood floors.


Floor Polish on Hardwood Floors

  • Common uses:  Creation of high-gloss shine
  • Risks:  Residue will build up over time creating a layer of sticky film that becomes increasingly difficult to keep clean and almost impossible to remove.
  • Recommendation:  Do not use floor polish, even those labeled for use on hardwood floors, on finished wood flooring.

Verdict: Unsafe


Tri-Sodium Phosphate (TSP) on Hardwood Floors

  • Common uses: Heavy-duty cleaner used to remove residue like that left by non-recommended cleaners and polishes
  • Risks:  Will often remove finish as well.
  • Recommendation:  Should only be used in preparing a floor for sanding and refinishing, preferably by a professional.

Verdict: Use with Caution

Learn more about the right way to use TSP on hardwood floors.


Scrubbers (Steel Wool, etc.) on Hardwood Floors 

  • Common uses: Removal of stuck-on messes or set-in stains
  • Risks: Will scratch finishes and, potentially, wood if the finish is thin.
  • Recommendation:  Best to avoid if possible; can be used for removing stains from floors that are to be refinished.

Verdict: Use With Caution


Steam Cleaners on Hardwood Floors 

  • Common uses: General cleaning, cleaning surface stains
  • Risks: Causes rapid and frequent changes in the moisture content of flooring, causing grain ridges, cracking, and separation of finish from wood.
  • Recommendation:  Never use steam to clean a wood floor, even if the product claims to be safe for hardwoods.
According to Riley Ellis, a cleaning professional from London, most manufacturers will say anything to convince you in buying a steam cleaner and you should always figure out if the type of material you have could or could not stand the moisture, especially steam. 

Verdict: Unsafe


Final Thoughts

The experts at MacDonald Hardwoods are always available to answer your hardwood questions.  Give us a call to discuss your project at 888- 459-4735.


Categories
Hardwood Flooring

Seasonal Floor Movement

One very important thing to understand when choosing hardwood for your flooring is that wood is what is known as a “hydroscopic” material—it will absorb and release moisture in response to the moisture in its environment.  This means that, no matter the quality of your flooring or the skill with which it is installed, some seasonal expansion and shrinkage should be expected, and slight changes in the appearance of your floor will likely occur.  If your hardwood is properly installed, however, this movement will never compromise its structural integrity of your floor or significantly detract from its appearance.

A wide variety of factors can affect the movement of your floors.  At Macwoods, we are happy to discuss these factors with you to help you determine what kind of flooring and installation would be best for you and your home.

INSTALLATION FACTORS THAT AFFECT MOVEMENT

Jobsite conditions:   This is an especially important factor for floors being installed in brand new homes or homes being extensively renovated.  When a building has just been constructed, a great deal of moisture is present in materials like concrete, mortar, drywall, paint, etc.  With modern measures taken to conserve energy on jobsites, much of this moisture remains in the home for quite some time after the floors, walls, etc. are considered “dry”.  If hardwood is laid during this time, it will readily absorb this moisture as it evaporates into the air inside your home.  If this excess moisture is not accounted for during installation, or better, avoided by waiting to lay the hardwood, the floor will be left with unsightly gaps once the moisture has dissipated or may cup or warp as it absorbs moisture after installation.  Whenever possible, it is best to wait for the house to “dry out” before installing your floors.

Timing of installation:  Since the relative humidity in the air changes with the seasons, it is important to take into consideration how much moisture is in the air at the time of installation.  If it is during humid summer months, a floor may need to be laid “tight” to avoid unsightly gaps in the winter.  If it is laid in winter, some give may be needed to make room for expansion in the summer.  A capable professional installer will, of course, always take such factors into account.  If you are planning to lay your floors yourself, you may find it helpful to talk with a flooring professional to learn more about moisture and spacing.  Here at Macwoods, our experts are always happy to lend advice when it comes to the details of hardwood.

Acclimation:  For any installation, from floors to doors, it is essential that wood be allowed to acclimate before it is placed in its permanent position.  This will mean letting your new floor “breathe” in the space where it will be installed for a week or so to let it come into balance, both in temperature and moisture content, with the environment where it will live.  For this to be effective, of course, the space in question should be brought to normal conditions for living (air conditioned or heated, depending on the season, for at least a few days) before the wood is introduced.  It is also important that all of the pieces be allowed to acclimate together, either stacked in the box or laid out in a room.  If some pieces are removed and others are not, they will adjust differently, affecting the way they fit together.

After the pre-installation acclimation period, wood will continue to adjust to the environment throughout the year.  For a new floor owner, the changes in the appearance of the floor in this first year may raise some concern, but there is usually no need to be alarmed.  Once your wood has been through a full cycle of seasonal changes, it will settle in to a less drastic cycle and the changes caused by seasonal expansion will be much less noticeable.

FLOORING SELECTION FACTORS THAT AFFECT MOVEMENT

Species:  Just like some species of wood are harder than others, some species are also inclined to absorb and release more moisture than others.  For example, a 12” plank of cedar might fluctuate in width about 1/8” from winter to summer while a plank of maple or hickory could fluctuate twice that much.  In a floor, of course, the close set of the planks greatly restricts this movement (you should never have a 1/4” gap in your flooring), but if you are concerned with minimizing seasonal changes in your floors, you will want to choose a species that is more stable.  This is especially true if the temperature and/or relative humidity in your area tend to varies greatly from season to season.

Width:  A piece of wood will expand primarily across the width of the grain as the grains fatten to accommodate more moisture.  The amount of expansion (or shrinkage) you will see is directly proportional to the width of the strip or plank.  So, a 4” strip of any given species will tend to fluctuate about half as much as an 8” plank of the same species.  Again, the installation of the pieces will have an effect on how much each strip or plank actually moves, but in most climates in the U.S., and certainly here in Colorado, you should be prepared to see somewhat more noticeable gapping in plank floors than you would in a floor made up of narrower boards.

Finish:  It has sometimes been suggested that certain types of finish can eliminate flooring movement altogether by stopping the exchange of moisture.  Though there is in reality no finish available at present that can completely stop expansion and shrinkage, the right finish can in some cases help to lessen it.  Moreover, choosing a finish that maintains much of the natural color of a species can make normal movement less noticeable by diminishing the contrast between the finished surface of each board and the wood that may become visible in narrow gaps between boards during drier months.

Cut:  When trees are milled for lumber, there are three primary ways in which a round log may be transformed into a stack of flat boards.  Most often, a log is essentially “sliced” into boards.  This is referred to as plane sawing and results in less waste and the familiar “u” shaped pattern you see in most wood.  In some instances, however, lumber may be “quarter sawn” or “rift sawn”.  These two methods are similar in that boards are cut from the outer edge of a log in towards its heart.  The grain of these boards tends to be more “stripey”, displaying the cross-section of the tree’s growth rings.  Because of the direction of the grain, quarter-sawn wood tends to expand vertically rather than across its width, almost eliminating visible movement.  However, because quarter sawing produces a smaller yield per log, flooring cut in this way tends to be much more costly than plane-sawn.

Egineered vs. solid wood:  One of the primary reasons some people choose engineered flooring over solid hardwood is because of its dimensional stability.  The layers of wood that make up a strip of engineered flooring are intentionally stacked in varying directions so that each layer helps to counteract the expansion and contraction of others.

ENVIRONMENTAL FACTORS THAT AFFECT MOVEMENT

In truth, there is really just one environmental factor that will seriously affect the movement of your floors—moisture.  This one factor can override all of the factors mentioned above and is so important that we have written an entire post on maintaining healthy levels of relative humidity (RH) in your home.

Just like the air, wood has a moisture content that needs to be maintained at certain levels to avoid excessive expansion and contraction, warping, cracking, and other terrible things.  Fortunately for wood lovers, the moisture content of wood is directly related to the relative humidity of the air around it, and keeping the latter at healthy levels will almost always keep the former stable.

Wood cuts image courtesy of Ron Trout, Portable Sawmill Service

Categories
Eco-Friendly Flooring Hardwood Flooring

Where Does Wood Flooring Come From?

So you know that the wood for hardwood floors can come from a number of different tree species, both domestic and exotic.  But have you ever wondered just where those trees come from, how they’re grown and harvested, or, say just how many trees it takes to make a hardwood floor?  Well, keep reading and find out how your floor was born.

Where do the trees for flooring grow?

There are more than 20 species of tree that grow in the United States that provide excellent wood for flooring.  Most of them grow in the eastern part of the country (hardwoods tend to be of the deciduous broad-leaf variety rather than the evergreen needle-leafed trees of the West Coast).  More than half of hardwood harvested domestically is oak that grows from New England to the Midwest.  The U.S. also imports quite a bit of “exotic” hardwood like mahogany, rosewood, teak and wenge, which typically grow in more tropical regions like Brazil and Indonesia.  However, we also get a good amount of wood from Canada, including the maple of which they are so proud (justifiably so).

How many trees does it take to make a hardwood floor?

Well, the number of trees you need will, of course, depend on the size of floor you are making and the size of the trees the lumber comes from, among other factors.  To give you an idea, though, consider the floor installed at AT&T Stadium for the recently concluded Final Four NCAA men’s basketball tournament.  That floor, about 9,800 square feet of solid maple (70’ x 140’ – almost twice the size of a normal basketball court), it has been widely published, required somewhere around 30 mature trees, though the size of the trees at harvest was not specified.  Coming closer to home, one might expect to get from a tree about 18 inches in diameter with about 10 feet of mill-able trunk something close to 100 square feet of flooring, depending on the quality of the wood once it was milled.

Is that a lot of trees?

If adding up the numbers above has you running for the bamboo or cork, wait just a moment and consider the following.  In the last century, almost all manufacturers of lumber in the United States have found ways of harvesting and replanting that allow forests to replenish themselves at an even faster rate than they are being culled.  After all, for people in the logging and lumber industries, nothing would do them more harm than to see the end of the forest—it’s the source of their livelihood.

baby beech

According to the U.S. Department of Agriculture’s Forest Service, the annual net growth of hardwoods at present is significantly greater than the average annual demand.  In fact, even though it takes some 40 to 60 years for most hardwoods to mature, the trees that are growing in forests used for logging today probably won’t actually be needed for another 100 years.  So, even though it seems like a lot of trees, remember that trees are one of the most renewable resources around.  They require no energy-gobbling factory production or even significant irrigation and the carbon they trap as they grow stays trapped, even after they have transformed into cabinets, furniture, flooring, and art.

Are there rules about which trees can be used?

There certainly are.  Most people in the logging industry understand the importance of reforestation.  For them, the plenitude of the forest is not only an environmental issue but one of economic concern as well.  It is doubly important to those involved in the production and distribution of lumber that forests remain in robust health.  Though opinions on how lumber should be harvested vary quite a bit, most lumber in the U.S. originates in forests that are carefully managed in one way or another.  There are also a host of organizations that exist specifically to ensure that trees have been harvested safely—for the forest, the loggers, and the quality of the lumber.

As to exotic woods, it is against the law in the U.S. to import wood products that have been illegally harvested abroad.  Though it is left, of course, to those governments to determine the laws related to logging in their countries, exotic wood flooring is now coming more and more from either tree plantations or areas specifically designated for harvesting which, in most cases, are well-managed for the health of the forest.

So what about the parts of the tree that can’t be used for lumber?

This is actually one of the coolest parts of the lumber industry.  Throughout the process of milling and cutting wood for lumber, every extra part is used for something.  Decent-sized bits not suitable for lumber are sent to manufacturers of furniture and other things that require smaller, less uniform pieces.  Bark and shavings are sent off to be used for paper or mulch, or, along with sawdust, used to heat and sometimes even power the mill.

At MacDonald Hardwoods we take care to ensure that our wood flooring is sourced from responsible manufacturers, people we trust to provide the highest quality product ethically and sustainably.  With hardwood, you can rest assured that your floor and your forest will be around long into the future.

Image credit: Cowboys Stadium configured for basketball Wikimedia
Image Credit: Baby Beech fickr

Categories
Hardwood Flooring

A Quick Guide to Flooring Terms – New and Improved!

When you are ready to invest in new hardwood flooring, the installers will use terms you may not understand.  However, you don’t have to feel lost because MacDonald Hardwoods is happy to provide you with the education you need. When you know what the terms are, you will have the information you need to make smart decisions about your flooring. Use the following guide to help you learn more about the flooring process.

Commonly Used Hardwood Flooring Vocabulary

1. Subfloor

This is the structural layer that will support your hardwood floors.  On ground floors, it may be concrete or plywood; upstairs, it will usually be wood.  The nature of your subfloor will help you determine what kind of underlayment you may need.

2. Joists

These are parallel beams that provide support for the floor or carry ceiling loads. When installing a hardwood floor, it is best to go perpendicular to the joists for a consistent look and to strengthen the floor.

3. Underlayment

A layer of material between the subfloor and your hardwood.  Depending on your subfloor and other factors, it may serve as a vapor barrier, padding, sound barrier, and insulation. Underlayment is comprised of foam, felt, cork, plastic sheathing or other synthetic materials.

4. Engineered

Engineered hardwood floors are multiple layers (plies) of solid wood assembled in a cross-ply construction, the top layer of which is the species and color you see after installation.  Engineered hardwood tends to be less prone to noticeable expansion than solid wood, so it is sometimes preferable over below-grade and or concrete subfloors, which typically seep moisture.  If you’re interested, learn more about engineered flooring.

5. Solid Wood

Boards manufactured from a single, solid piece of wood, as opposed to engineered wood.

6. Sapwood and Heartwood

Some tree species have different grain colors. Sapwood is in the outer rings of the tree and is usually a lighter color. Heartwood, found in the centermost rings of the tree, is often a darker color than the sapwood.

7. Locking/ Floating

Flooring designed with a tongue-and-groove profile that allows for easy installation by locking edges into place. No glue is required; instead, floors “float” atop your subfloor.

8. Base Shoe

When a Denver flooring company installs new flooring, they have to leave an expansion gap between the wood and the walls. This difference is usually ¼- to ½-inch in width and must be covered by the baseboard. The regular baseboard trim is not thick enough to adequately cover this gap, but shoe molding will make up the difference.

9. Shoe Molding

A rounded frame with a flat back and bottom that sits flush against the baseboard and extends over the base shoe gap.

10. Beveled Edge

Also known as an eased edge, many prefinished hardwood floors feature this type of finish. Rather than straight edges with 90-degree angles, the edges are gently beveled using 45-degree angles. The beveling makes it easier to match up the sides of finished planks for a smooth finish.

11. Relative Humidity (RH)

The amount of moisture in the air compared to the amount of moisture necessary to saturate the air.  Maintaining the proper RH in your home is essential to avoid crowning and cupping and excessive gapping.  An RH between 35% and 45% is best for both your health and your floors.

12. Crowning/ Cupping

Warping in floorboards caused by excessive moisture.

13. Gapping

Spaces that appear between boards in drier weather.  Some gapping is to be expected, especially in winter.  However, excessive gapping can result if moisture levels in a home are allowed to fall too far.

14. Janka rating

The Janka scale is used to describe the hardness of a particular species or subspecies of wood.  The Janka rating is a measure of the amount of force it takes to drive a .444 inch steel ball into a plank of wood to half the ball’s diameter.   For more information on the Janka scale, check out our post on the subject.

15. Pinworm hole

Small insects can drill through solid wood and leave a little round hole. These holes are pretty standard on hardwood floors, but not everyone appreciates the appearance of pin wormholes. If you don’t want these holes to be visible in the finished product, you will have to make sure every board is inspected to be sure it is free of the small holes.

Final Thoughts

MacDonald Hardwoods is an experienced flooring company in Denver. We offer an incredible range of wood flooring options, and we will work with you to find the style and color that’s perfect for your home. Call us today at 800-639-3006 to learn more about our services and to make an appointment for your free estimate.

Categories
Hardwood Flooring

Is There a Heaven for Hardwood Floors? Part 2

Once you’ve read “Is There a Heaven for Hardwood Floors?: Part 1,” it is time for Part 2: Now that I’ve taken out my floor, what do I do with all this wood?

So, you or someone you’ve paid have now removed that old floor from your house to make room for the shining (or matte or hand-scraped) new floor of your dreams. But what to do with all the wood that’s just come out? If it seems like an unforgivable waste to just chuck it out with the trash, that’s because it is. One punishable by focused disdain from tree-huggers, wood-lovers, creative types, and just plain practical people the world over.

Hardwood Flooring Salvage Options

Removal contractors:

If you’ve hired someone to take out your floors, it’s likely you’ve already talked to them about salvaging the wood for re-use as flooring. You may have even been able to arrange for the cost of removal to be lowered in exchange for the reusable material. Salvaging is definitely the most lucrative of the options for hardwood disposal, but it also requires the most care in removal.

If you took out the floor yourself, first off, kudos to you for a difficult job completed. If you think you have done a careful enough removal job to resell the wood as flooring, and if it is in good enough condition, it shouldn’t be too hard to find a home for it. Remember, it doesn’t need to be perfect—it will be refinished before it becomes a floor again—but it does need to have most of its tongues and grooves and have enough life left in it for at least one more (two or three is better) sanding and refinishing.

Do-it-yourself salvagers:

Exchanges like Craigslist and local remodeling or home improvement forums can be good places to find do-it-yourselfers in search of salvageable hardwood. They will want to take a look at the wood beforehand, of course, and they may not want all of it, depending on the condition.

Remember that, even once they acquire your wood, they are going to have to refinish and install it, and they may find that some of what you both thought would be usable won’t be. Consequently, you shouldn’t expect to resell the wood at more than a fraction of what you would pay for salvaged wood at a store, but you will have the satisfaction of knowing that your old floor is going to a caring home.

Professional salvagers:

On this note, if your wood is in good condition (i.e. if you took it out only because you wanted something different) you may want to call around to local flooring contractors or stores that specialize in salvaged wood flooring. Like do-it-yourself salvagers, they may not want all of it, but they are more likely to be able to use questionable pieces and they will likely come and collect the wood from your home, saving you on transportation hassle.

Donate: If your floor is healthy enough for a second life as a floor, consider donating it to an organization like Habitat for Humanity. They often have professional volunteers who can help them turn your old floor into a beautiful new one for a family that will be grateful to have it.

Hardwood Flooring Repurpose Options

Some hardwood floors have undergone resanding and refinishing too many times to ever be used as flooring again. This may well be why you chose to take it out. Likewise, if you took the flooring out yourself, you may have been able to save good-sized lengths of wood, but not the more delicate tongues and grooves that make it usable as flooring. All is not lost.

Take a look at your property. Maybe you’ve been thinking of making a dog run or an area for a garden. Wood that may be too worn for flooring is often just right fencing. Which additional woodworking projects have you been considering? A doghouse, maybe, or a playhouse? A raised workbench? Even if you don’t have any projects like this, check with your neighbors and friends, or even your local school’s woodshop. Someone is bound to have a project that needs some good-sized lengths of wood, and they will probably be grateful to have floor quality wood, even if it is a little bruised and beaten.

*If you are going to keep your wood around to use in future projects, be sure to store it somewhere off the ground to keep it free of termites and other varmints.

Be Creative

These days, “upcycling” is all the rage. If you don’t know what that is, type it into your search bar and be prepared for a deluge of creative, chic, and easy-to-pull-off ways to use everything from bottle caps to crayons – everything including old wood floors. Check out sites like Pinterest for ideas on how to “upcycle” or “repurpose” old hardwood floors. You might be surprised at the cool stuff you can do (we saw, among other things, an accent wall, a bar top, a treehouse, and innumerable planters, toy boxes, and shelves).

Final Resorts

As professional organizer, Sally Morgan says: Items that don’t have “significant value“, or aren’t expected to get a realistic return, shouldn’t try to be sold. Hardwoods flooring is no exception.

If your wood is absolutely destroyed (moldy, rotted, splintered into pieces), you may have no choice but to discard it. Even in this, though, you have some choices. There is rarely any reason that you should have to throw old wood in a dumpster (but if you do, there are plenty of dumpster rental options in Denver).

Don’t use it as firewood: Unfortunately, since most hardwood floors have been treated with some sort of solution that may become toxic when burnt, firewood is not the best option for this otherwise prime fireplace candidate. Likewise, if it is full of molds or fungus, these are not things you want to release into air that anyone will be breathing. For the same reasons, this wood is not usually going to be very good for chipping into mulch. We recommend these options instead:

  • If it’s not against neighborhood codes, try putting out front of your house (or on Craigslist or Freecycle) for a couple of days with a sign that says “free”. You might be surprised at how quickly it disappears.
  • Most places have somewhere within a reasonable drive where you can recycle old wood. Some cities may even include this as part of the garbage collection service, though you may have to call and request a special pick-up. However, there may be regulations about wood treated in certain ways.
  • If there is a wood pellet manufacturer in your area, you may be able to donate the old wood to be treated and made safe for use in wood pellet stoves.
  • Ask around. See what local contractors and flooring suppliers are doing with old, unusable hardwood. You may find a taker among them, but at the very least, you should be able to get some good advice about the best way to reuse, recycle, or otherwise dispose of the old wood in, yeah, your neck of the woods.
Categories
Hardwood Flooring

Is There a Heaven for Hardwood Floors?: Part 1

So you’ve read our post Refinish or Replace? Determining the Fate of Your Hardwood Floors, and you’ve decided that replacing a few boards or refinishing the floor just won’t cut it. Maybe it’s just too damaged to salvage; maybe you’ve got structural problems you have to address anyway; or maybe you just saw that Brazilian Cherry over at your neighbor’s house and have abandoned all sense of loyalty to your vintage pine. Whatever the reason, you’ve decided those old floors just have to come out. So what now?

Part One: To DIY or not to DIY?

To answer this question, there are a few others you should ask yourself:

1. What are your goals? Are you hoping to save money or are you seeking the satisfaction of a hard job well done? Removing your old floors yourself will probably save you some money, providing you are able to do it without damaging your subfloor. To have it professionally removed will likely cost between $2 and $4 per square foot, depending on whether it is part of an installation or just a removal (it may cost less attached to an installation, but you need to discuss this with your contractor/installer).

However, DIY removal will also require extra time off work and a certain amount of equipment, not to mention a full body massage to help you recover afterwards.

2. How much time/ energy do you have to spend? While finding advice on the internet about installing hardwood floor is about as easy as finding a local pizza place, you’ll be harder pressed to find much about removing hardwood flooring (some helpful hints can be found here and here). This is because removing a hardwood floor is a time- and labor-intensive project that most people prefer to leave it to professionals. For every 100 square feet of flooring, you should budget about 5-7 hours, depending on the factors in 3-6. This is assuming you don’t run into major problems like subfloor damage or equipment malfunction.

The process of pulling up boards also requires a decent amount of strength, which is going to have to hold out for hours at a time if you are going to finish before the turn of the century. You may also need to learn to use certain tools, like a circular saw and a pry bar and mallet combo. That said, it can be pretty satisfying to look at a clear floor and a stack of wood after a few days (very) hard work.

3. How is your old floor laid down? For obvious reasons, a floating floor is going to be much easier to remove than a floor that has been nailed down, which will be easier to remove than a floor that has been glued to a concrete subfloor. With each degree of difficulty, the advisability of removing the floor yourself (as well as your chances of salvaging the floor – see below) decreases significantly.

4. What is the area of the space you are needing to clear? The more rooms you have to de-floor, the more you will probably want to consider hiring someone with the equipment and experience to make quicker work of it. These folks do this every day. Unless you do manual labor in your profession, you are likely to get tired, and consequently slower and slower, as a big job drags on.

5. What is your level of experience? As we mentioned, you will need to be handy with a pry bar and mallet, nail claw, and possibly a circular saw to carry this project off. If you are asking as you read this what any of these things are, DIY may not be the path for you in this instance. Improper use of any of these tools could result in serious and expensive damage to your subfloor, not to mention yourself.

6. What are you planning to do with the wood when you’re done? We’ve mentioned salvaging the wood from your hardwood floors several times now. We’ll say more about that in Part Two, but for now, consider this: If you are hoping to resell the wood as flooring, you will need to take much greater care not to damage the planks, including their more delicate tongues and grooves, as you pry them from the floor, and you will probably want to try to keep them as unbroken and uncut as possible, making for a much more painstaking and difficult process. If, however, you are going to recycle or repurpose the wood, you may be able to cut it into smaller, easier to remove pieces.

For ideas about what to do with your wood once it’s been removed, check out “Is There a Heaven for Hardwood Floors?: Part 2.”

Skip to content