Treating Scratches in Hardwood Floors
December 7, 2015
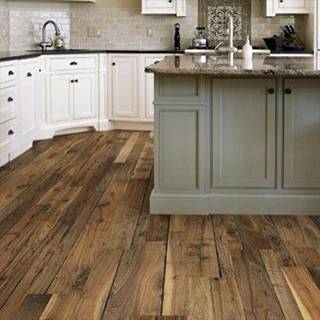
Hardwood floors can stand up to a lot of abuse if you choose the right species and the right finish for your lifestyle. But a scratch here and there can sometimes be impossible to avoid, especially in homes with dogs, cats, or small children. While there are some precautions you can take to protect your floors from damage, it is also usually possible to repair small imperfections without having to take drastic measures like resanding and refinishing.
Surface Scratches
Very light scratches can often be repaired by going over them with a hardwood refresher like Bona Pro Series Hardwood Floor Refresher or Hardwood Floor Reviver by Minwax. Here’s what you need to do:
 Make sure your floor is refresher-compatible. Many prefinished floors will not respond well to refreshers, and using one on an incompatible floor can ruin the finished. Check with the manufacturer or a hardwood floor professional to see what kinds of treatment are recommended.
- Read the directions on the product you choose.
- Thoroughly clean the area of the floor to be treated and make sure the surface is perfectly dry.
- Apply the refresher according to the directions and allow to dry completely, undisturbed.
- You may need to reapply every few months.
Deep, Narrow Scratches
If a scratch has penetrated through the stain and finish and into the raw wood exposing the lighter color beneath, but is too narrow to require filling, you should be able to mask the scratch by applying a matching stain. This will, of course, not repair the scratch, and you will still be able to see the damage up close, but it may hide it well enough to suit your purpose. This is an especially effective treatment for handscraped or otherwise distressed floors, on which additional dips and “imperfections” just add character. What to do:
 Find a matching stain. If your floor was site-finished, you may have some leftover stain on-hand (stain should be viable for about a year once it has been opened, 2-3 years if it has not) or be able to order a small amount of stain from the same manufacturer. If your floor is prefinished, you may be able to request a repair kit from the manufacturer. Otherwise, you can likely find a pretty close match in the form of a stain pen at your local hardwood flooring dealer or a home repair store.
- Thoroughly clean the area of the floor to be treated and make sure the surface is perfectly dry.
- Dab stain onto an applicator. Even if you are using a stain pen, it is better to dab a small amount onto a rag or other applicator (be sure not to use anything that may leave debris like cotton threads or lint) to give you more control over the amount of stain that enters the scratch. Too much will cause the scratch to stain darker than the surrounding area, exacerbating the problem.
- Rub the stain into the scratch with the same motion you might use to polish a piece of silver, going over each area repeatedly until it once again matches the wood around it.
- If the scratch is in an area where it is likely to come into contact with water (kitchen, entrances, dining room) you may also want to refinish the area to seal it from water, as stain does not protect wood from moisture ingress.
Wider Scratches and Gouges
For thicker scratches and gouges smaller than 2-3 inches, you can usually patch the damage and get a close enough match that the gouge will not be noticeable from a natural distance. This is a little more complicated than fixing a scratch, but still a fairly simple and quick repair. Here are the step to follow:
 Make sure the gouge is relatively free of dust and dirt.
- Purchase a pre-colored wood filler that closely matches the color of your flooring.
- For scratches (for gouges skip to stage 4) gently rub light-weight sandpaper over the scratch and about an inch on all sides of it, taking care to rub only in the direction of the wood grain or in a circular motion. Don’t overdo it – you just want to blend the scratch into the area around it a little. Once you have a good blend, clean the area with mineral spirits, then let the area dry thoroughly.
- Scoop a bit of your filler onto your finger or putty knife (only use a plastic putty knife so as to avoid making worse scratches with metal on the wood) and fill the scratch or gouge completely. You can be generous with it, since you will remove any excess at a later stage and it should be fairly easy to clean up any extra that may smear around the area. Smooth the filler in different directions to make sure there are no bubbles or missed bits. Once you are certain that the gouge is completely filled, use your putty knife to gently scrape off any excess, taking care not to scratch the surface nearby.
- Let the filler dry thoroughly. The directions on the product should tell you how long to leave it.
- Once the filler has dried, use very fine (180 grit) sand paper to buff the area around the filler and remove any smears. Rubbing in a circular motion should help you avoid creating any obvious marks in the fill. Use a barely damp cloth to remove any additional smears, taking care not to rub it over the filled area.
- Seal the sanded area.
- Depending on the condition of the surrounding wood, you may also want to refinish the board to match the rest of the floor. It is best to use a lambswool applicator or natural bristle brush in order to avoid bubbles in your finish.